Se non sei sicuro delle impostazioni di Massima qualità di rendering (MRQ) e Profondità di bit massima (MBD) di Premiere Pro, non sei il solo. È roba piuttosto complicata e non aiuta la documentazione ufficiale può essere difficile da trovare.
Allora perché li vediamo sia in Impostazioni sequenza che in Impostazioni di esportazione? E come influiscono sul nostro video? In questo articolo, analizzeremo come e quando funzionano queste impostazioni, in modo che tu possa fare la scelta migliore per i tuoi progetti.
Se non hai il tempo di leggere tutti i dettagli tecnici puoi saltare direttamente alla conclusione. (TL; DR basta attivare entrambe le impostazioni sia in Impostazioni sequenza che in Impostazioni esportazione.)
Alla fine dell'articolo troverai anche i test che ho usato per mostrare come queste impostazioni influiscono sui tempi di esportazione e sulla qualità dell'immagine. A questi si farà riferimento nel corso dell'articolo.
Contenuti
Dove troviamo queste impostazioni?
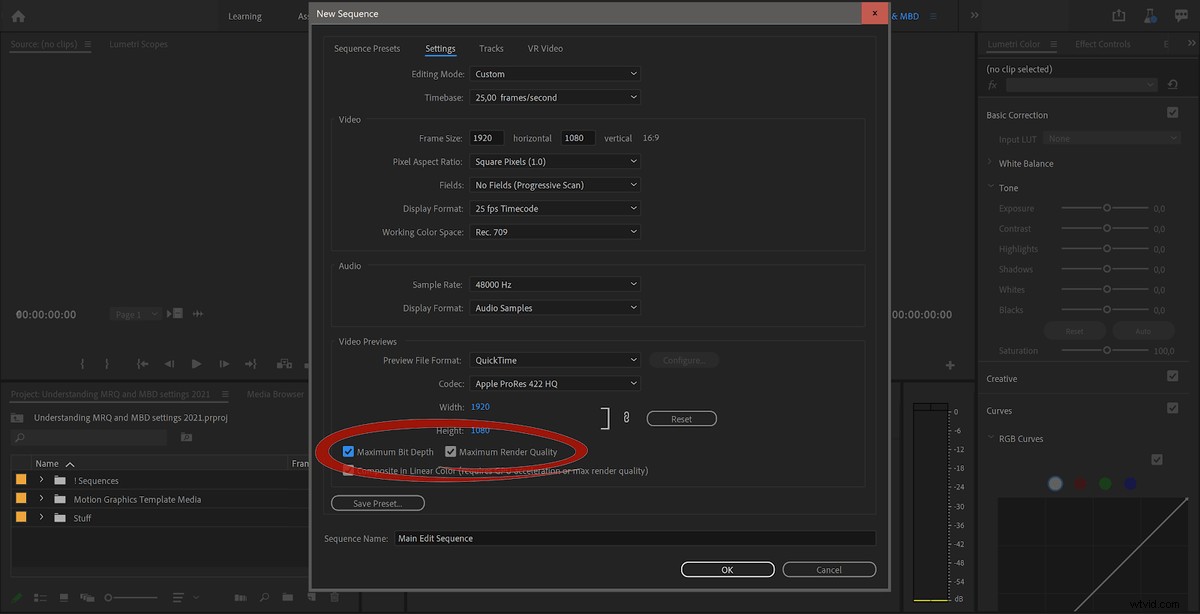
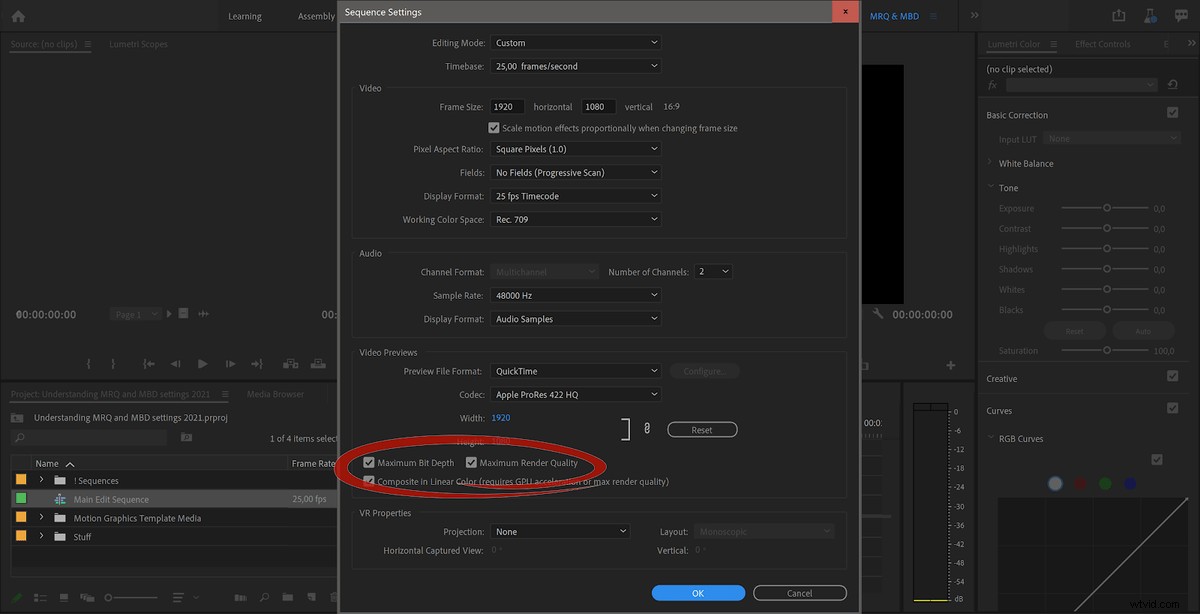
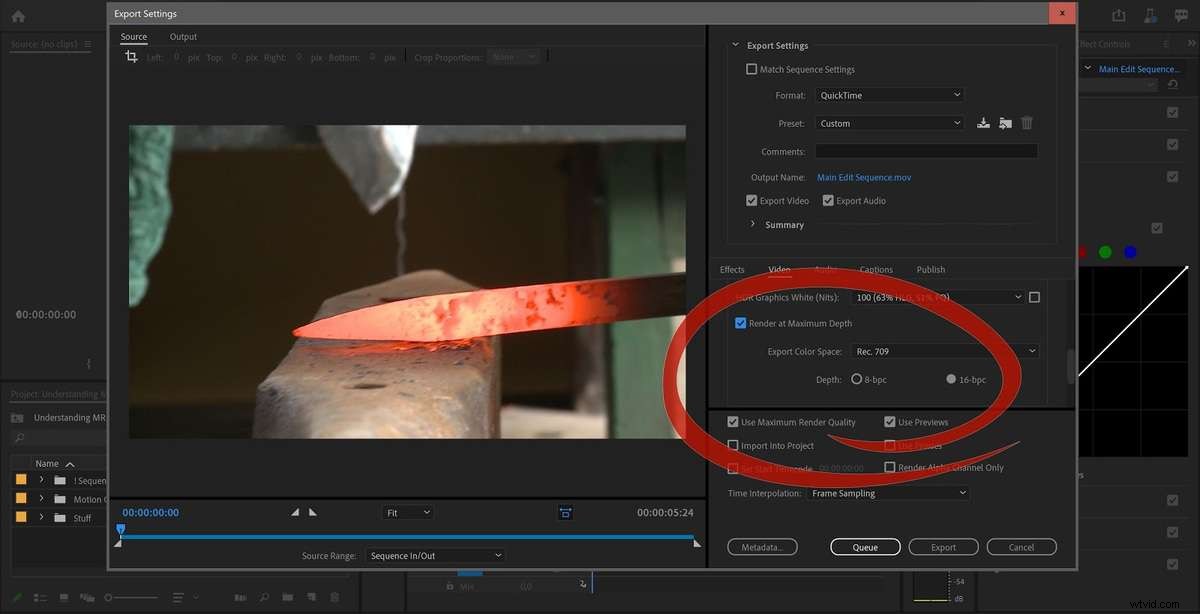
Troverai entrambi la Massima qualità di rendering e la profondità di bit massima impostazioni in almeno tre posizioni diverse in Premiere Pro:nella Nuova sequenza finestra di dialogo, in Impostazioni sequenza e nelle Impostazioni di esportazione .
Se crei una nuova sequenza manualmente in Premiere Pro (File> Nuovo> Sequenza ), vedrai questa finestra di dialogo.
Se hai già creato una sequenza e non hai prestato attenzione alle impostazioni, puoi andare su Impostazioni sequenza (Sequenza> Impostazioni sequenza ) e modificarli lì.
Quando esporti la sequenza temporale, vedrai le stesse impostazioni, una sotto il Video scheda e uno nella parte inferiore del riquadro.
OK, a parte questo, vediamo cosa succede quando abiliti queste impostazioni nella tua sequenza.
Verrai avvisato
Sì, se scegli di attivare una di queste due impostazioni, riceverai il seguente avviso.
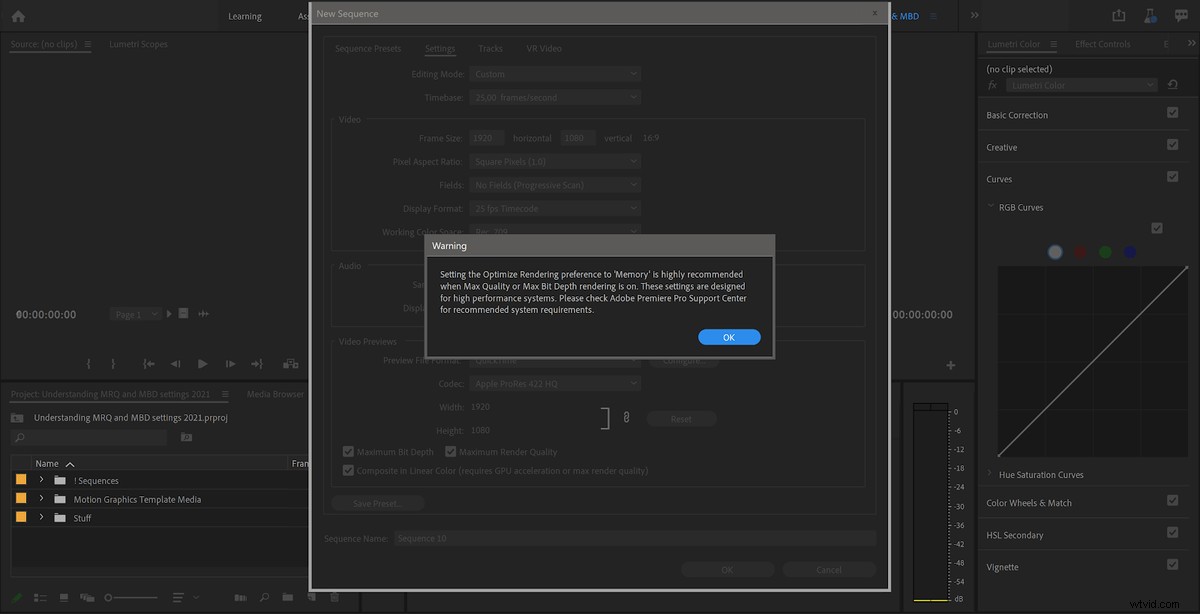
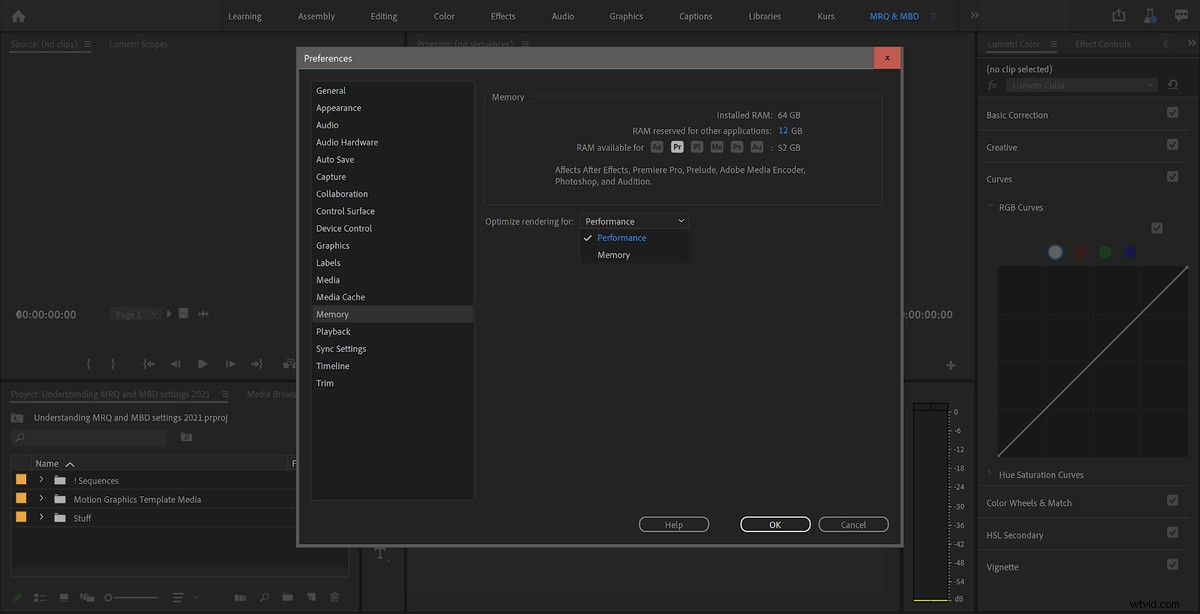
Questo non è così spaventoso come sembra. Ma se ritieni che sia motivo di preoccupazione, puoi accedere alle Preferenze per la memoria e impostarlo su Ottimizza il rendering per la memoria . Oppure ignora del tutto il messaggio, pensando "Ho molta RAM" come fa la maggior parte di noi. A meno che tu non abbia un computer di fascia alta con un numero di core elevatissimo, non dovresti incorrere in problemi di memoria con nessuna di queste impostazioni. Ho sempre le mie preferenze di memoria impostate su Ottimizza il rendering per le prestazioni .
Anche se l'avviso dice che è "altamente consigliato" impostarlo su Memoria , alcuni utenti hanno segnalato che ciò renderà i loro sistemi meno stabile. Lascio questo set al valore predefinito, che è Prestazioni .
Cosa fa la profondità di bit massima?
A prima vista, sembra che la profondità di bit massima switch forza semplicemente Premiere Pro a rendere gli effetti supportati a 32 bit con precisione in virgola mobile. Questo è positivo perché ridurrà le bande e altri artefatti mantenendo intatti anche i sovraluminosi e i super neri, senza mai ritagliare i livelli.
L'opzione Profondità di bit massima richiede anche un float a 32 bit dall'importatore, che altrimenti è solo a 8 bit.
Cosa dice Adobe?
Questa è la spiegazione che ti offre Premiere Pro quando passi il puntatore del mouse su Render at Maximum Depth pulsante nelle Impostazioni di esportazione.
"Il rendering alla massima profondità di bit migliora la qualità del video ma aumenta la durata della codifica."
Questo può creare confusione. Che cosa significa "Migliora la qualità del video" significare? Anche questa spiegazione non è il quadro completo:non necessariamente aumenta il tempo di codifica . Ne parleremo più avanti.
Per qualche motivo non esiste una descrizione comando per Rendering alla profondità massima in Premiere Pro 15.0, quindi sei lasciato alla tua interpretazione per quello.
Perché è importante?
Diamo prima un'occhiata al rendering dei fotogrammi video. Questo può essere fatto a 8 bit per canale o a 32 bit per canale. Se hai scelto il rendering GPU (CUDA, Metal o OpenCL) nelle impostazioni del progetto, verrà sempre eseguito a 32 bit a meno che tu non abbia utilizzato effetti che non sono accelerati dalla GPU.
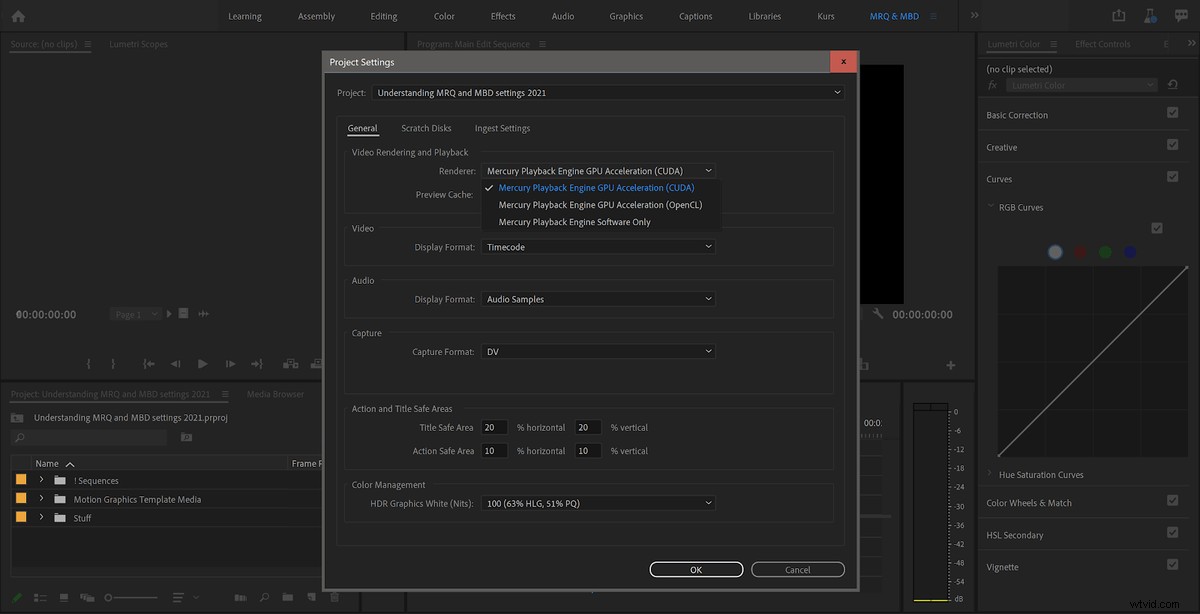
Se si sceglie Solo software nelle Impostazioni progetto, la profondità in bit dipende da Render at Maximum Depth interruttore. Se è attivo, il rendering verrà eseguito a 32 bit. In caso contrario, verrà eseguito a 8 bit.
8-bit significa che il risultato di ogni calcolo sull'immagine può avere solo 256 livelli possibili per canale (RGB o YUV). Non è molta precisione. Con più effetti su una clip, ciò significa che avremo errori di arrotondamento per ogni calcolo, con il rischio di introdurre bande e blocchi.
A 32 bit, eseguiamo tutti i calcoli con risultati che possono avere più di 4 miliardi di livelli diversi per canale, quindi gli errori di arrotondamento con effetti multipli vengono completamente eliminati. Possiamo anche memorizzare livelli ben oltre il 100% di bianco e lo 0% di nero.
Ecco un buon test da fare se vuoi vedere la differenza tra il rendering a 32 bit e quello a 8 bit. Usa una clip con alcuni punti salienti vicini al massimo.
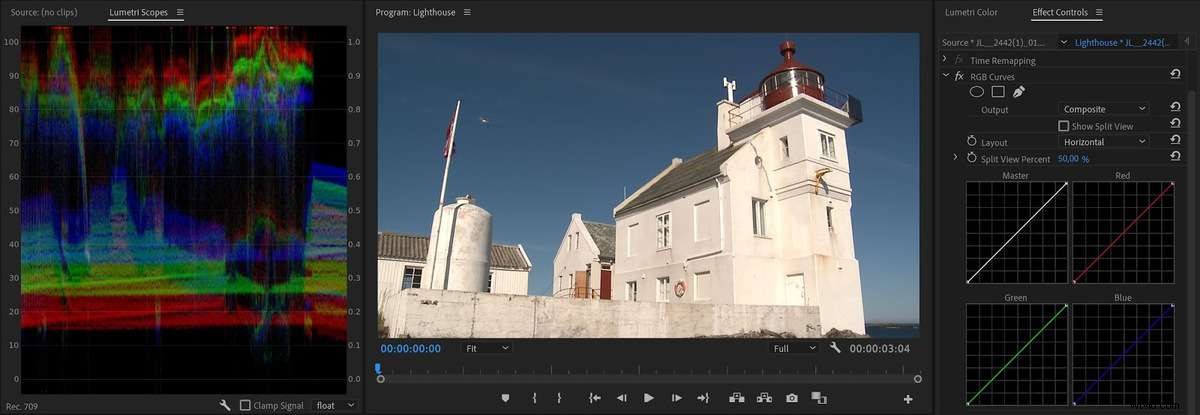
Usa il vecchio affidabile (e obsoleto) effetto Curve RGB per forzare i livelli ben oltre il 100% di bianco. (Non puoi usare Lumetri Color per questo perché taglia i livelli quando impilati.)
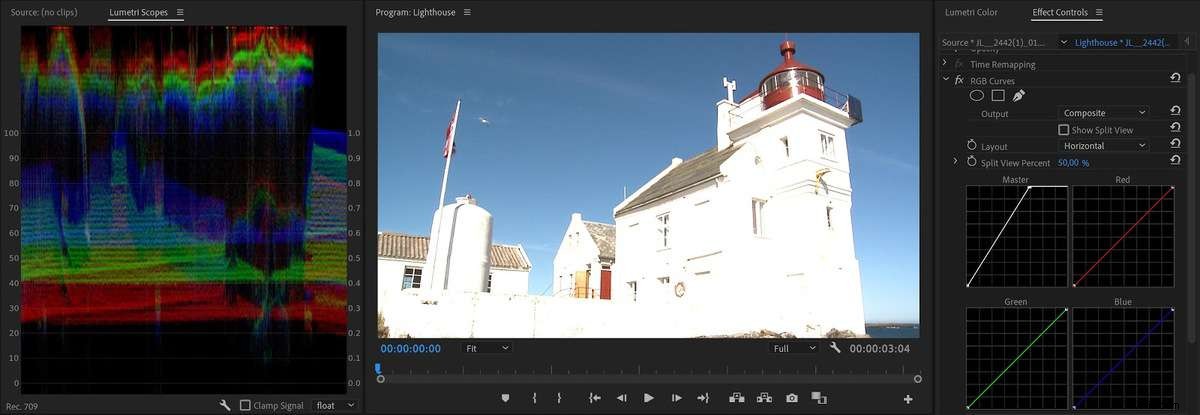
Ora aggiungiamo un'altra istanza di Curve RGB, dove trasciniamo di nuovo i bianchi verso il basso.
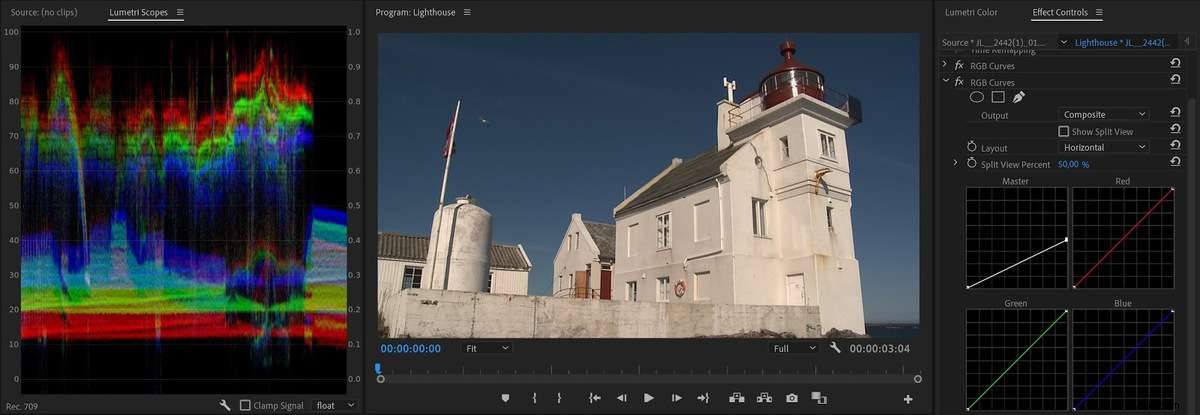
Poiché stiamo eseguendo il rendering a 32 bit utilizzando la GPU, gli overbright non sono stati ritagliati e l'immagine sembra normale. Ora passiamo a Solo software nelle impostazioni del progetto e guarda cosa otteniamo.
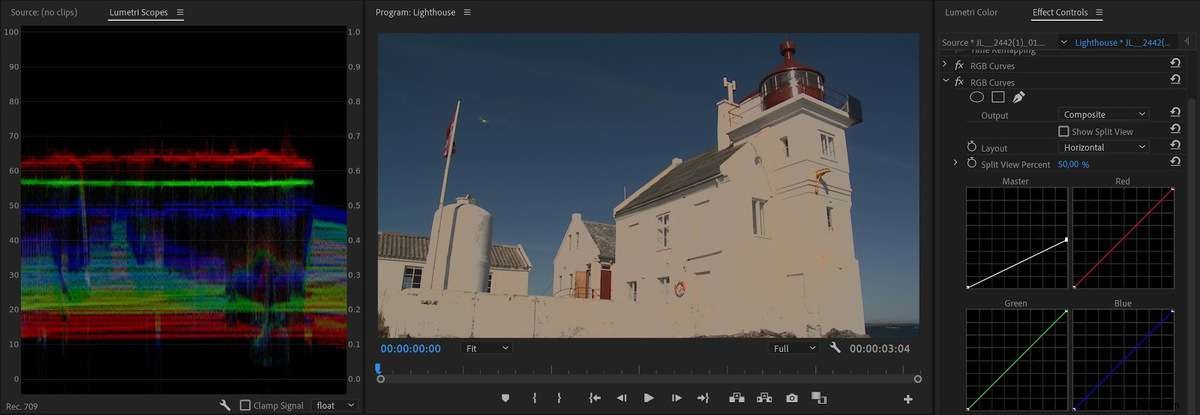
Con il rendering a 8 bit, gli overbright sono stati semplicemente ritagliati e l'abbassamento dei livelli di nuovo rende solo più scuri i livelli ritagliati. Molti dettagli sono persi.
Ora attiviamo la Massima Profondità di Bit passare nelle Impostazioni sequenza.
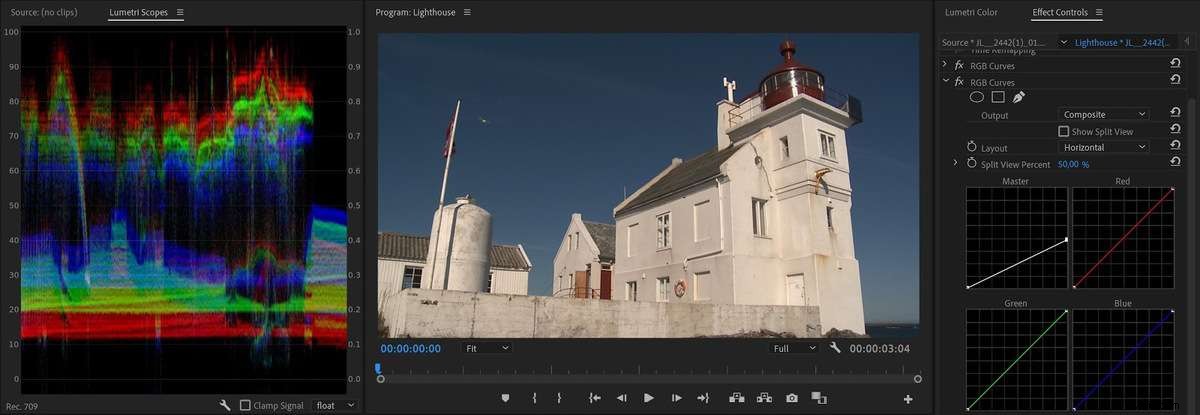
È quasi identico al risultato che abbiamo ottenuto con il rendering GPU. Quindi se lavori in modalità Software, dovresti sicuramente seleziona la casella Profondità in bit massima .
Naturalmente, si trattava di aggiustamenti estremi solo per rendere ovvia la differenza. Normalmente non lo faresti. Ma spesso finiamo per avere più di una regolazione su una clip. Ad esempio, potresti aggiungere un LOG a Rec.709 LUT come effetto Clip sorgente, quindi normalizzare l'immagine nella timeline e quindi aggiungere un livello di regolazione con un aspetto.
Sono tre regolazioni su una clip e tutti i livelli intermedi che superano il 100% verrebbero ritagliati a 8 bit, perdendo i dettagli. Puoi anche iniziare a vedere le bande nei gradienti, ecc. Assicurati di eseguire il rendering a 32 bit e questi problemi non esistono.
Come fai a sapere se una clip è renderizzata in modalità GPU o solo software?
Se hai attivato l'accelerazione GPU (CUDA, Metal o OpenCL) in Impostazioni progetto, è ragionevole presumere che otterrai sempre l'algoritmo migliore. Ma non è sempre così, ed è più complesso di quanto sembri a prima vista.
Se Solo software è scelto in Impostazioni progetto, ovviamente stai ricevendo il rendering del software. Ma anche quando scegli il rendering GPU nelle Impostazioni progetto, alcuni dei tuoi clip potrebbero essere renderizzati utilizzando la modalità Software . Aggiungi un effetto o una transizione non accelerati e una parte del rendering di ciascun fotogramma verrà eseguita a 8 bit, potenzialmente ritagliando livelli e introducendo errori di arrotondamento e bande.
Tali effetti non accelerati includono strumenti comuni come Camera Blur e Maschera contrasto . Questi non sono scritti per la GPU e devono essere calcolati sulla CPU.
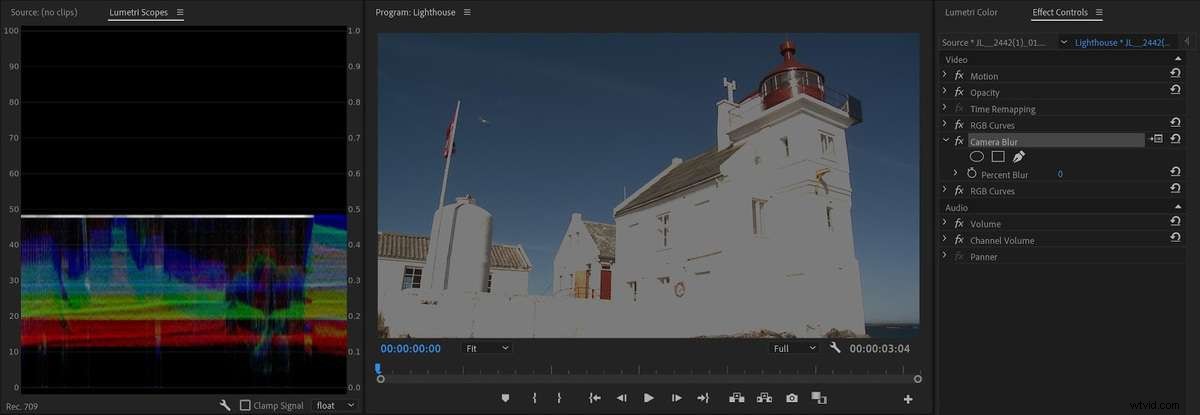
Attenzione alla barra di rendering rossa
La barra di rendering può darti alcuni indizi su cosa sta succedendo. Le aree della timeline senza barra di rendering non hanno alcun effetto, quindi quello che vedi dovrebbe essere quello che ottieni. Se hai scelto il rendering GPU in Impostazioni progetto e vedi una barra di rendering gialla nella timeline, allora sai anche che sei decisamente in modalità GPU e sei al sicuro.
Una barra di rendering rossa spesso indica che stai eseguendo il rendering in modalità Software , ma non è un'identificazione chiara. Potrebbe anche indicare che stai utilizzando un effetto accelerato dalla GPU che necessita di rendering, come Flusso ottico fusione dei fotogrammi per Speed o Morph Cut transizione. Sì, quelli devono essere renderizzati, da cui la barra di rendering rossa, ma verranno renderizzati sulla GPU a 32 bit. Quindi una barra di rendering rossa non è sempre significa che sei in modalità Software.

Si scopre che non esiste un modo semplice o diretto nella sequenza temporale per dire se parte del rendering viene eseguito in modalità Software. Quindi, come puoi scoprire se una clip che attiva una barra di rendering rossa lo fa a causa del rendering del software o meno?
Innanzitutto, devi scoprire se i clip nell'area con una barra di rendering rossa hanno effetti su di essi. Questa è la parte facile. Se il fx il badge è grigio, non ci sono effetti sulla clip. Se è giallo, dovresti anche essere buono, poiché ciò significa che sono stati modificati solo gli effetti fissi (Movimento, Opacità ecc.).
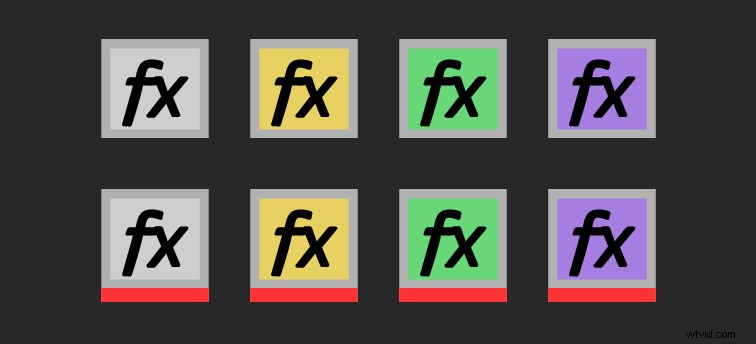
Se c'è una linea rossa sotto il badge, ha un effetto Clip sorgente su di esso e se è viola hai aggiunto un effetto sulla clip nella timeline. Quando diventa verde, significa che hai utilizzato un effetto e che hai anche modificato uno o più effetti fissi. La versione breve di questo è che devi solo preoccuparti dei clip con verde e viola badge e quelli con una linea rossa sotto il badge.
Puoi controllare il pannello Controllo effetti per vedere se qualcuno dei tuoi clip ha un effetto non abilitato per GPU. Se le clip hanno solo effetti accelerati dalla GPU, sei a posto. Se uno o più clip hanno un effetto non accelerato, alcuni dei calcoli verranno eseguiti sulla CPU.
Se non sai quali effetti sono accelerati dalla GPU, puoi scoprirlo guardando le icone dei mattoncini Lego nel pannello Effetti.
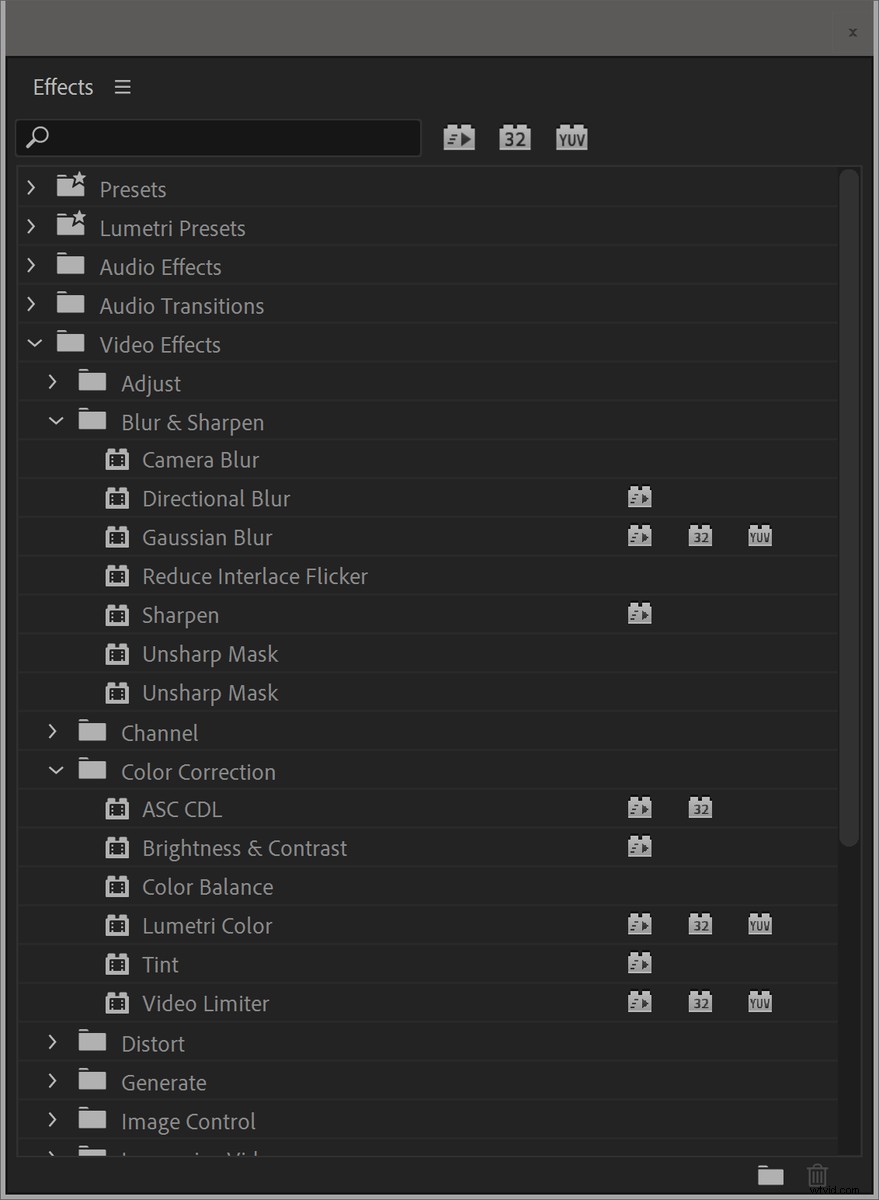
Ma il pannello Controllo effetti mostra solo gli effetti su una clip alla volta, quindi ci vorrà del tempo per scorrere tutte le clip. Ecco un modo più veloce per vedere tutti gli effetti su tutti quei clip:seleziona i clip che vuoi ispezionare e fai clic su Modifica> Rimuovi attributi . Questo mostrerà tutti gli effetti che sono stati usati su quei clip.
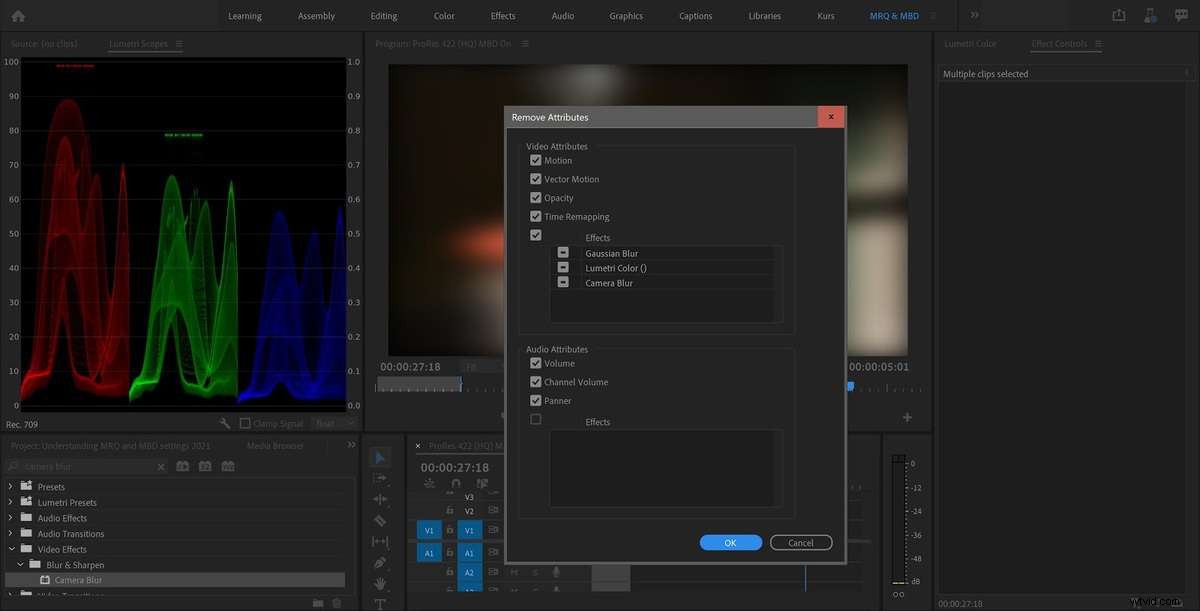
Non mostrerà quale clip ha quale effetto, ma probabilmente conosci la tua sequenza temporale abbastanza bene da avere una buona idea di cosa è stato utilizzato e dove.
E per quanto riguarda i rendering in anteprima?
Le impostazioni della sequenza normalmente non influiranno sull'esportazione finale, perché il pannello Impostazioni di esportazione ha le proprie impostazioni per Profondità di bit massima.
Se prevedi di utilizzare i rendering di anteprima per l'esportazione, sarai felice di apprendere che l'impostazione del formato del file di anteprima su qualcosa come ProRes 422 HQ decodificherà e renderà le tue anteprime a 10 bit, anche quando la sequenza ha Profondità di bit massima impostata su spento. Quindi è sempre sicuro utilizzare rendering di anteprima di alta qualità.
Questa è una buona cosa, ma significa anche che vedrai un cambiamento visibile nell'immagine sotto le sovrapposizioni video come i terzi inferiori se esegui il rendering di quella parte della timeline con Profondità in bit massima impostata su disattivata nelle impostazioni della sequenza.
La profondità di bit massima influisce sulla decodifica di alcuni formati
L'opzione Profondità di bit massima richiede anche un float a 32 bit dall'importatore, che altrimenti è solo a 8 bit. Quindi un fatto poco noto è che MBD influisce anche sul modo in cui alcuni formati video vengono importati/decodificati . Ciò significa che può influire su alcuni formati video più di altri, anche quando sei in modalità Accelerazione GPU.
Per alcuni formati, come RED, questo è necessario per ottenere pixel HDR. Ad esempio, RED RAW è a 12 bit e la profondità di bit massima sceglie tra la decodifica dei frame a 8 bit e l'utilizzo di 12 bit completi.
Non esiste un elenco di quali siano questi formati, ma gli editor che utilizzano ProRes dovrebbero sapere che senza MBD impostato, ProRes verrà decodificato a 8 bit , anche se la sorgente ProRes è sempre a 10 bit o più.
Quindi, quando questo interruttore non è abilitato nelle impostazioni della sequenza, è probabile che il tuo glorioso filmato ProRes mostri delle bande nel monitor del programma e nei telescopi Lumetri.
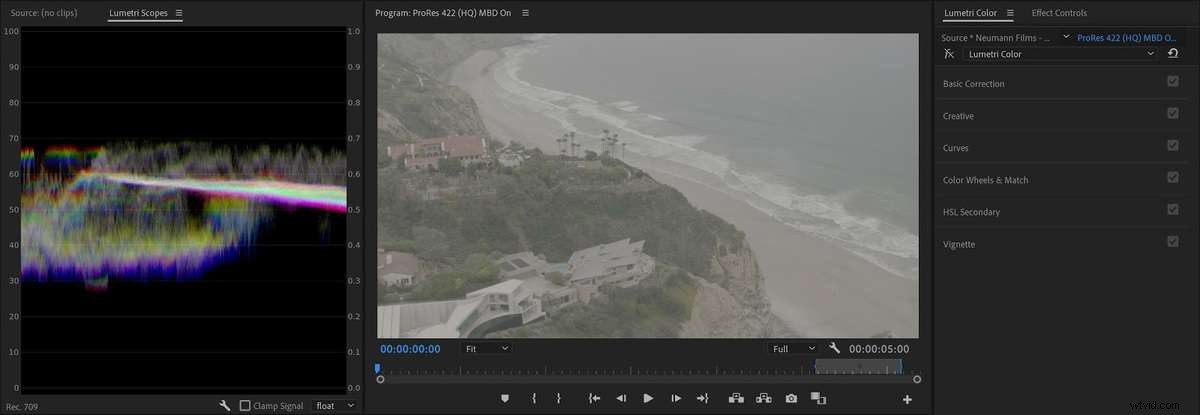
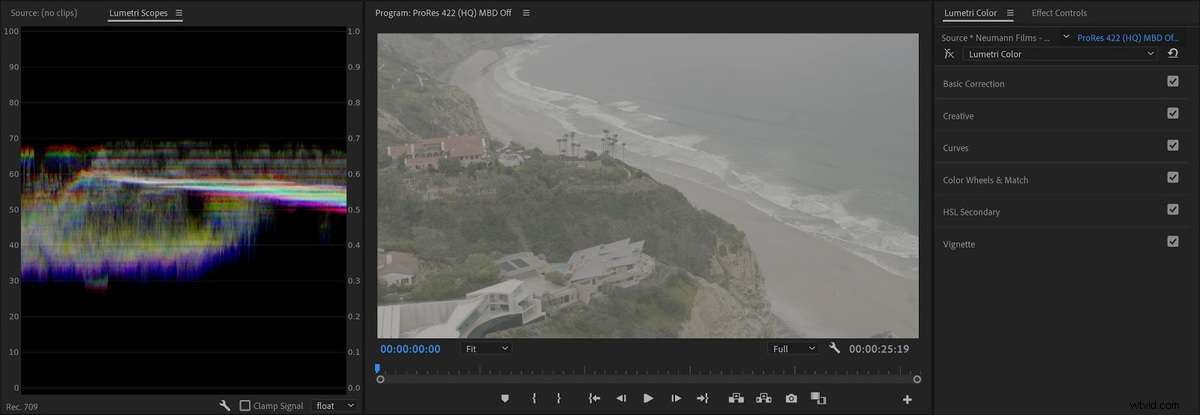
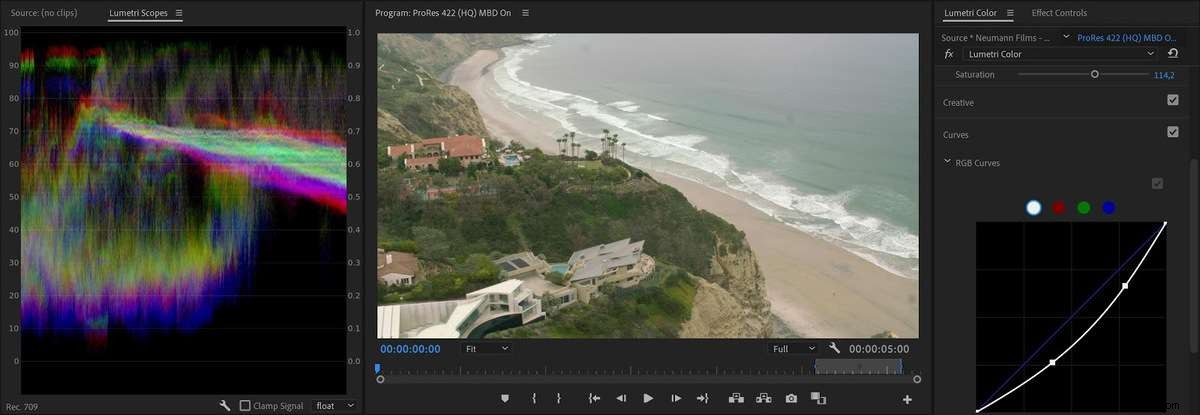
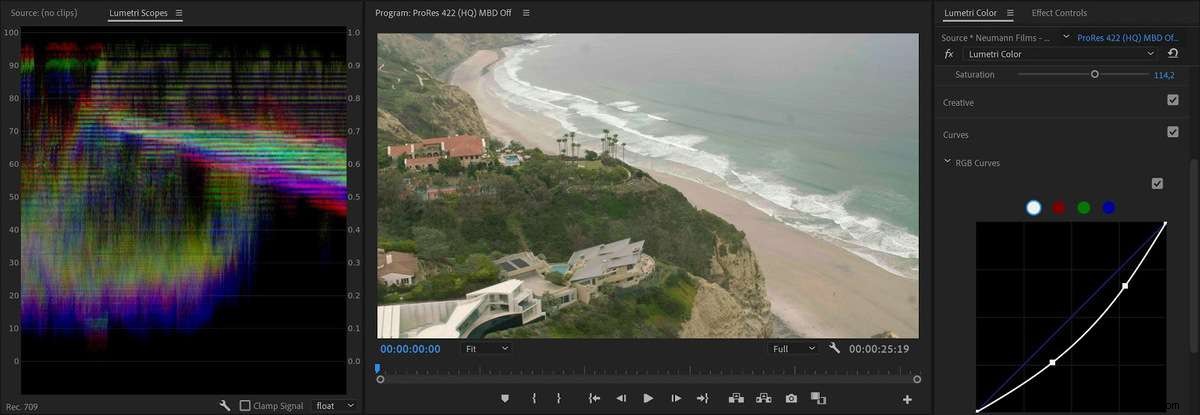
Senza la profondità di bit massima impostata, ProRes verrà decodificato in 8 bit.
Quindi, se vuoi che il monitor del tuo programma mostri qualcosa che assomigli all'output finale mentre stai effettuando il color grading, devi assolutamente abilitare la profondità di bit massima nelle impostazioni della sequenza.
La scelta Profondità spesso trascurata nelle Impostazioni di esportazione
Non confondere il Render at Maximum Depth impostazione con la Profondità impostazione che appare immediatamente sotto in Impostazioni di esportazione per alcuni formati. Il Rendering alla massima profondità la casella di spunta si riferisce all'accuratezza dei calcoli, mentre l'impostazione Profondità di seguito si riferisce alla profondità in bit della codifica.
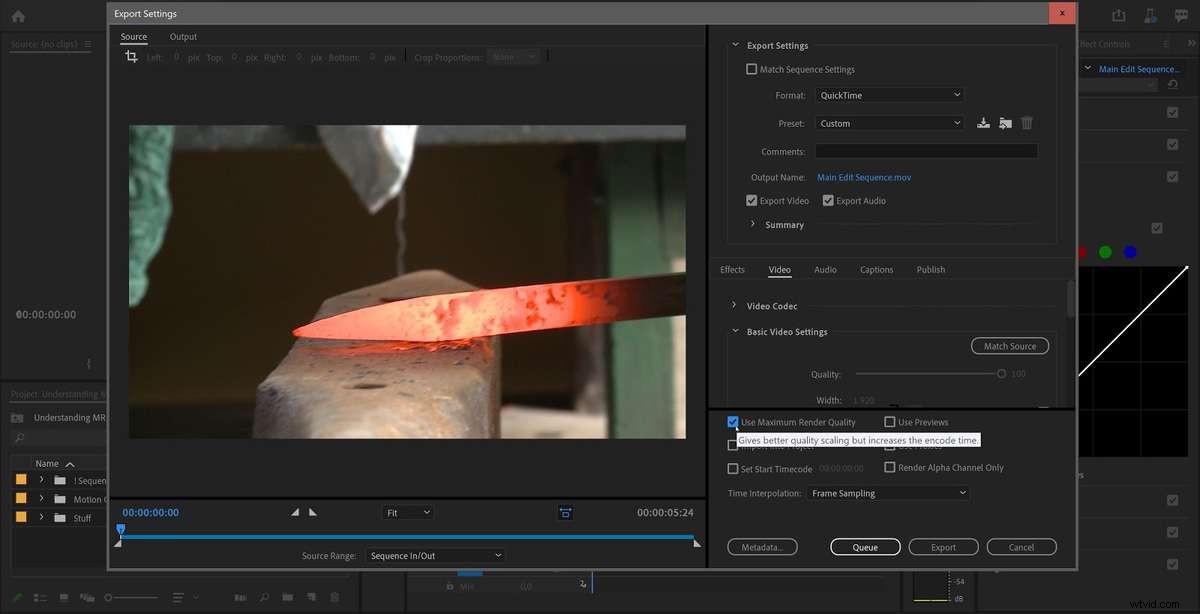
Quindi la Profondità l'impostazione decide se il file renderizzato avrà video a 8 bit, 10 bit o più. Quindi anche con Render at Maximum Depth spuntato, assicurandoti che i calcoli vengano eseguiti a 32 bit, in realtà esporterai in video a 8 bit se non lo imposti a 16 bit!
Per garantire un output di alta qualità, utilizza sempre una profondità di 16 bit durante l'esportazione in ProRes
Per qualche strana ragione, tutti i preset sono predefiniti a 8 bit, presumibilmente una scelta di prestazioni rispetto alla qualità, ma questo ti lascia aperto a bande e blocchi.
Poiché il valore a 8 bit rispetto a 16 bit non è archiviato in modo visibile nel file, il file a 8 bit fingerà di essere a 10 bit per tutte le versioni di ProRes 422 e a 12/16 bit in ProRes 4444. mostra in Proprietà in Premiere Pro e in software come MediaInfo.
Ti sta mentendo.
Si noti che quando si attiva Rendering intelligente, questa impostazione non ha effetto. Ma se hai una sovrapposizione come un livello Testo o hai aggiunto effetti come Lumetri, Premiere Pro esporterà a 8 bit se Profondità non è impostata su 16 bit. Se hai eseguito il rendering delle anteprime del segmento e scegli Usa anteprime, l'impostazione non influirà sull'output.
Inoltre, tieni presente che le Impostazioni sequenza di corrispondenza la funzione in Impostazioni di esportazione è impostata su Profondità in bit massima se la sequenza è abilitata, ma la Profondità è impostata su 8 bit, rendendo inutilizzabile anche questa funzione per l'esportazione ProRes di alta qualità.
Cosa fa la massima qualità di rendering?
MRQ, quando attivo, ti darà immagini più nitide dopo il ridimensionamento perché consente un Lanczos di qualità superiore metodo di interpolazione invece del bilineare predefinito. Questo è il motivo per cui aumenta anche il tempo di esportazione quando è attivo.
Sembra abbastanza semplice. Ma influisce su altre cose oltre al ridimensionamento? Scommetti. E che tipo di algoritmi stiamo guardando qui?

OK, ma cosa significa esattamente "Migliore ridimensionamento"?
Per rispondere a questa domanda, lasciamo per il momento Premiere Pro e diamo un'occhiata a Photoshop, invece. Potresti aver visto che Photoshop ha diversi algoritmi di ridimensionamento tra cui scegliere. Bicubic, Bicubic Sharper, ecc. E hanno tutti vantaggi e svantaggi diversi.
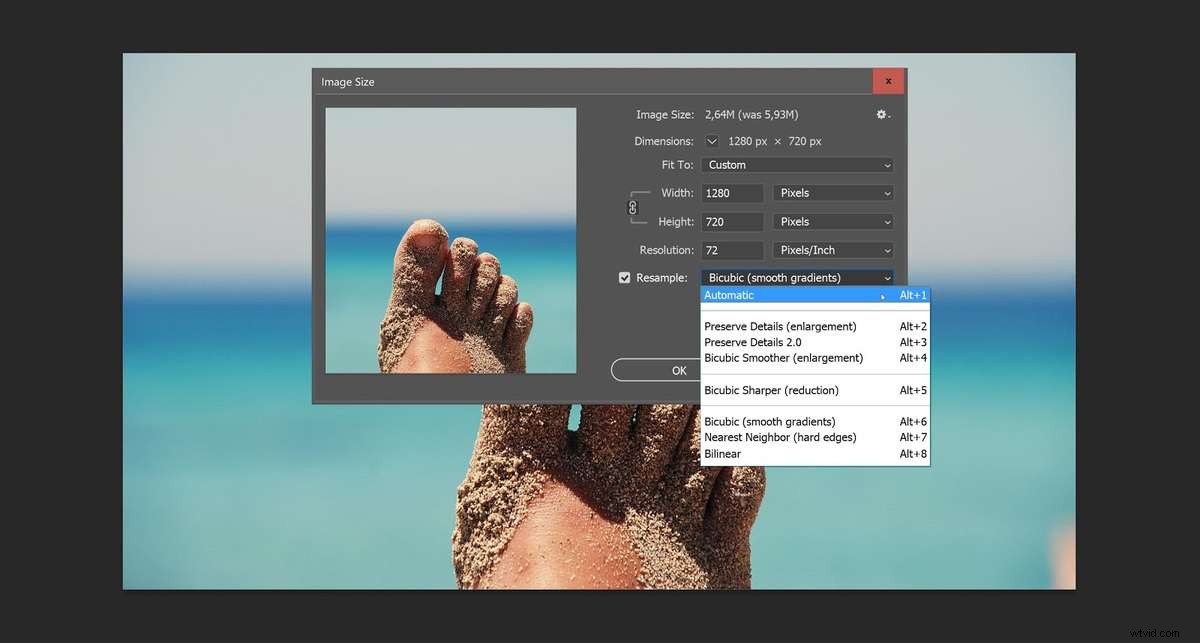
Perché ne abbiamo così tanti tra cui scegliere? Perché la nitidezza non è sempre quello che vuoi. Alcuni algoritmi sono migliori per elementi grafici e testo, mentre altri sono migliori per "immagini naturali". Alcuni funzionano meglio quando si aumenta, mentre altri funzionano meglio quando si ridimensiona. Colin Smith di PhotoshopCAFE ha una buona spiegazione nel suo video tutorial.
Torna a Premiere Pro e "migliore" sembra essere più nitido. Quindi questa è la prima affermazione leggermente imprecisa in quel testo del suggerimento. La seconda imprecisione è che menziona solo il ridimensionamento, nonostante influisca effettivamente su tutte le opzioni di trasformazione, incluse scala, posizione e rotazione, oltre a tutti gli effetti che fanno scala, posizione e rotazione, come lo stabilizzatore curvatura .
Proprio come la spiegazione per Max Bit Depth, anche la spiegazione nel tooltip è sbagliata:non necessariamente aumentare il tempo di codifica. Se hai abilitato l'accelerazione GPU, non aumenterà il tempo di codifica. Vedi Test 7
Quando entra in gioco?
Se hai utilizzato solo effetti con accelerazione GPU e hai una barra di rendering della timeline gialla o nessuna barra, non entra in gioco, poiché gli algoritmi di ridimensionamento della GPU sono ancora migliori, e tuttavia più veloci, perché vengono eseguiti sulla GPU.
Se la barra di rendering è rossa, potrebbe dare il via. Molto probabilmente lo farà, perché hai usato un effetto non accelerato. Ma ci sono delle eccezioni. Proprio come l'opzione Profondità di bit massima, la qualità di rendering massima non attiva se la barra di rendering è rossa perché hai usato morph cut e non hai ancora eseguito il rendering. Quella transizione viene renderizzata sulla GPU, quindi MRQ non si avvierà.
E ricorda:influisce su Transforms (anche se menziona solo il ridimensionamento nelle impostazioni di esportazione). Quindi, se non hai ridimensionato, spostato o ruotato nulla, non funzionerà. Se hai regolato o impostato il fotogramma chiave su Posizione, Rotazione o Scala (incluso Scala o Imposta su Dimensione fotogramma), potresti aver attivato questi algoritmi.
Poi di nuovo, potresti ridimensionare senza rendertene conto. Ad esempio, stabilizzatore di curvatura introduce il ridimensionamento, la rotazione e il riposizionamento. E se hai utilizzato l'impostazione predefinita Imposta su dimensione cornice , potresti ridimensionare senza saperlo. Ovviamente, se stai eseguendo l'output a una dimensione diversa dalla tua sequenza (ad esempio, esportando HD da una timeline 4k), allora sicuramente lo stai ridimensionamento.
Alcuni fatti che potrebbero sorprenderti
Come hai visto, il livello di complessità è sorprendentemente alto per un obiettivo così semplice:darmi la massima qualità di output. Non solo è complesso, ma le diverse impostazioni si trovano in angoli diversi del software e devono essere tutte impostate correttamente.
Molti di noi faranno fatica a trovare, comprendere e applicare correttamente tutte queste impostazioni.
Ma c'è di più. Ecco alcune informazioni che potrebbero sorprenderti o meno.
Premiere Pro ha diversi algoritmi di ridimensionamento
Adobe ha descritto come e quando funzionano i diversi algoritmi di ridimensionamento in un post del blog del 2010.
Ecco una panoramica che ho realizzato, aggiornata con gli algoritmi utilizzati per la Riproduzione di alta qualità , che non era una cosa nel 2010.
| Algoritmo | Descrizione | Quando si usa? |
| Vicino più vicino | Super veloce, ma a blocchi | Per alcuni formati quando si riduce la risoluzione di riproduzione nel monitor programma. |
| Bilineare " data-order="Bilineare ">Bilineare | Molto veloce, ma non della migliore qualità. | Utilizzato per la riproduzione quando la riproduzione ad alta qualità non è abilitata. |
| gaussiano passa-basso campionato con bilineare" data-order=" gaussiano passa-basso campionato con bilineare">gaussiano passa-basso campionato con bilineare | Veloce, ma un po' morbido. | Utilizzato quando esporti in modalità Software con la massima qualità di rendering disattivata. Utilizzato anche in modalità Software quando la riproduzione è in pausa. |
| bicubico " data-order=" Raggio variabile bicubico ">Bicubico a raggio variabile | Lento, ma più nitido. Simile alla modalità bicubica standard in Photoshop. | Utilizzato per l'esportazione in modalità Software quando è abilitata la massima qualità di rendering. |
| Lanczos 2 passa-basso campionato con bicubico. Descritto anche come modificato bicubico con prefiltro dipendente dalla scala." data-order="Lanczos 2 passa-basso campionato con bicubico. Descritto anche come bicubico modificato con un prefiltro dipendente dalla scala.">Lanczos 2 passa basso campionato con bicubico. Descritto anche come bicubico modificato con un prefiltro dipendente dalla scala. | Il miglior algoritmo di ridimensionamento completo. Abbastanza avanzato, ma poiché è disponibile solo in modalità GPU è comunque veloce. | Utilizzato in modalità GPU per l'esportazione e quando la riproduzione è in pausa. Utilizzato anche in modalità GPU quando è abilitata la riproduzione di alta qualità. |
Normalmente non vedi la qualità completa nel monitor del programma
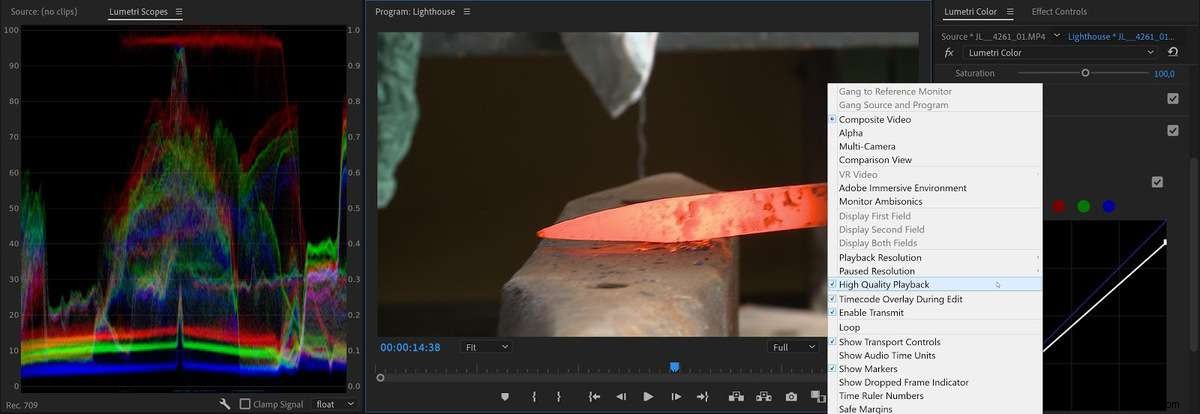
Come puoi vedere nella tabella sopra, Premiere Pro utilizza un algoritmo veloce e di qualità inferiore per la riproduzione per impostazione predefinita. Ciò rende la riproduzione meno impegnativa e potrebbe essere l'unica scelta praticabile su sistemi meno capaci. To see what you’ll get on export, and accurately judge the results, you’ll have to enable High Quality Playback in the Program Monitor settings menu.
With High Quality Playback enabled, Premiere Pro plays and scrubs the image using the same quality that’s used when the Playhead is paused. So you might find that your system struggles and starts dropping frames. In that’s the case, turn this feature off.
Your choices in Sequence Settings don’t matter that much
As we’ve seen (and to make things more complicated), both settings are available both in the sequence and in the export settings. If you take a look at the tests at the end of this article, you’ll see that your sequence settings have no impact on the quality of the exported file .
But if you want to know what you’re exporting, the sequence settings and the export settings have to match. If they’re set differently, the output won’t be the same as what you saw while editing. So I recommend that you keep MRQ and MBD settings matched.
Max Render Quality also affects the way color is rendered
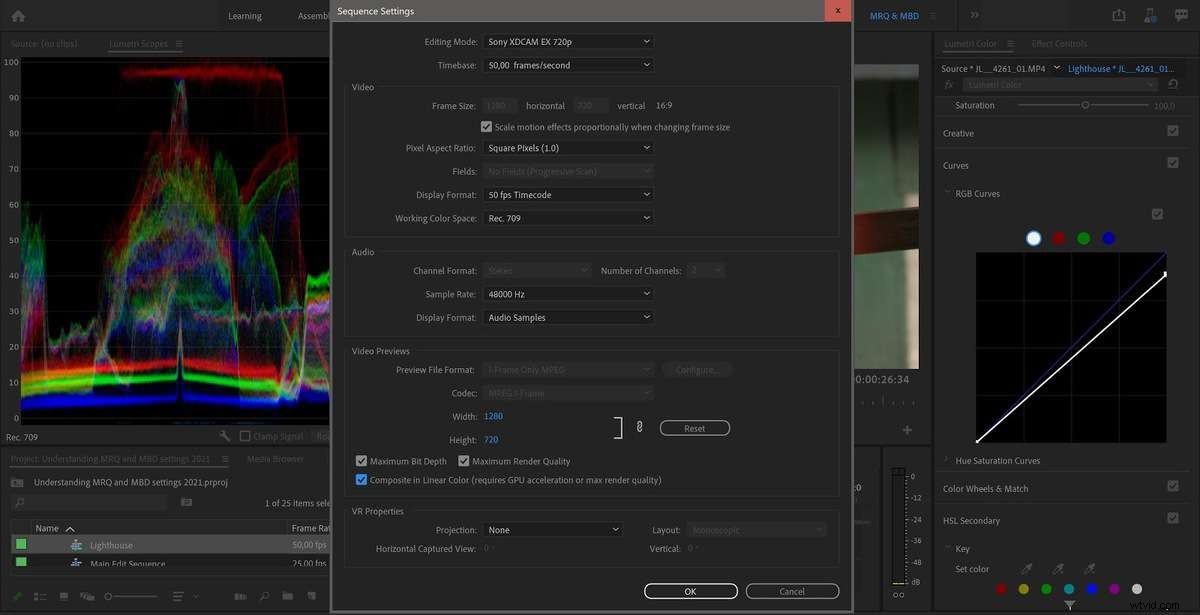
As you’ll see in the Sequence settings, the Composite in Linear Color setting depends on GPU acceleration or Max Render Quality. So if this is on, as it is by default, activating Max Render Quality will also activate Composite in Linear Color when you’re in Software mode. And this will affect how your compositing, cross-dissolves, and color grading will look.
In Software mode, this also makes Premiere Pro blend in linear color for frame blending when you change Speed/Duration.
Max Render Quality affects how some formats are decoded
As we’ve seen, the Max Render Quality setting normally has no impact on our exports in GPU mode, because a superior scaling algorithm will be used on the GPU. But even with GPU rendering, MRQ can improve quality when working with footage that supports fractional resolution (Wavelet codecs, like RED for example), using full-resolution sources instead of a fractional resolution for the export when the image has been scaled down. See Test 14.
According to engineers and developers from Adobe, MRQ affects decisions made by RED, PNG, JPEG, HIEC, HIEF and WEBP importers. And they mention that this list will change over time, as well as what impact MRQ has on them.
Common Misconceptions
There are some statements that you’ll often see in forums, books and articles—even by Adobe evangelists—that don’t hold up to scrutiny. So let’s clear these up.
“Maximum Render Quality only affects scaling”
There are many versions of this misconception, but it usually goes a bit like this.
“Using Maximum Render Quality will not help unless you’re scaling up or down”.
Wrong . It also kicks in if you’re changing Rotation, Position, and other Transforms, or the Warp Stabilizer, which also does some scaling and other Transforms. But it only affects Software rendering. See Test 9
“Maximum Bit Depth doesn’t help if your source or destination file is 8-bit”
Since a lot of source files are 8-bit and we often export to 8-bit codecs, people tend to think that we don’t have to render effects in 32-bit. Here are two common statements.
“You don’t have to check Maximum Bit Depth, because H.264 and YouTube is 8-bit anyway.”
“You don’t need Maximum Bit Depth if your source material is 8-bit.”
Wrong. Even when the source and export are 8-bit, doing the decoding and all the internal calculations at 32-bit accuracy will make sure your consecutive adjustments (say, Lumetri on the source clip and a LUT or tweak on an added Adjustment Layer) don’t introduce clipping, banding and posterization.
This affects both GPU rendering and Software rendering, as you can see in Tests 3, 4 and 5.
Unfortunately, none of the presets in the new Quick Export have Maximum Bit Depth set. So, to get less banding and blocking when exporting using the standard export method, choose the same preset, you should activate MBD.
“When you have GPU acceleration enabled, the settings don’t matter”
This is true for MRQ, but only if your timeline does not have a red render bar due to non-accelerated effects, which forces you into Software rendering. For Max Bit Depth, it’s only true if you haven’t added any effects. See Test 3, 4, 7 and 8.
“The export will match what you see in the program monitor”
Not entirely true. To get WYSIWYG in the Program Monitor during playback, not just when playback is paused, you’ll have to enable High Quality Playback in the program monitor panel menu.
Effects and transitions like Morph Cut and Optical Flow need to be rendered to see the actual result. Also, when you’re rendering previews, you’ll need to render to a good codec, or else the result will not match your output.
If it’s rendered to the default I-frame Only MPEG-2 codec, you’ll get a bad preview compared to ProRes, DNxHR or CineForm codecs, which provide better-quality previews.
So it’s best to use codecs that are so good you can use them for export, enabling Use Previews in the export settings. Ideally, you should use the exact same format as you’ll use when you export your master file to get super-fast Smart Rendering and eliminate re-transcoding.
Render Previews if you’re editing in Software mode. During playback in Software mode, you’ll not get 32-bit rendering. Effects and compositing can look very different before and after rendering.
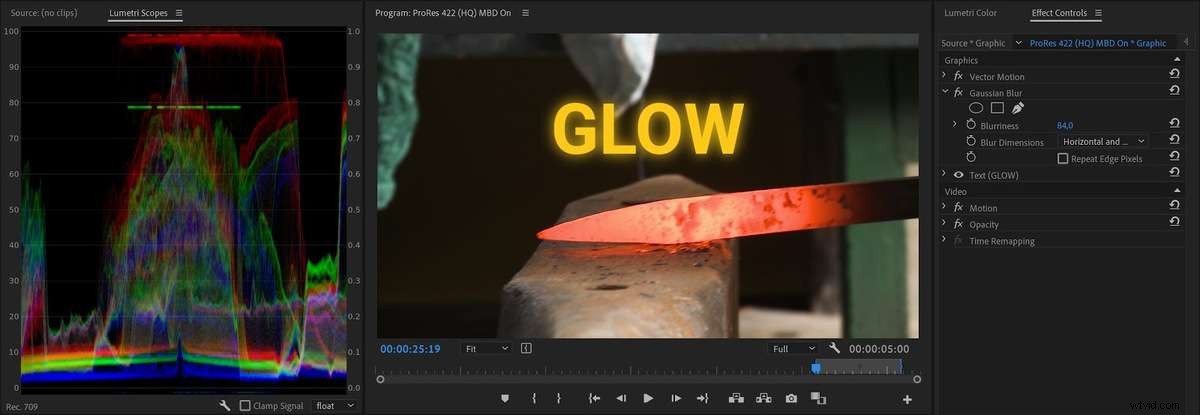
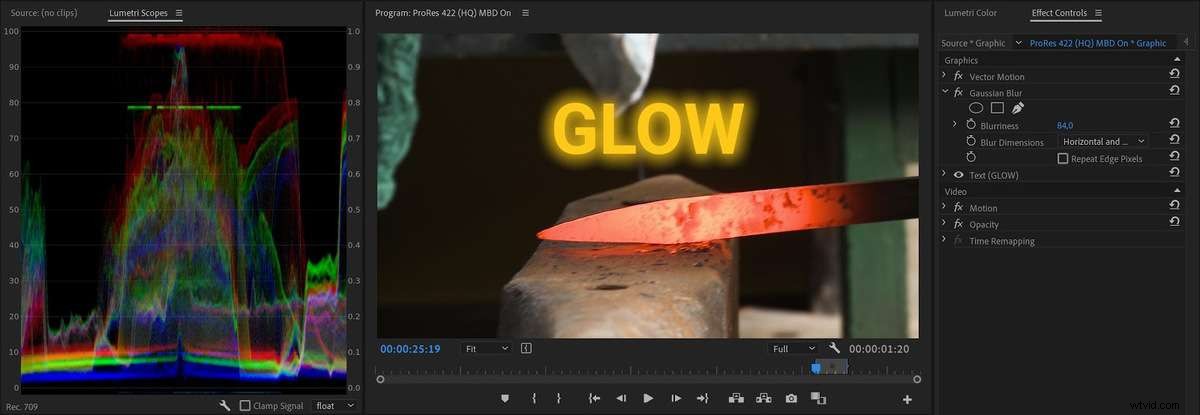
For example, graphics might get jagged edges during playback, and Linear compositing won’t be applied, which changes the look of blending modes, etc. By rendering your previews, you’ll get to see them in full quality, which is useful if your system can’t handle High Quality Playback.
Summing up
These MRQ and MBD settings affect the video quality at three different stages in the pipeline. The importer/decoder can be 8-bit or 32-bit, the processing of effects and transforms can be done in 8-bit or 32-bit, and finally the exporter can render to 8-bit, 10-bit, 16-bit, etc.
As we’ve seen, where these settings really matter is in your Export settings. Both Max Render Quality and Max Bit Depth have an impact on your image quality, although Max Render Quality mostly only kicks in when you’re in Software mode (which is entirely possible even with GPU acceleration turned on, see Test 11).
It’s hard to be definitive, but in many (most?) cases, leaving the settings on will not affect the export time.
For some sources, MRQ can make a difference even in GPU mode. MBD in export settings can also affect how some formats are decoded, even in GPU mode, most notably ProRes.
And finally, you should always enable 16-bit Depth for formats where this choice is available.
Unfortunately, in both Sequence Settings and in Export Settings, the defaults don’t have these settings enabled, so you’ll have to intervene to get the best quality video in Premiere Pro. The Quick Export has none of these settings enabled, and there’s no way you can change it.
If you want good quality video, always enable Maximum Bit Depth and Maximum Render Quality, and choose 16-bit instead of 8-bit for formats with a choice for Depth.
With all of this in mind, I recommend that you always have MBD and MRQ enabled in your export settings. If you want WYSIWYG, you should also enable both of them settings in your sequences. If your system struggles you may want to turn them off, and see if the exported files still meet your quality standards, knowing that it’s not top quality.
Most of the time, the settings will do nothing at all, but they will kick in when needed, and ensure the best possible quality.
Here’s what I do
You may be wondering what choices I have made, and how I set up my workflow. Here you go.
- I use Sequence Presets that have both settings activated
- The Sequence Presets use ProRes 422 HQ to get high-quality preview renders
- I’ve made a ProRes 422 HQ Export Preset with both settings activated
- The Export Preset also has Use Previews, and 16-bit Depth activated
The export to a master file is very quick if I’ve rendered parts of the timeline where there’s a red render bar, due to Smart Rendering (see Test 1 and 6). Of course, I don’t always have to render, but I sometimes render during breaks or when I’m on the phone, to save time on final export when Smart Rendering kicks in.
I also use Render &Replace for dynamic link comps, titles, MOGRTs etc.
For longer projects I will set up watch folders in Adobe Media Encoder to automatically take my exported master file and output the h.264 versions, using a preset with Maximum Bit Depth and Maximum Render Quality enabled. But for short-form projects I normally just queue these exports, which is fast and easy.
I hope the info in this article enables you to make qualified choices for these settings for future projects. This should enable you to improve your image quality and yield fewer surprises when you export your films.
Testing, testing
In the interests of transparency, here are the tests. (They were run on a 7-year old laptop, so you may laugh at some of the export times.)
Each test was an export of the same timeline with different settings enabled, with MRQ and MBD enabled and disabled, with and without GPU rendering, scaling on/off, etc. Here are the basic sequence settings and export settings.
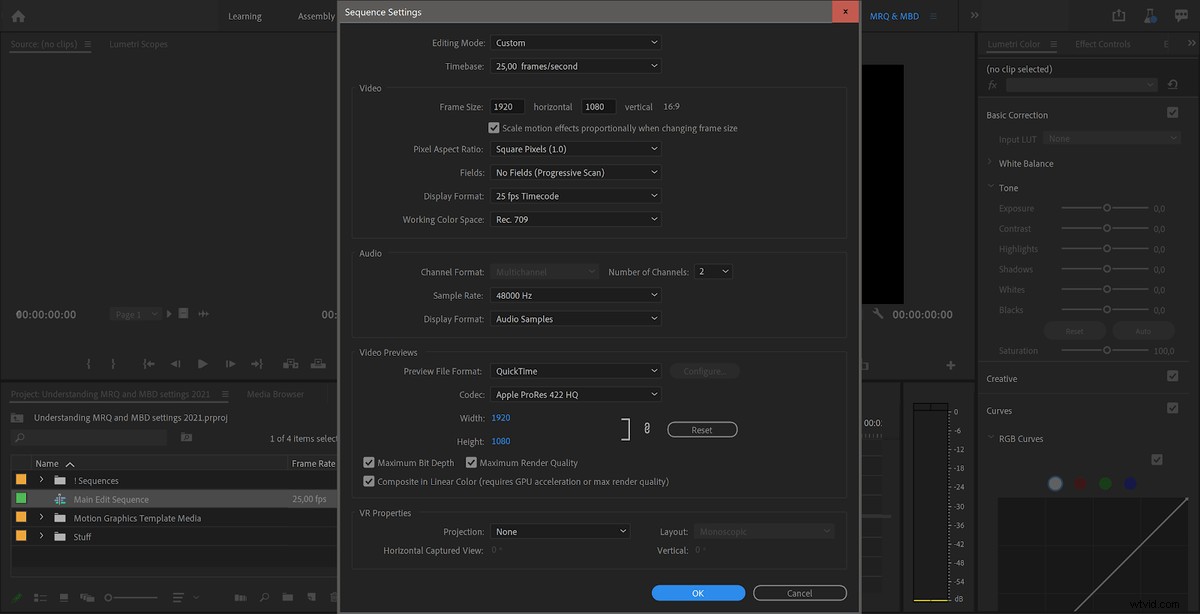
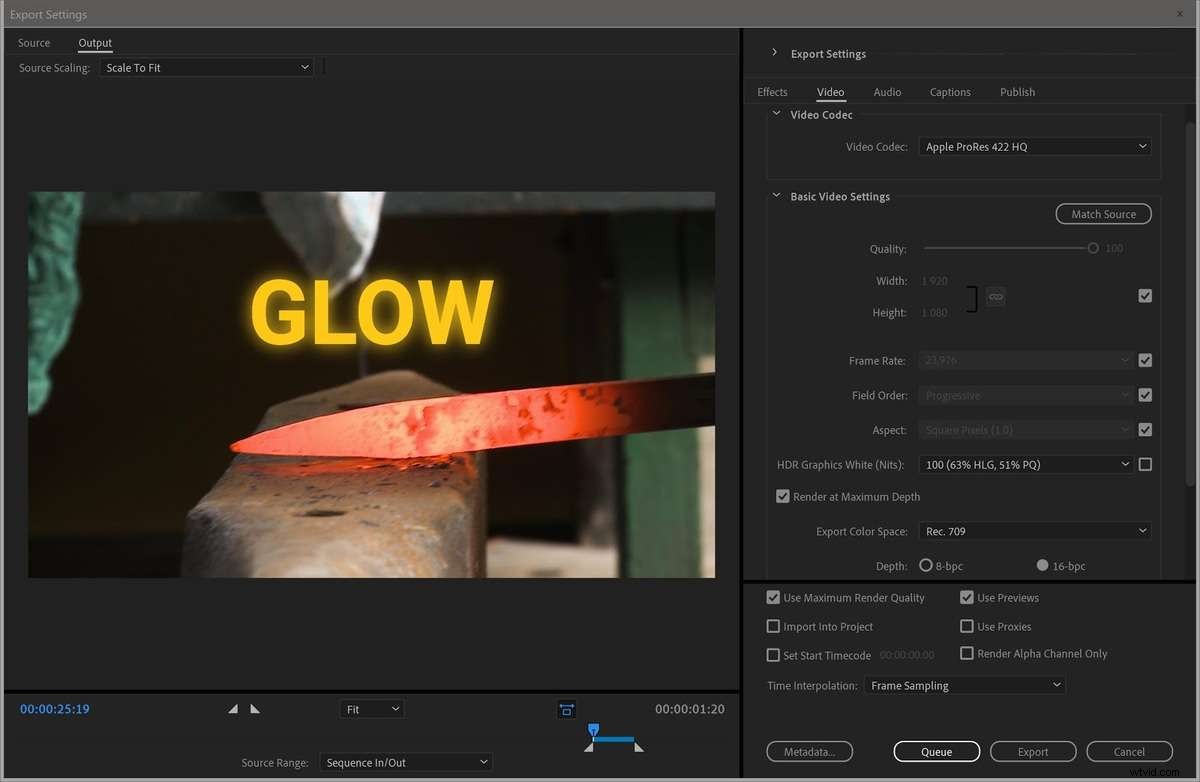
During each export, I monitored the CPU and GPU usage, and timed every export. After each export, I performed a Difference Mode test, to see if any pixels had different values in the different versions.
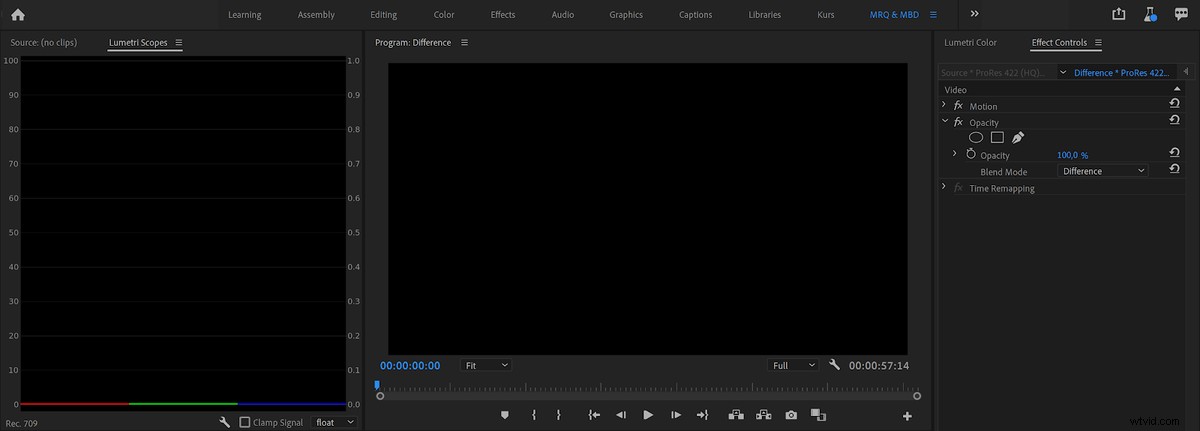
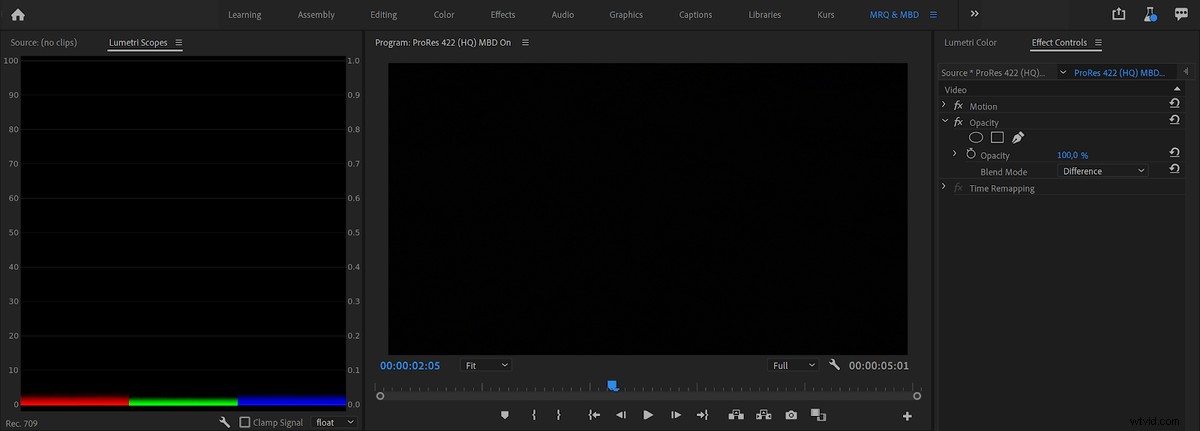
My main testing timeline was a minute long and contained a 10-second clip repeated six times. The source file was 1920x1080px, ProRes 422 HQ, 29.97 fps, progressive. (This matched the export, so in the first test, Smart Rendering kicked in, and the export time was very short.) I also did a test with RED RAW footage.
Let me preface this by saying that these tests are not scientific. I had other software running in the background, and I timed the exports using the stopwatch app on my smartphone, so the timing may be off by at least one second, maybe more. But they’re enough for us to see how different settings affect the exported file and the time the export takes.
Test 1:Export to ProRes 422 HQ, No effects
| # | Sequence | Export | GPU | Export Time | GPU Usage |
| A | MBD off | MBD off | CUDA | 9 sec | - |
| B | MBD on | MBD off | CUDA | 9 sec | - |
| C | MBD off | MBD on | CUDA | 9 sec | - |
| D | MBD on | MBD on | CUDA | 8 sec | - |
| E | MBD off | MBD off | Off | 9 sec | - |
| F | MBD on | MBD off | Off | 9 sec | - |
| G | MBD off | MBD on | Off | 8 sec | - |
| H | MBD on | MBD on | Off | 9 sec | - |
Conclusion:When no effects are added, Premiere Pro uses Smart Rendering on this sequence, regardless of the Maximum Bit Depth value in the Sequence and Export settings. This is indicated by the very low CPU usage. Almost zero processing is going on, and the export is super fast.
Test 2:Comparison of exported files from test 1, Difference mode, No effects
| # | Comparison (Difference Mode) | Program Monitor | Waveform Scope |
| A | Files from A and E in test 1 | Black | Flat line |
| B | Files from A and F in test 1 | Black | Flat line |
| C | Files from A and G in test 1 | Black | Flat line |
| D | Files from A and H in test 1 | Black | Flat line |
| E | Files from A and B in test 1 | Black | Flat line |
| F | Files from A and C in test 1 | Black | Flat line |
| G | Files from A and D in test 1 | Black | Flat line |
Conclusion:All the files are identical. I could see no difference in the program monitor or in the scopes—the waveforms were a straight flat line. They were also exactly the same size, down to the byte.
Test 3:Export to ProRes 422 HQ, with Lumetri effect (RGB Curve), GPU enabled
| # | Sequence | Export | GPU | Export Time | GPU Usage |
| A | MBD off | MBD off | CUDA | 25 sec | 40-90% |
| B | MBD on | MBD off | CUDA | 26 sec | 40-90% |
| C | MBD off | MBD on | CUDA | 38 sec | 40-90% |
| D | MBD on | MBD on | CUDA | 39 sec | 40-90% |
The CPU was constantly around 100% on all cores, and GPU usage was between 40-90% for all exports. Only when the export setting is changed does the file size differ, and a fuzzy line shows in the scopes. Files exported with MBD on in export settings are identical (down to the byte) no matter what the sequence setting is. Files exported with MBD off in export settings are also identical (down to the byte) no matter what the sequence setting is.
Conclusion:Export settings affect export times, and what algorithm is used. Sequence settings do not affect the exported files, unless you enable Use Previews in the export settings.
Test 4:Export to ProRes 422 HQ, with Lumetri effect (RGB Curve), GPU disabled
| # | Sequence | Export | GPU | Export Time | GPU Usage |
| A | MBD off | MBD off | Off | 2 min 14sec | – |
| B | MBD on | MBD off | Off | 2 min 16 sec | – |
| C | MBD off | MBD on | Off | 2 min 30 sec | – |
| D | MBD on | MBD on | Off | 2 min 28 sec | – |
The CPU was constantly around 100% on all cores for all exports. When the export setting is changed the file sizes differ, and a fuzzy line also shows in the scopes. Files exported with MBD on in export settings are identical (down to the byte) no matter what the sequence setting is. Files exported with MBD off in export settings are also identical (down to the byte) no matter what the sequence setting is.
Conclusion:Export settings affect export times, and what algorithm is used, but sequence settings do not, unless you enable Use Previews in the export settings.
Test 5:Difference mode, with Lumetri effect (RGB Curve)
| # | Comparison (Difference Mode) | Program Monitor | Waveform Scope |
| A | Off-off GPU vs on-off GPU | Black | Flat line |
| B | Off-off GPU vs off-on GPU | Black | Fuzzy line |
| C | Off-off GPU vs on-on GPU | Black | Fuzzy line |
| D | Off-off CPU vs off-on CPU | Black | Fuzzy line |
| E | Off-off CPU vs on-off CPU | Black | Flat line |
| F | Off-off CPU vs on-on CPU | Black | Fuzzy line |
| G | All GPU vs CPU | Black | Fuzzy line |
Conclusion:Premiere Pro uses slightly different algorithms in CPU and GPU mode, so files exported with GPU enabled and GPU disabled are slightly different. The export settings make an impact on the exported file—sequence settings have no influence on the exported file, unless you enable Use Previews in the export settings.
Test 6:Export to ProRes 422 HQ, no scaling
| # | Sequence | Export | GPU | Export Time | GPU Usage |
| A | MRQ off | MRQ off | CUDA | 8 sec | - |
| B | MRQ on | MRQ off | CUDA | 8 sec | - |
| C | MRQ off | MRQ on | CUDA | 8 sec | - |
| D | MRQ on | MRQ on | CUDA | 8 sec | - |
| E | MRQ off | MRQ off | Off | 8 sec | - |
| F | MRQ on | MRQ off | Off | 8 sec | - |
| G | MRQ off | MRQ on | Off | 8 sec | - |
| H | MRQ on | MRQ on | Off | 8 sec | - |
Conclusion:When no scaling is going on, Premiere Pro uses Smart Rendering, and all the exported files are identical.
Test 7:Export to ProRes 422 HQ, with scaling set to 120%
| # | Sequence | Export | GPU | Export Time | GPU Usage |
| A | MRQ off | MRQ off | CUDA | 25 sec | 40-85% |
| B | MRQ on | MRQ off | CUDA | 25 sec | 40-85% |
| C | MRQ off | MRQ on | CUDA | 25 sec | 40-85% |
| D | MRQ on | MRQ on | CUDA | 25 sec | 40-85% |
| E | MRQ off | MRQ off | Off | 35 sec | – |
| F | MRQ on | MRQ off | Off | 35 sec | – |
| G | MRQ off | MRQ on | Off | 3 min 55sec | – |
| H | MRQ on | MRQ on | Off | 3 min 55sec | – |
The CPU was constantly around 100% on all cores for all exports. Files exported with MBD on in export settings are identical (down to the byte) no matter what the sequence setting is. Files exported with MBD off in export settings are also identical (down to the byte) no matter what the sequence setting is. Files exported with GPU enabled and GPU disabled are slightly different.
Conclusion:Export settings affect export times in Software mode, and what algorithm is used, but Sequence settings have no impact on the exported files, unless you enable Use Previews in the export settings.
Test 8:Difference mode, with scaling
| # | Comparison (Difference Mode) | Program Monitor | Waveform Scope |
| A | All GPU vs GPU | Black | Flat line |
| B | GPU vs off-off CPU | Black | Fuzzy line |
| C | GPU vs on-off CPU | Black | Fuzzy line |
| D | GPU vs off-on CPU | Black | Fuzzy line |
| E | GPU vs on-on CPU | Black | Fuzzy line |
| F | On-off CPU vs off-off CPU | Black | Flat line |
| G | On-off CPU vs off-on CPU | Black | Fuzzy line |
| H | Off-on CPU vs on-on CPU | Black | Flat line |
Files exported with MBD on in export settings are identical (down to the byte) no matter what the sequence setting is. Files exported with MBD off in export settings are also identical (down to the byte) no matter what the sequence setting is. Only when the export setting is changed does the file size differ, and a fuzzy line shows in the scopes.
Conclusion:Premiere Pro uses slightly different algorithms in CPU and GPU mode. Export settings affect export times, and what algorithm is used, but Sequence settings have no impact on the exported files, unless you enable Use Previews in the export settings.
Test 9:Export to ProRes 422 HQ, with rotation set to 10 degrees, no scaling
| # | Sequence | Export | GPU | Export Time | GPU Usage |
| A | MRQ off | MRQ off | CUDA | 27 sec | 40-95% |
| B | MRQ on | MRQ off | CUDA | 26 sec | 40-95% |
| C | MRQ off | MRQ on | CUDA | 25 sec | 40-95% |
| D | MRQ on | MRQ on | CUDA | 25 sec | 40-95% |
| E | MRQ off | MRQ off | Off | 37 sec | – |
| F | MRQ on | MRQ off | Off | 37 sec | – |
| G | MRQ off | MRQ on | Off | 5 min 26sec | – |
| H | MRQ on | MRQ on | Off | 5 min 26sec | – |
CPU was constantly around 100% on all cores for all exports. Files exported with MBD on in export settings are identical (down to the byte) no matter what the sequence setting is. Files exported with MBD off in export settings are also identical (down to the byte) no matter what the sequence setting is.
Conclusion:Premiere Pro uses slightly different algorithms in CPU and GPU mode. Export settings affect export times, and what algorithm is used, but Sequence settings have no impact on the exported files, unless you enable Use Previews in the export settings.
Test 10:Difference mode, with rotation set to 10 degrees, no scaling
| # | Comparison (Sequence Export) | Program Monitor | Waveform Scope |
| A | All GPU vs GPU | Black | Flat line |
| B | GPU vs off-off CPU | Black | Fuzzy line |
| C | GPU vs on-off CPU | Black | Fuzzy line |
| D | GPU vs off-on CPU | Black | Fuzzy line |
| E | GPU vs on-on CPU | Black | Fuzzy line |
| F | On-off CPU vs off-off CPU | Black | Flat line |
| G | On-off CPU vs off-on CPU | Black | Fuzzy line |
| H | Off-on CPU vs on-on CPU | Black | Flat line |
All files exported with GPU enabled are identical, no matter what the sequence or export settings are. Files exported with GPU disabled with MRQ off are identical whatever the sequence settings are. Files exported with GPU disabled with MRQ on are identical) whatever the sequence settings are.
Conclusion:Premiere Pro uses slightly different algorithms in CPU and GPU mode. Only when the export settings are changed does the file size differ, and a fuzzy line shows in the scopes. Sequence settings have no impact on the exported files, unless you enable Use Previews in the export settings.
Test 11:Export to ProRes 422 HQ, with scaling at 120% and Unsharp Mask effect at 0%
| # | Sequence | Export | GPU | Export Time | GPU Usage |
| A | MRQ on | MRQ on | CUDA | 3 min 56 sec | – |
| B | MRQ on | MRQ on | Off | 3 min 54 sec | – |
CPU was constantly around 100% on all cores for all exports. The two files are identical, down to the byte. GPU was not used, even though GPU acceleration was enabled.
Conclusion:Adding a non-accelerated effect to a clip forces Premiere into software only mode for the duration of the clip, even when the GPU acceleration is enabled in Project settings.
Test 12:RED source, Export to ProRes 422 HQ, MBD settings
| # | Sequence | Export | GPU | Export Time | GPU Usage |
| A | MBD off | MBD off | CUDA | 49 sec | 0-90% |
| B | MBD off | MBD on | CUDA | 50 sec | 0-90% |
| C | MBD on | MBD off | CUDA | 49 sec | 0-90% |
| D | MBD on | MBD on | CUDA | 50 sec | 0-90% |
| E | MBD off | MBD off | Off | 4 min 11 sec | – |
| F | MBD off | MBD on | Off | 4 min 31 sec | – |
| G | MBD on | MBD off | Off | 4 min 11 sec | – |
| H | MBD on | MBD on | Off | 4 min 29 sec | – |
The test was performed with a 5.5 seconds clip, R3D REDCODE 8:1, 3792x3160px (anamorphic), with Lumetri (RGB Curves), exported to ProRes 422 HQ at the same size. CPU usage was around 50% on all cores for all exports with GPU, and around 30-40% without the GPU.
The four files exported with GPU enabled are identical, down to the byte, and difference mode shows a straight line in the waveform scope. When comparing exports done with and without MBD with GPU disabled , the line is fuzzy. When comparing exports done with MBD with GPU disabled , the line is straight, and the files are identical, down to the byte. When comparing exports done without MBD with GPU disabled , the line is straight, and the files are identical, down to the byte.
Conclusion:The MBD setting in the export settings affects render times and the exported file only in Software mode. The MBD switch in the sequence settings does not affect the final render unless you check Use Previews in the export settings.
Test 13:RED source, Scaled, Export to ProRes 422 HQ, MRQ settings
| # | Sequence | Export | GPU | Export Time | GPU Usage |
| A | MRQ off | MRQ off | CUDA | 41 sec | 0-50% |
| B | MRQ off | MRQ on | CUDA | 41 sec | 0-50% |
| C | MRQ on | MRQ off | CUDA | 41 sec | 0-50% |
| D | MRQ on | MRQ on | CUDA | 41 sec | 0-50% |
| E | MRQ off | MRQ off | Off | 1 min 50 sec | – |
| F | MRQ off | MRQ on | Off | 5 min 55 sec | – |
| G | MRQ on | MRQ off | Off | 1 min 51 sec | – |
| H | MRQ on | MRQ on | Off | 5 min 54 sec | – |
The test was done with a 5.5 seconds clip, R3D REDCODE 8:1, 3792x3160px (anamorphic), scaled to 120%, exported to ProRes 422 HQ at the same size.
CPU usage was around 60% on all cores for all exports with GPU, about 50% for software exports without MRQ, and around 30-40% for software exports with MRQ. That feels kind of backwards, but that’s what the test showed.
All four files exported with GPU enabled are identical, down to the byte. The files exported with MRQ off and GPU acceleration off were identical, down to the byte. The files exported with MRQ on and GPU acceleration off were also identical, down to the byte.
Conclusion:when you’re in GPU mode, this setting does not matter (unless you have source files that support fractional resolutions). When you’re in Software mode, MRQ in export settings does affect the exported clip, while the sequence setting does not, unless you check Use Previews in export settings.
Test 14:RED source, Scaled to HD, Export to ProRes 422 HQ, MRQ settings
| # | Sequence | Export | GPU | Export Time | GPU Usage |
| A | MRQ off | MRQ off | CUDA | 10 sec | 20-30% |
| B | MRQ off | MRQ on | CUDA | 14 sec | 90-100% |
The test was done with a 5.5 seconds clip, R3D REDCODE 8:1, 3792x3160px (anamorphic), scaled to HD size using Set to Frame Size (25.3%) exported to ProRes 422 HQ HD.
CPU usage was 100% on all cores for both exports. The files are not identical at all, and a Difference mode test shows a thick fuzzy line. Surprisingly, the export done without MRQ seems sharper than the one exported with MRQ. But it’s also more pixelated, so leaving MRQ on results in a more pleasant-looking image with less noise.
Conclusion:With MRQ on, Premiere uses the full res image to create the low-res output. Without MRQ, it uses a partial resolution (half-res, quarter-res, etc.) that wavelet-based codecs like RED and some other formats have built-in. Even with GPU enabled, MRQ will affect exports of these formats.
Test 15:Cineform source, Scaled to HD, Export to ProRes 422 HQ, MRQ settings
| # | Sequence | Export | GPU | Export Time | GPU Usage |
| A | MRQ off | MRQ off | CUDA | 8 sec | 50-100% |
| B | MRQ off | MRQ on | CUDA | 8 sec | 50-100% |
The test was done with a 5.5 seconds clip, GoPro Cineform, 3792x1580px made from the RED clip.
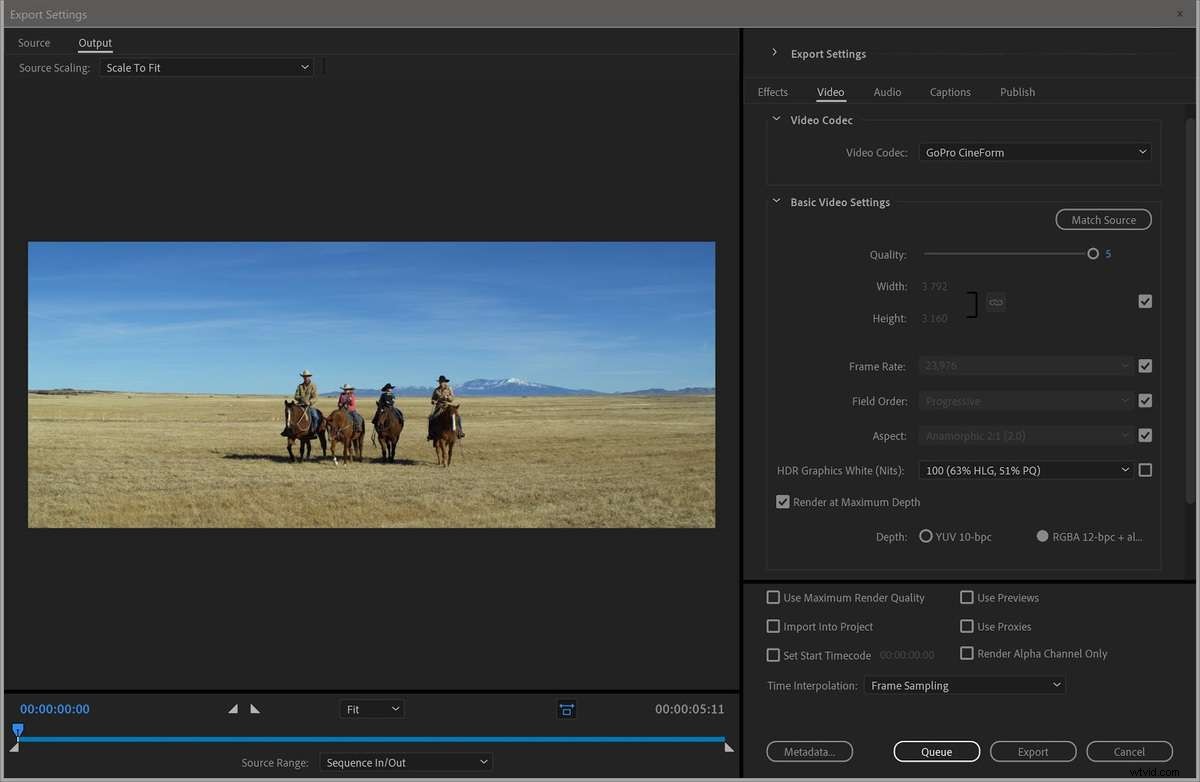
The clip was scaled to HD size using Set to Frame Size (50,6%) exported to ProRes 422 HQ HD.CPU usage was 100% on all cores.
The clips are almost identical, but not quite (144 bytes difference in size). In Premiere, the scopes show a perfectly flat line, though, so the image quality is exactly the same.
I ran the test again with scale set to 50%, and the two files were identical.
Conclusion:Premiere Pro is probably not using partial resolutions when scaling Cineform clips without MRQ enabled. It may be using partial resolutions only when scaling to less than 50%.
Test 16:JPEG2k source, Scaled to HD, Export to ProRes 422 HQ, MRQ settings
| # | Sequence | Export | GPU | Export Time | GPU Usage |
| A | MRQ off | MRQ off | CUDA | 38 sec | 20-50% |
| B | MRQ off | MRQ on | CUDA | 39 sec | 20-50% |
The test was done with a 5.5 seconds clip, JPEG2000, 3792×1580, made from the RED clip.
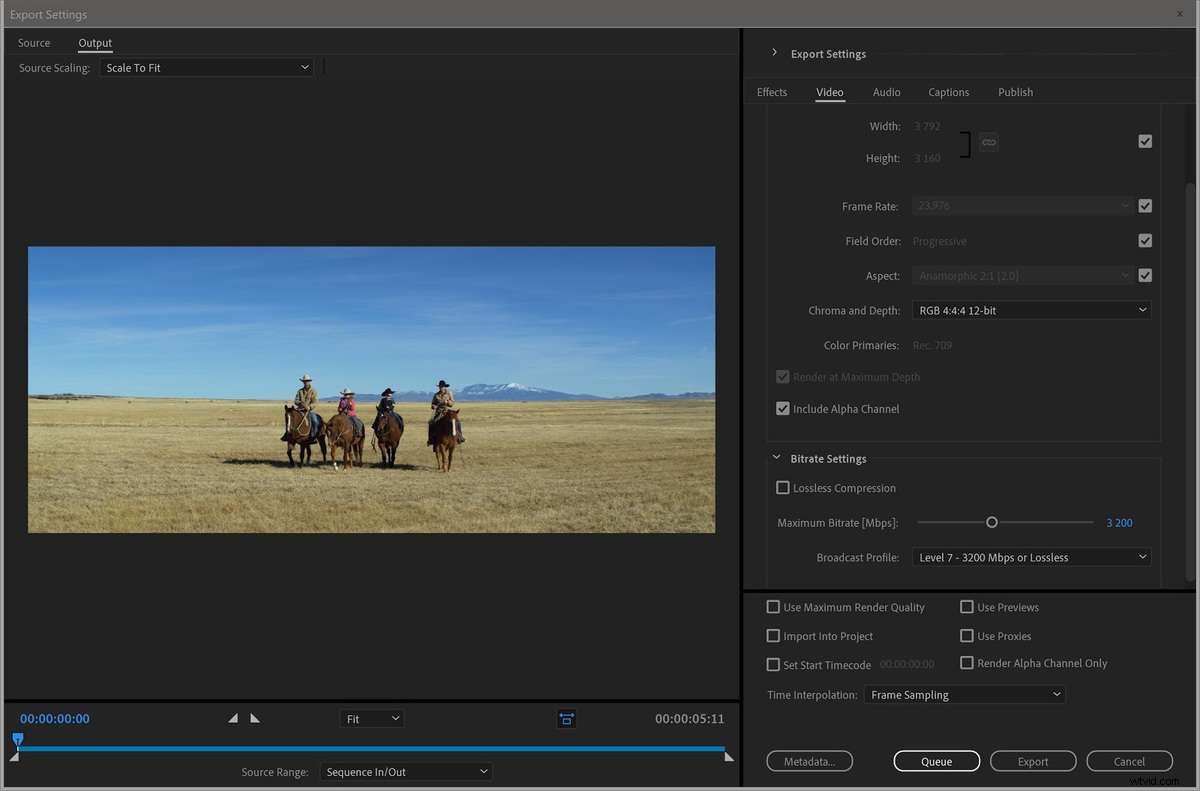
The clip was scaled to HD size using Set to Frame Size (50.6%) exported to ProRes 422 HQ HD. CPU usage was 100% on all cores.
The files are identical, down to the byte. I did the test again with scale set to exactly 50%, and again those two files were identical.
Conclusion:Premiere Pro does not use partial resolutions when scaling JPEG2000 clips, unless it’s only used when scaling to less than 50%.
Test 17:Sony RAW Source, Scaled to HD, Export to ProRes 422 HQ, MRQ settings
| # | Sequence | Export | GPU | Export Time | GPU Usage |
| A | MRQ off | MRQ off | CUDA | 13 sec | 50-90% |
| B | MRQ off | MRQ on | CUDA | 13 sec | 50-90% |
The test was done with a 5.5 seconds Sony RAW clip. The clip was scaled to HD size using Set to Frame Size (46.9%) exported to ProRes 422 HQ HD. CPU usage was 100% on all cores.
The files are identical.
Conclusion:Premiere Pro does not use partial resolutions when scaling Sony RAW clips.
