Con innumerevoli screen recorder per Mac tra cui scegliere, può essere complicato scegliere quello più adatto alle tue esigenze e facile da usare.
Abbiamo fatto le basi e creato un elenco dei tre migliori strumenti di registrazione dello schermo per Mac. Alla fine di questo blog, saprai non solo come registrare lo schermo su Mac, ma anche quale software di registrazione dello schermo Mac è il migliore per te e perché.
Tratteremo:
- Come registrare lo schermo con QuickTime su Mac
- Come registrare lo schermo su Mac utilizzando la barra degli strumenti Screenshot
- Come registrare il tuo schermo con l'estensione gratuita del browser Screen Recorder di VEED
[#TOC1]Come registrare lo schermo con QuickTime su Mac[#TOC1]
Ideale per: Persone che necessitano di una soluzione rapida integrata gratuita per registrare tutorial brevi e semplici.
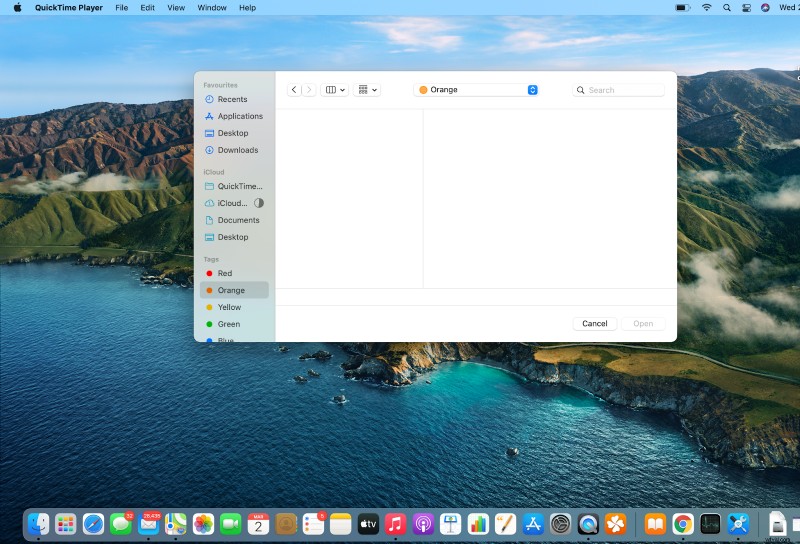
QuickTime è un software di registrazione dello schermo integrato e gratuito per Mac in grado di gestire vari formati di immagini e video. La maggior parte delle persone lo conosce per guardare video, ma meno conosce le sue potenti funzionalità di registrazione. È l'ideale per le persone che necessitano di registrazioni piccole e leggere.
Consente inoltre di tagliare il video in base alle esigenze. Ma se ti aspetti un software con strumenti potenti che migliorino l'esperienza video per gli spettatori, allora QuickTime non è la scelta ideale per te.
Ha una versione a pagamento che include alcune funzionalità aggiuntive come:
- Compressore video
- Modifica dei video
- Ritaglio e ridimensionamento dei video
NOTA: Le dimensioni dei file con QuickTime sono grandi. E avrai bisogno di un compressore video per ridurre le possibilità di condivisione o archiviazione.
| Pro | Svantaggi |
|---|---|
| Preinstallato (non devi scaricarlo.) | Poche funzionalità di modifica (con un'opzione per tagliare solo alcune parti.) |
| Ti permette di registrare qualsiasi area specifica. | Nessuna opzione per scegliere la qualità della registrazione video |
| Condividi con altri tramite airdrop, posta o altri modi | Le dimensioni dei file sono grandi |
| Ideale per registrazioni brevi e semplici. | Impossibile comprimere le registrazioni con la versione gratuita. |
- Apri il lettore QuickTime

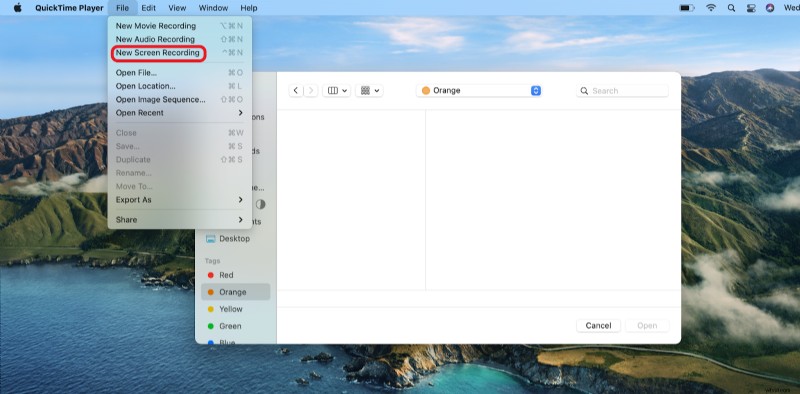
- Dalla barra in alto, fai clic su "File" e seleziona la nuova registrazione dello schermo.
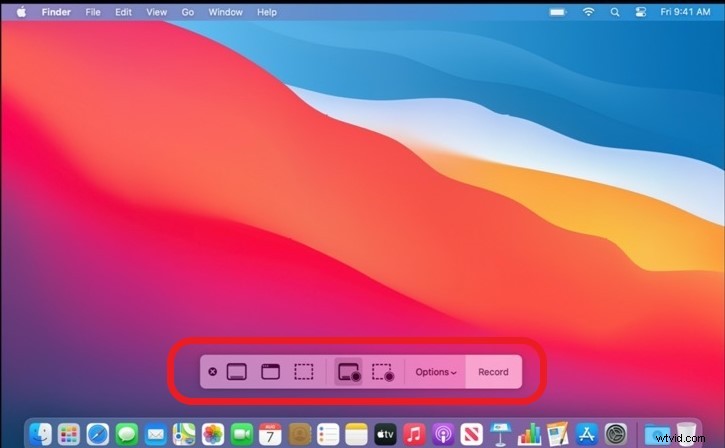
- Una volta sullo schermo puoi scegliere tra le opzioni per ridimensionare lo schermo.
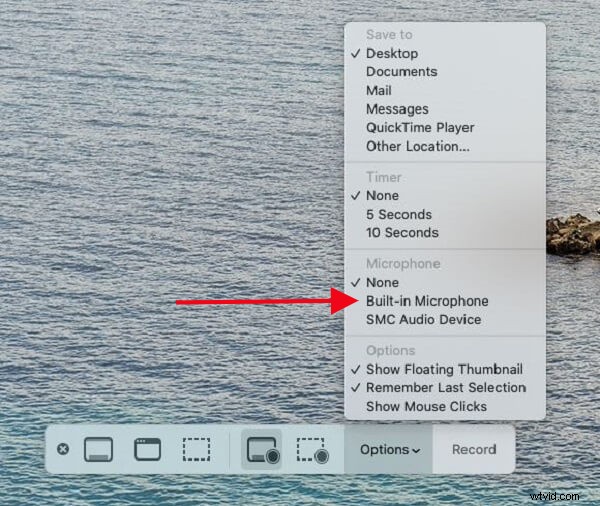
- Per registrare lo schermo con l'audio. Fai clic su "Opzioni" e scegli il microfono che preferisci per registrare l'audio.
- Al termine della configurazione, fai clic su Registra per avviare la registrazione.
Nota:la registrazione inizia immediatamente, quindi assicurati di aver completato tutte le impostazioni.

- Per interrompere la registrazione, fai clic sull'icona di arresto in alto a destra.
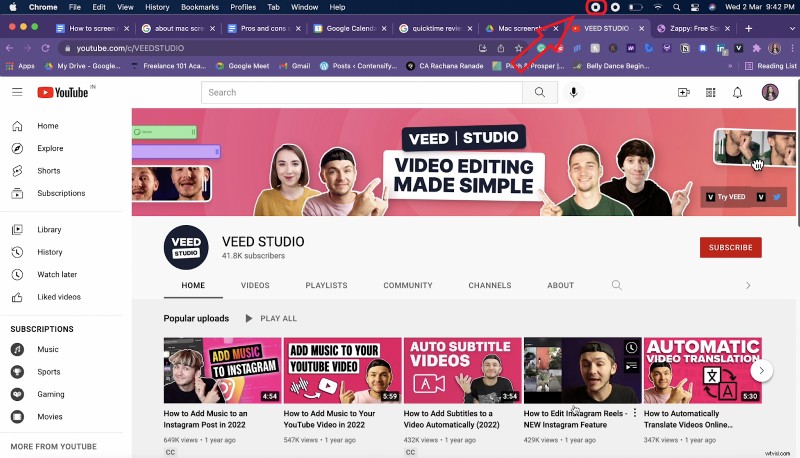
- Al termine, puoi trovare la registrazione sul desktop o nella tua cartella preferita.
[#TOC2]Come registrare lo schermo su Mac utilizzando la barra degli strumenti screenshot[#TOC2]
Ideale per: persone che desiderano acquisire rapidamente lo schermo per un tutorial istantaneo.
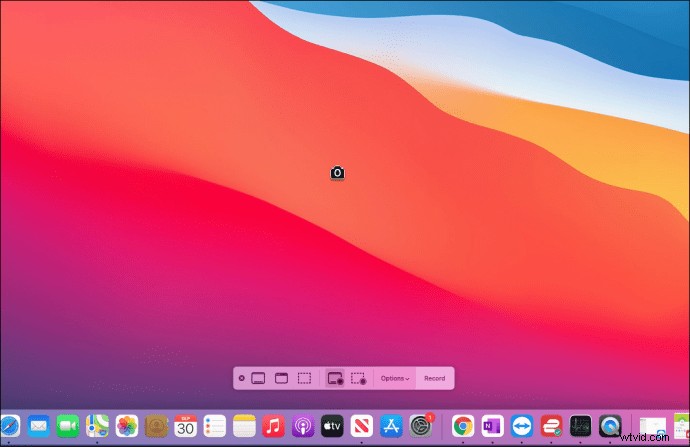
La barra degli strumenti dello screenshot è accessibile tramite una scorciatoia da tastiera che ti consente di registrare lo schermo all'istante. Quindi, se sei una persona a cui piace lavorare con le scorciatoie da tastiera, registrare lo schermo con una barra degli strumenti screenshot è l'opzione giusta per te.
Con questo metodo, non devi affollare il tuo dock con tutte le app ed è facilmente accessibile.
The screenshot toolbar gives you multiple options:
- Record the entire screen, a specific window, or you can select a particular area to record it.
- Choose the specific folder in which you want to save this recording.
- Easily choose the option to add your voice with the microphone.
| Pros | Cons |
|---|---|
| Quick to use | Recorded videos cannot be saved in DivX, .wmv, and .mkvs |
| Easily accessible | Few editing features |
| Option to choose the folder to save the work | No countdown before the recording begins. |
| Various options to choose from | Not suitable for lengthy recordings. |
Here’s how you can record a quick video with screenshot toolbar:
- To open the screenshot toolbar, press ‘Command+shift+5’.
- Once done, at the bottom of the screen you can spot your toolbar.

- With the toolbar, you can change the size of the screen from various options.
👉 Capture entire screen
👉 Capture selected window
👉 Capture selected portion
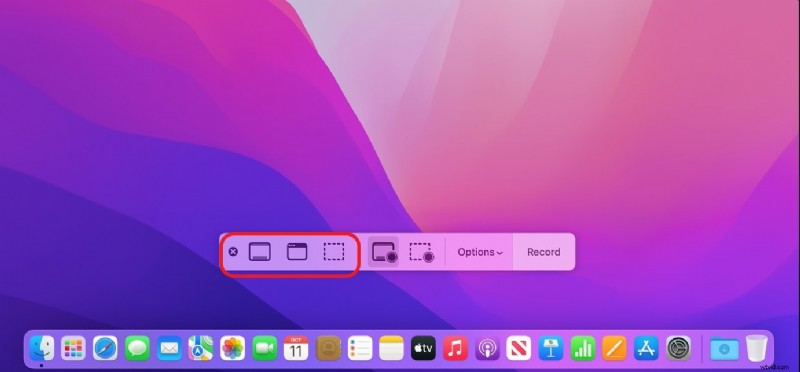
- To record the screen with audio click on ‘options’ and choose the appropriate input device.

- To start recording click on ‘Record’.

- Once you’re done recording click on the stop icon at the top right hand corner.
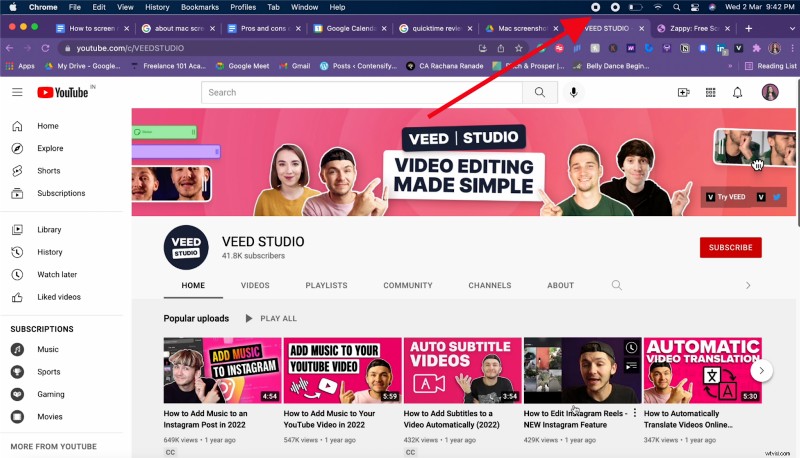
- If you haven’t selected any folder to save the recording, you can find it on your desktop by default.
[#TOC3]How to Record Your Screen with VEED’s Free Screen Recorder Browser Extension[#TOC3]
Best for: people and teams who need to create lots of shareable and customizable screen recordings plus want cloud storage.
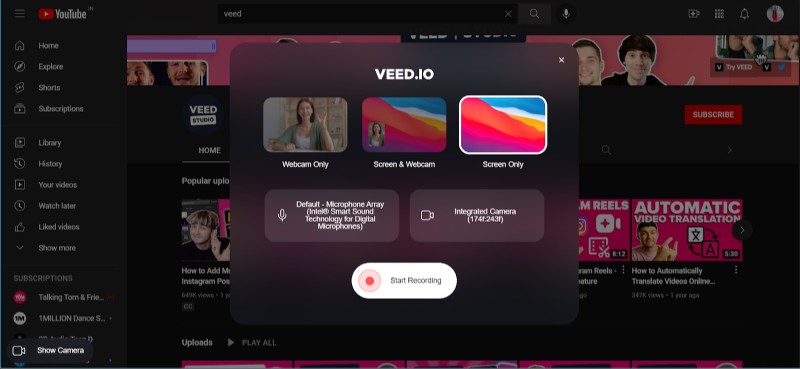
VEED’s screen recorder browser extension is a simple yet powerful screen recording software that lets you tap into your creative side with tons of extra features. You can screen record your entire screen, and in case you switch between tabs, VEED records all of that.
And the best part about the extension is—it’s completely free with unlimited recordings and recording length.
| Pros | Cons |
|---|---|
| Free unlimited recordings and no limits on recording length | Cannot customize the color of sticky notes or pen |
| Additional features to amp up your recordings | Not available for mobile |
| Saves your work on cloud | |
| Share your screen recording with a share link |
Here’s how you can get started with VEED:
- Head over to the chrome web store and install the VEED screen recorder extension .

- As soon as you add it to the chrome, it'll prompt a new page to load where you’ll be asked to create a free account or you can log in to the existing one.

After you finish up the installation process, you can pin up the VEED extension to the browser toolbar for easy access.
- To start, click on the VEED icon on the toolbar .
Your system must have prompted you to ask for access to your camera and microphone.

- Choose the layout for your screen recording.
Before you hit recording, think about the way you want to present the video. VEED has three layouts for you to choose from:
- Screen and webcam
- Screen only
- Webcam only
You can also spot two boxes with an option for your microphone and camera access. You can also use an external or built in device to record the screen with audio.
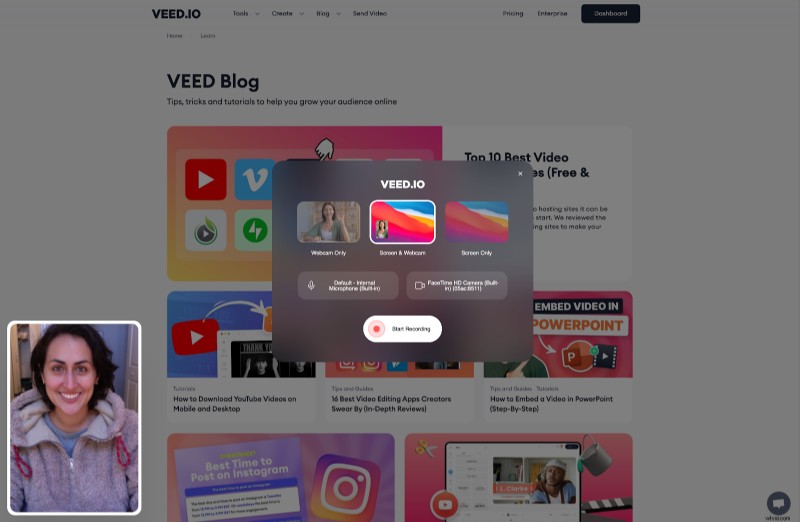
- Click on ‘Start recording’
It'll prompt a new window where you can select the screen(s) you want to record.
- Window
- Entire Screen
- Chrome Tab
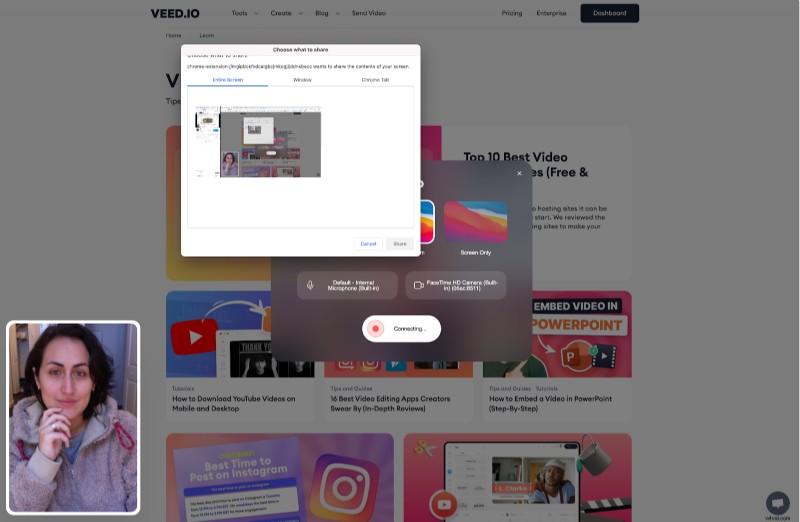
- Initiate recording after the 3 second timer .
VEED gives you a few seconds to have everything in place so you don’t go haywire in setting up things before it starts recording.
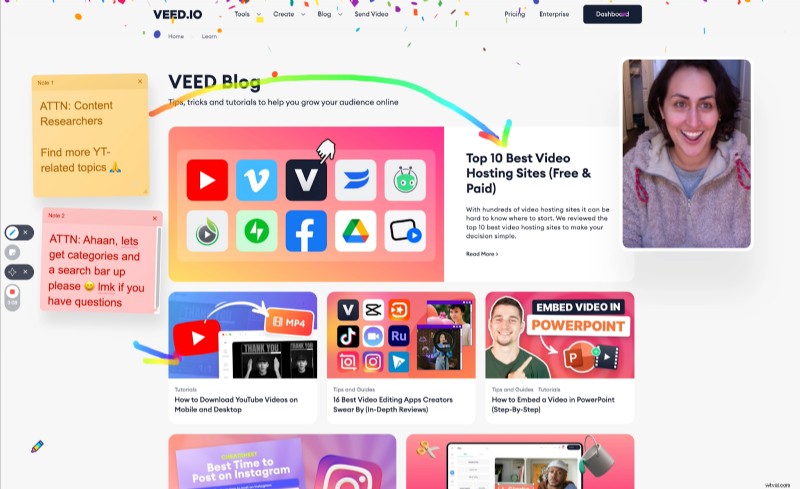
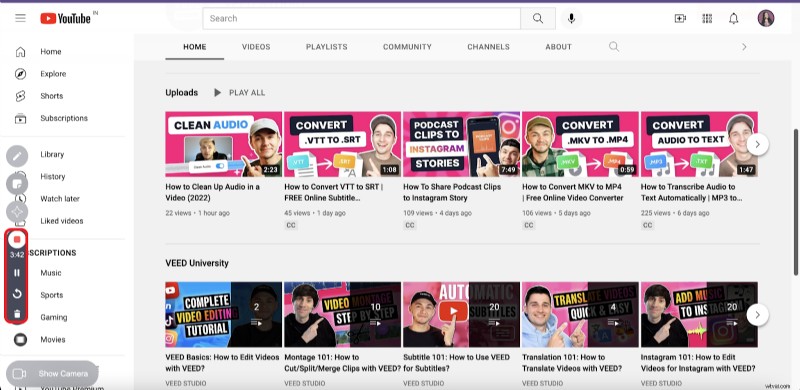
To control the recording, you can find the toolbar on the left side of the screen. And in case you find that the webcam is blocking the view, you can move or resize it around to display everything on your screen better.
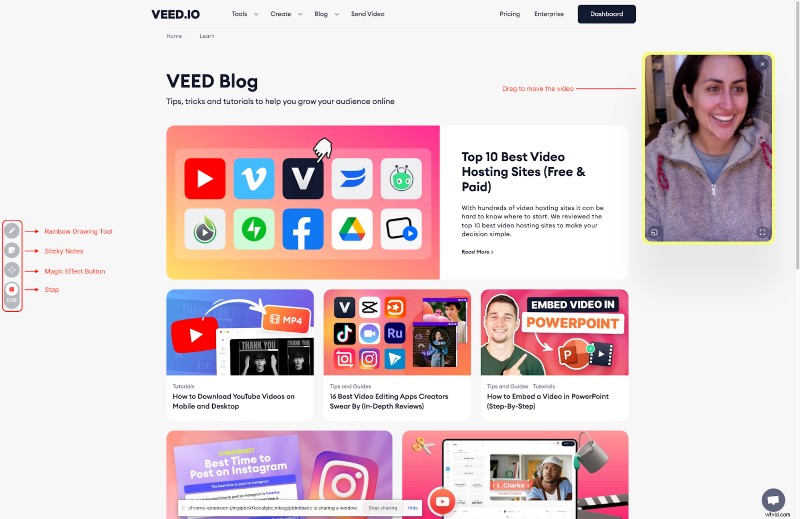
- Try the VEED’s screen recorder tools to make your video more creative and fun to watch. If you want to highlight something while recording you can use:
🌈 Rainbow draw tool to annotate or highlight.
📒 Sticky note to add any additional information for future reference.
🪄 Magic tool to add a celebration effect in the recording.
And all of these tools are free to use, so go on and uncover your creative side.
- Click on the stop icon on the left side to stop recording.
Then, VEED will render your video. And the duration of the rendering process can vary according to the file size.
Nota: You can record unlimited videos without any limits to the recording length. If you want to store your recordings, you can create a free or paid VEED account to host your content.
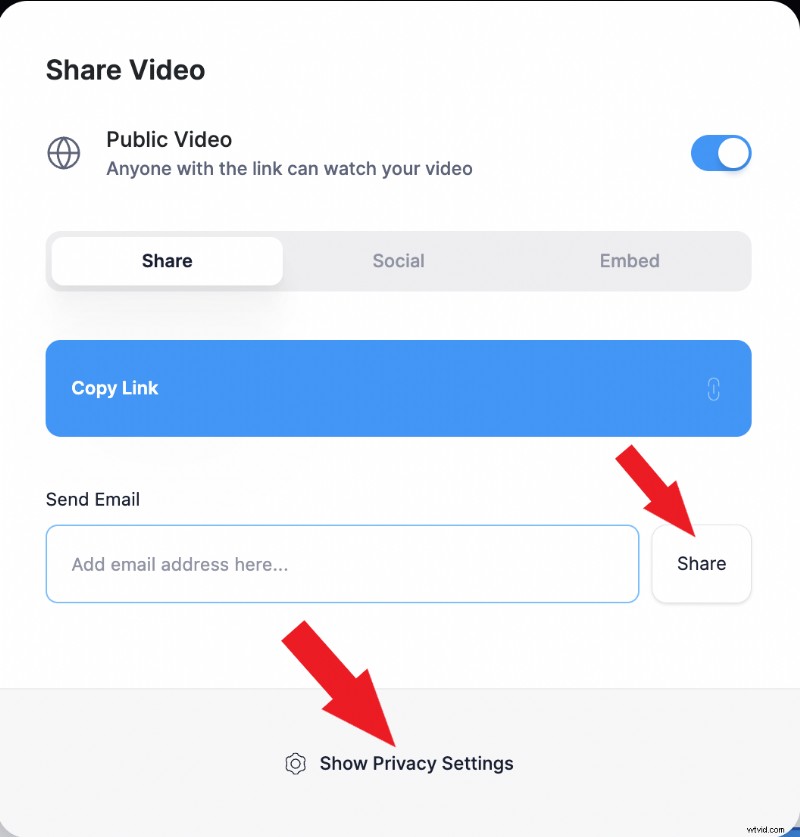
- Click on share and choose ‘Copy link’.
Click to share your video on social media channels, embed it , or email it.

You can share the video when it’s marked as public with anyone who has the link. But if you want to keep it private, turn off the public video toggle so only you can view the video.
So what’s the best free screen recorder for Mac for you?
If you need just the basics to occasionally record your screen, QuickTime is the best free built-in screen recording tool to use.
If you’re looking for a quick, simple, and easy-access solution the screenshot toolbar shortcut is the fastest free way to record your Mac screen without clicking to open another app.
But, if you’re looking for an all-in-one video tool to screen record, edit, cost, and share videos, then VEED is the best free screen recorder app.
The best part is VEED allows unlimited recordings without any time constraints and the number of recordings you make!
Try VEED’s screen recorder chrome extension for free.
