Realizzare quel primo video può sembrare una lotta.
È difficile sapere da dove cominciare e quali abilità, tecniche e concetti devi conoscere per avere successo.
Tuttavia, imparare a modificare i contenuti video non deve essere difficile e SICURAMENTE non sei solo!
Siamo qui per aiutarti a sopravvivere al tuo primo video. In effetti, abbiamo ospitato un evento live gratuito ed è ora disponibile su richiesta.
Questo video ti guiderà attraverso esattamente ciò che devi sapere per modificare i tuoi video. Sebbene ci siano tantissime app mobili, software desktop e strumenti di editing video online, ti mostreremo come modificare un video con Camtasia (Windows/Mac).
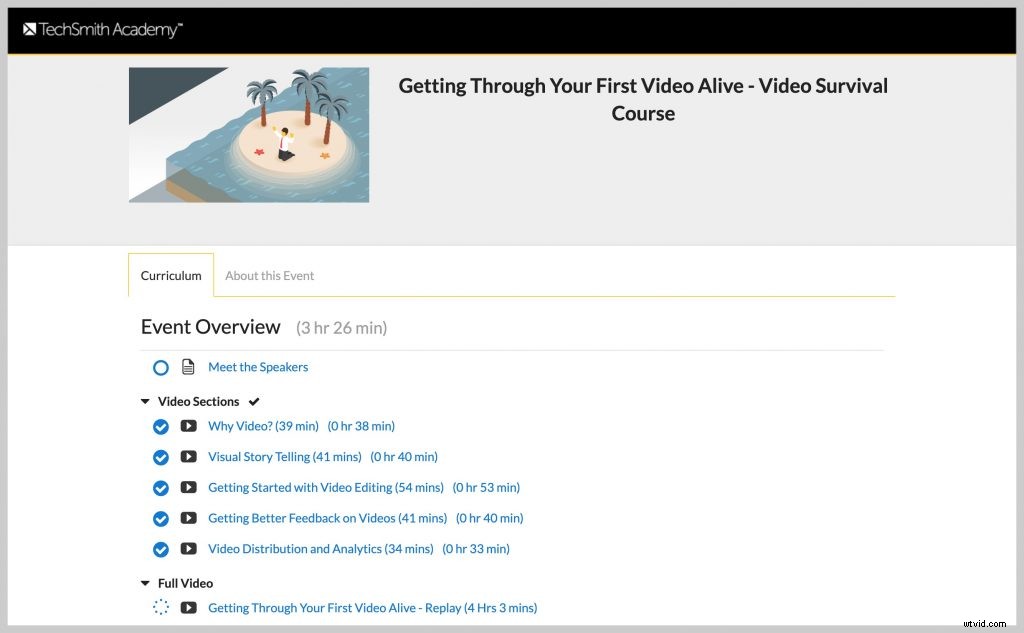
Fare clic sul video qui sotto per iniziare.
Come modificare un video (passo dopo passo)
Jason Valade, Master Trainer presso TechSmith, ti fornirà alcuni dei concetti di base e ti guiderà attraverso come modificare un video.
Ottieni i file di progetto
Iscriviti alla TechSmith Academy (è gratis!) per scaricare tutti i file di progetto di seguito che Jason utilizza durante il video per esercitarsi con il montaggio video.
- Un video di esempio .mp4 che è stato completato e pronto per essere pubblicato su un servizio online (Camtasia PPT Green Screen Experiment).
- Versioni non elaborate (.mp4) e Camtasia ready (.tscproj) dei video introduttivi e finali della webcam (Video introduttivi e finali di YouTube).
- Raw (.mp4) e leggermente modificato per il tempo per le versioni Camtasia (.tscproj) del processo dello schermo di YouTube.
- Tre versioni (tutte in formato .wav non compresso) della voce fuori campo. Inedito, Modificato e Super Modificato con riempitivi White Noise.
- Un brano musicale esente da diritti d'autore da utilizzare come musica di sottofondo, se lo si desidera (le-chat-gourmand.mp3).
- Un .libzip (da utilizzare con Camtasia 2018) di alcuni asset mostrati durante la trasmissione (intro, outro, lower third)
- Due versioni (in .docx e .pdf) dello script utilizzato per la voce fuori campo in questo progetto.
Guarda il corso completo [GRATUITO]
Se desideri ancora più contenuti sulla realizzazione del tuo primo video, il corso completo in cinque parti è disponibile gratuitamente su TechSmith Academy.
Presenta diversi esperti di video, tra cui Owen Video (Thevideospot.net), Buddy Scalera (Content Strategist), Jason Valade, Master Trainer (TechSmith), Danny Wittenborn, Product Strategy Manager (TechSmith) e Amanda Robinson (Social Savvy Society).
Trascrizione video completa
E siamo qui con Jason Valade. È un master trainer qui a TechSmith e gli siamo grati, benvenuto Jason.
Grazie, Matt, grazie per avermi ospitato, sono davvero entusiasta di essere qui.
Sì, è fantastico che tu possa essere qui. Ora parleremo in questa sezione di cui parleremo di editing video.
Poiché durante questo processo abbiamo parlato del motivo per cui il video è così importante, abbiamo parlato di alcune strategie per ottenere video, in termini di renderlo visivamente accattivante, perché le immagini sono importanti. Se vai nel resto dell'Accademia puoi vedere cose sulla registrazione di video. Ma sappiamo che l'editing diventa una cosa, vero?
Esatto.
È un pezzo importante nel processo di creazione.
Esatto, e molte persone si mettono molta preoccupazione dietro pensando che ci vorrà un tempo eccezionale. E potrebbe essere così all'inizio.
Ma in un certo senso quello che mostreremo oggi è come puoi forse dedicare un po' di tempo per costruire un po' di fiducia in alcune di quelle abilità. E sii d'accordo con il prodotto che pubblichi.
Assolutamente, quindi chiunque guarderà questo oggi useremo Camtasia, perché TechSmith, ovviamente. Ma i concetti che affronterai, Jason, si applicheranno alla maggior parte degli editor di video, giusto?
Assolutamente sì.
È fantastico, quindi entriamo qui, perché, per quelli, se ti sintonizzi questo sarà un segmento più lungo, quindi abbiamo un po' di tempo per affrontarlo. Ma vogliamo che tu sia preparato.
Allora, da dove iniziamo?
Inizia con l'organizzazione
Quindi inizio sempre, Matt, con l'organizzazione. E in realtà l'ho imparato da molti altri amici nel settore della produzione di video ed è stato il più preparato a mettere le cose e i contenuti in posti da trovare in seguito, a rendere l'editing un processo facile.
Quindi la prima cosa che farò in realtà è che aprirò usando una macchina Windows qui. Ho il mio desktop davanti a me. La prima cosa che farò in realtà è creare una cartella.
Ora non lo metterei sempre sul mio desktop, ma per gli scopi di oggi lo farò. E lo chiamerò semplicemente "Live". Questo sarà il nome del nostro progetto oggi. E tutto ciò che associo a questo, che si tratti di un file di progetto o qualcosa del genere, lo nomineremo con la stessa convenzione e lo metteremo nella stessa cartella. Davvero utile. Quindi ora che abbiamo una cartella in cui archiviare tutte le nostre cose, la prossima cosa che faremo è parlare di un paio di articoli per le pulizie per quando stai registrando.
Registra alla giusta dimensione
Quindi, quando stai registrando un video se avrà contenuto dello schermo, ovvero catturare lo schermo, la regola generale è registrare, modificare e produrre tutto alle stesse dimensioni.
Quindi, in termini di dimensioni comuni, probabilmente hai sentito parlare di 720p o 1080p, qualunque sia il tuo set di schermi.
Nel mio caso questo schermo è a 1080p, voglio assicurarmi che la mia registrazione sia impostata per lo stesso 1080p, che modifico in qualsiasi software che sto modificando a 1080p. E lo produco a 1080p, e questo perché posso controllare l'aspetto del contenuto sulla mia macchina.
Ma non posso decidere come lo consumeranno le altre persone, o dove lo consumeranno. Quindi voglio dare loro il miglior prodotto possibile.
Quindi so per molte persone là fuori che questa è una di quelle cose grandi e complicate.
Lo è.
Perché è come oh, ci sono tutti questi numeri. Ma se mantieni la coerenza, questo è il tuo consiglio, mantieni la coerenza.
Sì, mantienilo coerente. E se hai bisogno di apportare una modifica passando da un numero grande come 1080 a 720 andrà sempre bene, non andare dall'altra parte.
Quindi non ingrandirlo e quindi dovrebbe essere proporzionale.
Dovrebbe essere proporzionale, è corretto.
Prepara l'editor video
Quindi abbiamo impostato quella cartella e la prossima cosa che dobbiamo fare è preparare il nostro editor con alcuni avvertimenti.
Quindi, come hai detto, oggi utilizziamo Camtasia, ma per questo particolare progetto il video che creeremo è come caricare un video su YouTube. E come modificare le impostazioni di ottimizzazione della ricerca SEO. In modo da farti scoprire il tuo video.
Ora, per prepararmi a questo, ho avuto altri contenuti che ho creato. E il contenuto è semplicemente questo, ho registrato una registrazione dello schermo di ciò che avevo fatto, il che significa semplicemente camminare attraverso il processo senza audio. Ho allestito un ottimo studio e registrato un video introduttivo e finale sulla mia webcam in modo da potermi presentare alle persone.
Quindi assicurati di avere un video davvero personalizzabile. E poi ho fatto anche una voce fuori campo. Quindi avevo uno script che ho creato per questo progetto. Leggilo più volte, perché ammettiamolo, non sono perfetto la prima volta o la quinta volta. Ma avevo tutti quei componenti pronti in modo che quando vado a fare il mio video quelle cose sono a mia disposizione.
Quindi mi piace, torneremo indietro, se te lo sei perso stamattina, Owen Video ne ha parlato.
Ha detto di creare i tuoi modelli. Hai un modello e fuori con te davanti alla telecamera, hai la tua sezione centrale che ne è il fulcro. E poi stai creando una traccia audio così perfetta.
Sì, e per quelle persone che sono sempre preoccupate per il tempo necessario per modificare il video, questo è un componente chiave. E guardando i nostri due ospiti fino ad oggi ho effettivamente preso alcuni appunti.
Li applicherò ai miei progetti futuri.
Ma sì, essere preparati con l'idea del modello è sempre utile. Quindi in questo momento dovremmo guardare il mio schermo che è il mio editor di Camtasia e in questo momento questo è semplicemente un progetto senza titolo.
Quindi, per assicurarci di rimanere nel campo dell'organizzazione, salveremo questo progetto molto velocemente. E se ricordi Matt, abbiamo etichettato questo progetto con la parola "Live" per la cartella sul desktop. Quindi chiameremo il nostro progetto Camtasia o qualunque cosa tu stia usando anche Live. Quindi ora c'è coerenza con i progetti in modo che quando vado a trovare qualcosa o sposto qualcosa so che "Live" sta per "Live".
Aggiungi media
E popoliamo il nostro cestino dei media. Quindi tutto questo è per qualsiasi software particolare che stai utilizzando è il contenuto di cui abbiamo parlato prima. Quindi andremo avanti e importeremo alcuni file multimediali e, nell'interesse del tempo, li avrò archiviati qui sul mio desktop. E comunque avrai anche queste cose a tua disposizione.
Quindi dopo questo evento pubblicheremo i materiali che puoi scaricare. Quindi, se vuoi davvero giocare con questo progetto di esempio che Jason ha costruito, avrai l'opportunità di farlo. Lo pubblicheremo di nuovo dopo l'evento. Dopo l'evento, perfetto.
Quindi gli oggetti che inserirò sono solo le cose di cui ho parlato. Questo è il mio video completo che avevo fatto, che caricherò su YouTube, quindi lo stiamo usando.
Un po' di musica di sottofondo, quel video introduttivo e finale che abbiamo creato sulla nostra webcam. La registrazione dello schermo senza audio di sorta. E le mie voci fuori campo inedite.
Quindi porteremo tutte queste cose in Camtasia e le lasceremo popolare nel cestino dei media. E poi siamo pronti per eseguire la parte di editing vera e propria. Quindi, prima di tutto, vogliamo sempre salvare e assicurarci di mantenere il progetto aggiornato il più spesso possibile. Salva file o per me sono una persona con una scorciatoia da tastiera corta, quindi Ctrl S per qualsiasi cosa.
Ricordo che questo risalirà a me stesso, molto, molto tempo fa ai tempi della laurea stavo lavorando con uno dei primi software di editing video digitale. E se non salvassi ogni tanto lo avresti perso e quindi solo un buon consiglio. Se prendi l'abitudine, sei coperto, quindi assolutamente.
Inserisci la registrazione dello schermo
Va bene, quindi la prima cosa che faccio quando creo un video e l'avvertenza è che ci sono molti modi per modificare il video. Ho fatto diversi video ai miei tempi. E questa è quella che ho scoperto essere la mia migliore pratica. Quindi si spera che le persone possano prendere da questo ciò che possono e applicarlo alla propria situazione.
Quindi la prima cosa che farò è effettivamente portare la mia registrazione dello schermo. E la registrazione dello schermo è la registrazione generica dello schermo vuoto. Significa che non c'è audio, nessun effetto sonoro di sorta.
E farei quelli che considero tagli all'ingrosso. Quindi i tagli all'ingrosso per me sono, questa registrazione è più lunga di quello che sarà il mio vero progetto alla fine. Probabilmente ci sono degli errori, c'è del tempo di caricamento tra le modifiche allo schermo. Farò quei tagli giganteschi che descrivo come tagli all'ingrosso perché voglio metterlo nelle condizioni più perfette che posso per la registrazione. Quindi diciamo che il modello o la direzione che userò per questo video è in realtà la sceneggiatura.
La sceneggiatura della voce fuori campo che ho realizzato in precedenza per darmi un'idea di dove devo essere. Quindi, anche se il mio video si aprirà con la mia webcam e si chiuderà con la mia webcam, inizierò con la registrazione dello schermo. Perché è il punto cruciale della presentazione, giusto?
Fai dei tagli
Quindi potrei fare un paio di tagli qua e là per assicurarmi che questo tempo di caricamento. Per noi, c'è un processo di autenticazione che attraversiamo, quindi in realtà lo eliminerò. E quando le persone avranno finito con questo processo oggi, avranno tutte le parti grezze e modificate di questo con cui giocare. Farei tagli significativi qua e là.
Se c'è un oh, non conosco un'interruzione di corrente, o so di essere stato interrotto nel processo e il mio schermo è rimasto vuoto, farei indicazioni durante la mia registrazione per assicurarmi che a tre minuti o tre minuti e mezzo ci sono sezioni che posso ritagliare.
E quindi se stai attraversando questo, voglio dire che praticamente ogni editor di video ha uno strumento che ti consente di tagliare giusto?
Lo fa.
Quindi stiamo solo cercando qualunque sia lo strumento, di solito ci sono tasti di scelta rapida, ci sono oggetti lì che ti permetteranno di farlo. Ma dovrai solo farlo a pezzi.
Taglialo a pezzi, magari ritaglia l'inizio e la fine se ci vuole troppo tempo. Quindi ritagliare, ovviamente, significa semplicemente andare all'inizio o alla fine di una clip e tirarla dentro solo per stringerla ed eliminare quei pezzi extra. È sempre importante. a questo punto puoi anche fare ciò che ritengo inasprindo le tue modifiche. Quali sono quando le schermate vengono caricate. Quindi ho dei punti qui in cui lo schermo sta impiegando un po' di tempo, dei piccoli schermi pop-up che so solo che non contribuiranno alla fine del mio progetto. Quindi posso semplicemente rimuoverli se necessario.
Quindi sembra che l'obiettivo mentre esegui una modifica sia immagino di arrivare davvero ad alcune delle cose che Buddy ha detto. È mostrare le cose che sono più importanti, mostrare le cose che ti daranno più valore. Ma se qualcuno non ha bisogno di vederlo, taglialo fuori.
Vero non dire qualcosa con 15 parole quando puoi dirlo efficacemente con cinque. Lo stesso vale per la tua visuale, non darmi 30 secondi di video quando cinque secondi lo faranno.
Cinque secondi per un video potrebbero essere difficili, ma lo sai. Probabilmente, probabilmente lo è, ma assolutamente lo stesso concetto.
Focalizza l'attenzione del tuo spettatore
Ok, quindi una volta che ho fatto i tagli, ora ovviamente ce ne sono molti di più che farei personalmente. Ma la prossima cosa che voglio fare è guardare la mia sceneggiatura e scoprire dove voglio attirare l'attenzione del mio spettatore.
È qui che inizieremo a utilizzare cose come lo zoom sullo schermo, la panoramica o ciò che usiamo in Camtasia chiamato call-out. Una sorta di rappresentazione dello schermo che attira l'attenzione degli spettatori.
Quindi so nel mio video che la mia voce fuori campo parla dell'accesso al loro studio di creazione su YouTube. Quindi, se andiamo alla sezione del mio video in cui inizio a parlare dell'accesso, c'è un accesso nell'angolo in alto a destra di questa schermata. Bene, so dove si trova, ma ho bisogno di aiutare il mio spettatore a scoprire dove si trova. Quindi potrei utilizzare qualcosa di molto semplice come uno zoom avanti, uno zoom nell'angolo in alto a destra.
Quindi applicherò uno zoom al mio progetto. Per essere sicuro di attirare l'attenzione del mio spettatore su quella sezione del video. In questo modo ho la garanzia di mostrare loro quello che voglio che vedano. A questo punto posso anche aumentare l'attenzione aggiungendo una sorta di richiamo, forse una freccia, forse un oscuramento dello schermo. In effetti, per me in genere uso l'oscuramento dello schermo come opzione per attirare l'attenzione perché rimuove il resto delle informazioni estranee dallo schermo e consente di ottenere un buon punto focale. Cose semplici come queste attirano l'attenzione dello spettatore proprio dove vuoi tu.
Non esagerare
Quindi lascia che ti chieda questo. Quindi, mentre stai attraversando questo processo, sai che stai iniziando a entrare in quel tipo di pezzo di miglioramento di una volta che lo hai ridotto, tagliato, non c'è troppo che puoi fare? Come ho notato, se ingrandisci una chiamata, puoi davvero esagerare?
Credo che tu possa, credo che tu possa esagerare. Ed ero molto colpevole di questo nelle prime parti del mio montaggio video, e alcuni potrebbero dire che lo sono ora. Ma direi che aggiungere troppe annotazioni può farlo. Tutto, dall'ingrandimento e l'aggiunta di un richiamo, forse una freccia, e forse scurirlo, forse è troppo, assolutamente. Penso che sia un buon consiglio vero?
Come se vogliamo migliorare ma non vuoi esagerare con questo?
Esatto, sì. Vuoi dare alle informazioni il meglio che puoi senza, penso che uno dei nostri ospiti stesse parlando, devi fornire loro informazioni o devi intrattenerli? Credo che Buddy ne stesse parlando. E mi piace trovare un buon equilibrio tra mantenerlo coinvolgente ma anche portarli proprio dove devono essere.
Quindi, una volta arrivati al punto in cui abbiamo apportato tutte le nostre modifiche visive e ovviamente non le faremo bene oggi. Vogliamo iniziare a parlare degli altri componenti che abbiamo portato in questo video. Quindi la nostra registrazione dello schermo, molto importante. Ma non fa nulla per me senza portare il mio audio.
Porta il tuo audio
Quindi a questo punto possiamo andare nel nostro cestino multimediale o ovunque tu abbia archiviato il tuo audio e inserire la voce fuori campo. E quello che voglio che tu noti per questo particolare progetto, la lunghezza della mia voce nel tempo non corrisponde alla lunghezza del mio schermo registrazione.
Quindi ci sono un paio di cose che potrei fare. Uno, potrei assolutamente tagliare l'audio, o il video mi scusi, per abbinare perfettamente l'audio. Oppure potrei lasciare delle pause intermedie in modo che le persone possano assorbire il contenuto che hai appena consegnato loro e andare avanti e andare avanti. Per noi avremmo effettivamente diviso il nostro audio in parti diverse e l'avremmo abbinato a ciò che stava accadendo sullo schermo.
Ed è davvero facile da fare a seconda del software. Semplicemente, puoi trovare le interruzioni di dove stava avvenendo il discorso e dividerle e spostarle verso il basso. Sono un grande sostenitore della registrazione dell'audio separatamente. Con una voce fuori campo e farlo in più riprese, perché a volte sai quando ti suona bene.
E poi un altro ottimo consiglio è che qualcun altro lo ascolti, l'analogia è se hai scritto un foglio per la scuola e sai cosa dice, ma lo passi a qualcun altro e loro sono così senza alcun senso, lo stesso con l'audio. È fantastico avere un sistema di controllo e bilanciamento in atto se qualcuno è disponibile e disposto ad ascoltare il tuo audio.
Quindi c'è uno scontro di filosofia qui. Alcune persone diranno di registrarlo insieme, specialmente con le registrazioni dello schermo in particolare. Quando stai realizzando un video con la fotocamera, ha senso registrarlo allo stesso tempo. Alcune persone diranno prima di registrarlo, prima l'audio e poi costruire il tuo video su quello. E alcune persone diranno di registrare il tuo video e poi aggiungere il tuo audio.
Pensieri su uno è meglio dell'altro?
Dico sempre di sapere chi è il tuo pubblico. Se sto registrando un video per, ad esempio, colleghi, amici, familiari stretti o qualcuno con cui ho un ottimo rapporto, non ho problemi a registrare, registrare il mio schermo e registrare il mio audio allo stesso tempo.
Se il video continuerà a vivere, se lo posterò da qualche parte e parleremo dell'hosting più avanti nell'evento di oggi, voglio pensarci un po' di più. Potrei entrare nel nostro studio. Potrei prendermi un po' più di tempo perché se quel video continuerà a vivere, voglio un certo tocco di raffinatezza e professionalità. Quindi, conoscendo il tuo pubblico se 100.000 persone lo guarderanno, potresti voler dedicare un po' più di tempo al video. Se 10, ottengono quello che ottengono.
Quindi, prima o dopo la registrazione dell'audio in modo che corrisponda al video o il video in modo che corrisponda all'audio?
Registro l'audio in modo che corrisponda al video. Quindi prima registro lo schermo, poi eseguo l'audio, è proprio come faccio io.
Il che è divertente perché faccio l'esatto contrario.
Lo facciamo in modo diverso.
Prima faccio l'audio e poi costruisco il mio video. Quindi posso tagliare il video, trovo sempre il video più facile da modificare.
E mi piace il suono della mia stessa voce, quindi mi piace registrare l'audio, quindi lo salvo per poter assaporare quel pezzo in seguito.
Porta la tua webcam
Quindi portiamo la registrazione dello schermo, abbiniamo il nostro video all'audio che abbiamo registrato e quindi vogliamo iniziare a parlare di portare il video della webcam.
Quindi in Camtasia è abbastanza facile, un concetto simile qui è semplicemente quello di creare spazio per la webcam all'inizio o alla fine. Quindi avrei spostato il contenuto e ovviamente ho una traccia bloccata, ecco perché non si muoveva per me.
È divertente. Lo faccio in questo modo solo perché il controllo di cui ho bisogno sulla registrazione dello schermo è fondamentale. Ecco perché prima eseguo quelle modifiche all'ingrosso. Ma questi pezzi li ho già registrati in anticipo e li ho già montati. Quindi loro hanno passato il tempo, io mi sono preso il tempo, le persone li hanno guardati. Ho regolato l'illuminazione e tutte le cose che devo fare per assicurarmi che quell'introduzione e quella conclusione siano perfettamente adatte a questo particolare progetto.
Per quanto riguarda la webcam, vuoi sempre guardare la tua illuminazione. vuoi fare un paio di scatti di prova, assicurati che abbia un bell'aspetto. Invia anche questo avanti e indietro affinché le persone lo vedano e assicurati di notare cosa c'è intorno a te e ciò che ti circonda.
Quindi guarda dietro di te ambientato qui oggi è bellissimo. Il set nello studio di registrazione che uso abbastanza bene, sembra professionale. Un raccolto bello e pulito, niente per distogliere lo sguardo degli spettatori da ciò di cui hanno bisogno. A questo punto potrei decidere se aggiungere o meno diapositive introduttive. Che molti software hanno integrato.
In realtà in Camtasia abbiamo anche quelli a nostra disposizione dove posso fornire una sorta di diapositiva introduttiva che ho salvato come modello. E questo è un altro gesto che fa risparmiare tempo, è assicurarsi che se hai cose a tua disposizione, che puoi programmare in anticipo, è utile averle pronte per l'uso.
In modo che sia bello e pulito e riduca i tempi di modifica. E aggiunge solo un bel po' di smalto professionale. Questo dirà il testo e l'evento dal vivo. Ma non mi ci è voluto tempo per digitarlo e farlo entrare nella mia webcam in seguito. Possiamo anche parlare dell'aggiunta di transizioni per ammorbidire tali modifiche. Sono disponibili anche dissolvenze, diapositive e questo genere di cose.
Quindi, mentre sto guardando il tuo prodotto finora, abbiamo una piccola introduzione grafica carina. Abbiamo la registrazione dello schermo, tu hai la tua fotocamera. Notando già la fotocamera, però, c'è molto nero intorno.
C'è. Quindi è successo che il formato in cui ho girato la fotocamera è diverso da quello del mio progetto. E ne avevamo parlato un po' prima. Il formato in cui l'ho girato mi consente di farlo cambiare dove posso adattarlo allo schermo e avere ancora quell'aspetto di alta qualità.
Se l'avessi girato molto più piccolo e avessi cercato di espanderlo, come abbiamo detto, puoi passare da grandi numeri a piccoli, ma mai troppo grandi senza che pixel e sembri un po' sfocato. Questo mi permette di apportare anche quella modifica. Stesso genere di cose nel nostro outro.
Lo faccio semplicemente per adattarlo alla tela. E proprio così, la mia introduzione, la mia webcam e la mia registrazione dello schermo hanno tutte le stesse dimensioni e gli consentono di apparire belli, puliti e professionali.
Non andare nella tana del coniglio di editing
Quindi è qui che avverto le persone sulla tana del coniglio del montaggio. Puoi fare molte modifiche. Ci sono numeri là fuori che le persone parlano di quanto tempo ci vuole per modificare, per quanto tempo di un video di produzione.
Varia per ogni persona.
Per me quello che provo e faccio è fare un montaggio molto pulito e semplice di un video e poi lo condivido. E più avanti parleremo con Danny della revisione e poi dei concetti a riguardo. Se supera una o due persone come video fattibile, è fuori e me ne lavo le mani. Se dedico troppo tempo alla posizione della freccia o all'evidenziazione, si tratta più del video e meno del contenuto che stai cercando di fornire. Quello dovrebbe essere sempre l'obiettivo principale. Qualunque cosa tu stia cercando di fornire è il contenuto per essere efficace, il video ha un bell'aspetto e un buon suono, è proprio come l'1a del tuo requisito di livello uno.
Quindi sembra almeno dal punto di vista temporale perché so che molte persone sono preoccupate per la quantità di tempo necessaria per modificare. E sono stato in quella tana del coniglio dove ho passato giorni a modificare tutorial e cose del genere. Quindi sembra che una cosa sia conoscere la tua soglia di qualità. Quindi è un modo, ancora una volta non stiamo cercando di essere Hollywood qui.
Evita la maledizione della perfezione
Sì, si dice che hai bisogno di un perfetto o ne hai bisogno entro martedì?
La maggior parte delle persone che creano video nel mondo degli affari ne hanno bisogno entro martedì.
Ci sono state molte situazioni in cui ho lavorato con alcuni dei nostri clienti in cui arrivano di lunedì mattina e il loro capo dice che ho bisogno di un video e che sia perfetto e ne ho bisogno entro pranzo. Ed è questa la situazione in cui si trovano.
Quindi l'applicazione di un paio di trucchi come avere le cose salvate nella libreria o salvate in una cartella e disponibili per te, pronte per l'uso come modello facilmente modificabile, riduce i tempi di modifica. Conoscere il tuo processo riduce i tempi di modifica. E per quanto non ne sia mai stato un fan prima di scrivere la sceneggiatura di ciò che dirai ti farà risparmiare tempo. Perché non sei quassù ad armeggiare con le tue parole.
Come diventare un editor video più veloce
Mentre procediamo, so che abbiamo già alcune domande su questo, è solo come lo facciamo, e non dobbiamo affrontare bene questo secondo, le persone stanno cercando come possiamo accelerare questo processo in modo che possano diventare più veloci e una qualità migliore, conosci una qualità migliore ma solo per lo più più veloce e non passi tutto il giorno a farlo?
Sì, quindi penso che la cosa numero uno sia avere familiarità con il software che utilizzerai.
Alcune persone sono davvero appassionate e abituate a usare voci di menu come qui in cima a Camtasia. Tutti gli strumenti di modifica sono qui. Ma la maggior parte di loro, se non tutti, hanno una scorciatoia da tastiera associata. Quelli sono molto utili.
Se conosci le scorciatoie da tastiera e la maggior parte di esse su piattaforma Windows sono praticamente le stesse per copia, incolla e taglia. Conoscerli è davvero utile. Quindi le scorciatoie da tastiera numero uno. Due, è conoscere il resto del tuo software in modo da non cercare qualcosa. Accorciare i processi.
Realizza un paio di video divertenti, creane alcuni pratici. Crea qualcosa su un argomento che conosci già molto bene. Sai come aprire un nuovo indirizzo email? Non fai un negozio in un particolare ambiente di acquisto online? Realizza quei video in modo che la prima volta non sia la prima volta. Ti stai concedendo la capacità di imparare attraverso quel processo. E in terzo luogo, se puoi, utilizza una sorta di libreria di modelli.
Che si tratti di una singola schermata di una presentazione PowerPoint che hai salvato come diapositiva, la maggior parte delle persone ha PowerPoint o qualcosa del genere. Crea una semplice diapositiva che puoi utilizzare come intro outro, informazioni pertinenti. Non sovraccaricarlo di parole e questo può anche ridurre il tempo del tuo video. Perché tutto ciò che devi fare è registrare il contenuto principale, aggiungere l'introduzione e l'uscita, produrre il tuo video.
Che suggerimento fantastico, specialmente con PowerPoint c'è così tanto che potresti fare solo con PowerPoint. Ovviamente puoi farlo con molti altri strumenti, ma se conosci PowerPoint è uno strumento semplice con cui iniziare.
Sì, ed è in genere comune. C'è Google Doc, ci sono tutti i tipi di cose là fuori in cui puoi fare lo stesso genere di cose, assolutamente.
Produci ed esporta il tuo video
E praticamente a questo punto quando hai finito con il tuo progetto, cosa che non lo siamo. Ma potremmo essere per questo progetto. Vogliamo portarlo al di fuori dell'ambiente dell'editor.
Quindi vogliamo produrre il video.
È qui che decidi un paio di cose. Produco sempre il mio video come file locale, un mp4 che viene salvato sul mio disco rigido, in particolare in quella cartella che ho creato e poi consegnato a un luogo online che avrò in quel particolare momento.
Che sia il nostro screencast.com, YouTube o qualsiasi altro sito di condivisione in cui lo metterò. Voglio assicurarmi di avere un video di backup per me stesso, ma conservo anche una libreria nel caso in cui posso apportare modifiche a quel progetto originale o al video originale.
Oppure usa clip di esso nei video futuri che ancora una volta abbrevia il mio tempo perché uno, l'ho etichettato in modo appropriato e posso trovarlo. Due, il video è di alta qualità perché l'ho pubblicato con le dimensioni corrette e lo ho disponibile localmente.
Quindi pubblicherai il tuo video, lo pubblicherai sul web. Devi eseguire il processo di rendering e ciò può richiedere molto tempo.
Può, sì. Il rendering è una di quelle situazioni in cui dipende dalla durata del video. Quanto c'è nel video, quanti livelli, quanta musica, video, quanto è potente la tua macchina. Sono così tanti diversi fattori di qualificazione che lo fanno. Ho una macchina abbastanza buona qui, questo video probabilmente ci richiederebbe, non lo so, quattro o cinque minuti per il rendering. Ma assicurati di integrarlo nel tempo del tuo progetto. Se stai registrando un video di un'ora. Per favore, non provare a fare un video di un'ora. Ma se necessario, puoi.
Non fare quello che stiamo facendo qui dal vivo per le prossime quattro ore.
E anche questo è stato discusso oggi, e sarà discusso per sempre, la durata del video e per quanto tempo lo fai. Ma vuoi sempre pensare a quanto tempo ci vuole per il rendering e puoi esercitarti con quello, con quei video di pratica di cui abbiamo parlato. Fai un paio di video, guarda quanto tempo ci vuole. È un video di una tazza di caffè? È un video per andare a pranzo?
Come modificare video senza script
Quindi voglio parlare, perché ti sei messo qui sullo schermo, questo video della videocamera. Penso che tu sappia che gli screencast sono abbastanza facili. Puoi tagliarli e puoi fare dissolvenze e transizioni tra. Ma quando qualcuno si sta registrando davanti alla telecamera, perché questo è ciò di cui parlava Owen Video, avere te stesso davanti alla telecamera, semplicemente parlare con la telecamera.
E ovviamente, quando stai facendo qualcosa del genere è programmato, vuoi che sia un messaggio prestabilito per una buona ragione invece di parlare a braccio come siamo oggi, quali sono alcuni suggerimenti per modificarlo? Perché quello che succede, quando l'ho fatto, sono io che parlo e faccio un errore, e poi finisco come un salto mortale. Va bene o dovrei cercare altre cose da fare per renderlo migliore?
Penso che per le condivisioni sui social media che sono tagli di salto informali per me vada bene, sembra essere una tendenza attuale che sta accadendo nei video in questo momento. For a video like this the actual unedited video that everyone will have access to of my webcam is three or four times the length of this. There were a lot of screw ups. For me I simply pause and I do what’s called spiking the timeline. I do a triple clap so that I can visually see, in fact on my screen here on the voiceover you can see these giant spikes of audio right on the timeline.
Those are all errors.
How to edit around mistakes
Go ahead make that track taller so people can actually see it, really see that.
So on track number two here you can see significant jumps and if I can play this back because I believe we have the audio for it, you’ll hear the clapping noise. And loud claps and it happens multiple times. People do this in different ways, but this is for me a great way for me to have a visual representation of where I need to make those cuts.
When I’m watching my webcam playback. It’s pretty obvious. I look exacerbated, I get angry. I’m like oh geez, or someone walks into my office because I failed to put a hey I’m recording, please stop coming into my office thing. I typically start every webcam intro outro in particular as a whole take. So there aren’t any jump cuts, personal preference. Do I think jump cuts could work?
Absolutely, I absolutely think they could work. If you’re pretty good at staying in frame. I talk with my hands, I move around a lot so my jump cuts might look like my head bouncing around, personally it doesn’t look good to me. But it could still work for other people as well.
So with that there’s a couple things I think I’m hearing. First of all these spikes, the audio spiking that you talk about, a great way to look at your timeline and edit to that because you know probably where you made a mistake. But the other thing I think about is if you don’t want jump cuts and you can’t do it in one take, heaven knows the video guys here can tell you I can’t do anything in one take. Then what? What’s your options? Because maybe it’s a little bit long and you want to be on screen for two minutes and that’s not gonna happen. You don’t have a teleprompter, something to read off. What can we do?
I speak my lines, hopefully I have ’em memorized or I’ve got it taped up near the the camera. If you’re pretty good and you got your camera at slightly above eye line and maybe a teleprompter which with me is a piece of scotch tape and a sheet of paper. The other thing I do is I simply pause, collect my thoughts mostly, and then continue. It allows for those gaps, it allows for the ability to make cuts that don’t look like jump cuts. And the other thing I can do is if I’m intent on using the entirety of that video, I just take my deep breaths and keep going.
The other thing you can do is fade that video in and out and or drop it down, and do like the PIP or picture-in-picture format. Where not only am I still on camera, and I’m talking to you, and I’m delivering information, but if I’m bringing myself to a corner or fading in and out I’m still drawing attention to the content on the screen. Which hopefully is the crux of that information. If it’s just a talking head video where it’s just me talking, I’m gonna probably rehearse a few times before I do it and then be comfortable with what I produce.
I think for all those out there I would say to add on to what your point is Jason is that it’s okay to have an error. I mean, if you’re going to some high end super client, you want this to be perfect, you got to deal with it, figure this out, but a summary is that natural stuff is okay. Things happen just as long as it’s not too much.
Use b-roll
The other thing is b-roll. And I know like we talk, b-roll for those who don’t know, we want to talk about it for a second ’cause I think it’s important to the editing process. Is if Jason on camera is a-roll, b-roll is stuff that’s maybe what he’s talking about. That could be the screencast footage. That could be if we’re talking about a mechanical process, maybe you’re showing that machine. Things like that to then enhance. And so then what you can do is you can cut between the two pieces and I’ll give one more piece of advice here. That I think is really important, is if you’re lucky enough if you were not editing at the same time size that you shot your video at. You’re editing smaller, you can always zoom in like you did with your screencast.
Use cuts
It’s a great point about the a-roll and b-roll that you talked about. There’s actually good information that we even produce out on our blog about things called L-cuts and J-cuts that are great ways to bring you between a-roll and b-roll. And especially if you’re talking about a process. You’re showing something around a studio, anything like that. If you’re able to even semi master something like that the video has such a professional look to it that people are gonna wonder how much you paid to have it done and you’re like yeah, actually I did it myself and you can too.
So Jason for a video like this final runtime I don’t know where we end up at but how long does it take to edit and get something that you were happy with?
For me for an audience that’s going to be widespread a four to five-minute video I would probably give myself in the editing process afterwards hour and a half to two hours, caveat I’ve done this a long time and my level of what I expect at the end is different than everybody else’s. The prep work that goes into this, it depends. Shooting the webcam video it was a half a day.
Voiceover a couple hours because I did multiple takes to make sure. But as you get better and faster all those times do reduce and you decide at a certain point what level of completeness you want the video to be at. And that can then allow you to make changes in all that production process. Five to ten-minute video afterward editing I give it about an hour and a half to two hours.
So there’s maybe some guidelines. Maybe it will take you take you longer and that’s okay.
Yeah, or faster who knows?
More video editing tips
Absolutely, so okay, so we’ve looked at it kind of this overall broad and kind of look at your project. Are there any other tips that you would give to get people going with their editing, to help them to be successful?
So the one thing I always want to encourage people to do is to make a decision on the fly when it comes to editing. If you see something that doesn’t sound right, doesn’t look right, cut it out. Most products like ours even allows you to undo or save versions of a project. If you think it doesn’t look right cut it out move on. That way you’re not spinning your wheels so to speak on a certain section.
And it goes to goes without saying, have someone check it out. Produce the video, share a snippet of a section that you want to have people review. But most of all editing video is a fun process. It is creative, you have control over every aspect.
If I run it from start to finish, even if you’re asking for someone to create content for you that you bring in. It can be a really fun process which is where you need to balance your time between when it’s due and the rabbit hole of features that you might have within your video editing software.
Videos are never done, they’re only due .
Is that kinda how it goes? They’re never done, they’re never done.
Scripting tips
I want to talk a little bit about script and the editing. So I know some people like scripts, some people don’t like scripts. But is there a role in the script in your editing process?
There is. For me, I tend to write a script that’s longer than I think I’m gonna actually need. So that as I’m listening back to it or trying to match it up with my video that I have sections that maybe are a little bit too long-winded.
And I can easily cut those sections out and feel comfortable with it. It also tends to give me a sense that a written page of documentation about a minute, minute and a half of screen time. So it helps me with my pacing. It helps me to make sure that the words that I’m choosing are appropriate.
And even if I don’t read the script verbatim I’m still within the same wheelhouse of what I want the content to be. I may rotate a word here or two, but as long as I’m still getting to the main points that I want it to hit, then I’m comfortable.
And I do want to say that I don’t always write a script. I do sometimes use bullet points where I’m familiar with the topic enough that I can read through the bullet points and make sure that I’m hitting on certain points.
Fantastico. So we got our video.
We got our video.
We’re produced it. Anything else that we need to know?
Make videos often
I would make sure once again you keep it organized. Make sure it’s shared out the way you want to be shared out. Make sure people review it, and make sure you make ’em often. Make sure you make ’em often. It is a perishable skill to edit a video.
You can’t edit one today and then take six weeks off and come back and feel like you’re still going to be confident. Do it often as you can.
So we’ve got a little bit of time before we get into Q&A but I want to just remind you guys if you have questions for Jason, things that you’re like saying oh but what about this? How do I do that? Feel free to put those in the Q&A pod next to the video player because we do want to make sure we’re addressing your time. And we have some time, we have some time to go through some stuff here.
Excellent.
So okay, so we look at a tool like Camtasia and there’s a lot here.
There is.
Pick the right transition
Let’s talk about, you talked about transitions a little bit earlier. Let’s look at transitions and I’d love your opinion about transitions because I have some opinions to share about transitions.
Sure, sure, so in a product like Camtasia which we have in front of us here, we have built-in a ton of transitions. The first two at the top are your classic, what I call classic fades. Fade through black and then there are a lot of what I call classic PowerPoint-style transitions.
Barn doors, spinning irises, and stuff like that. If you want my honest opinion, I actually typically only show those two transitions in Camtasia and that’s the two fades. And I would say 99% of the transition I use is a fade transition. I believe it has a professional look to it.
When I consume videos and I see a video that just starts abruptly versus one that fades in I know that that person at least spent a little bit of time on their edit which translates to me to be a more professional complete video. So I am a fade aficionado fanatic.
And that’s to say fading should not be applied liberally right?
Correct, correct, yep, you don’t want to constantly be changing over. Jump cuts are fine, switching between content. If you’re doing a like we were talking about an a-roll to b-roll switch you’re not fading between those two, that doesn’t make too much sense. I like to do it at the beginnings and ends. Or between major changes in content. Whether it be webcam to screen recording. If I’m not shrinking down that webcam I tend to fade it in it makes it a little bit softer. I’m a fan.
Create the right content for your audience
Yeah, absolutely. Now I will say one thing that I’ve noticed, and I’ve talked to some people who’ve worked in the video industry, in the film industry and one thing they say is that like for television, now obviously we’re not making television here, that changes occur every like two to three seconds or faster. Maybe even every second when you’re watching you know some show on Netflix or on the local station. That these shows are just constantly changing. Is that something you think as beginners we should be trying to do?
I don’t believe so when we’re talking about screen recording. That kind of motion is not going to allow for the content that you’re trying to deliver to be consumed and absorbed. That being said if your style of video creation is a little bit more I would call it frantic without trying to be negative, a lot more motion, there is something that your viewers can do that you can think about. And that is they can hit the pause button and they can rewind and move back and forth.
Because it’s a medium that they then have control over. So if your visual style, your video making style is more motion-based, give it a shot. I think two to three seconds is pretty dramatic when it comes to screen recording. But depending on what you’re showing it could work. If I’m showing you a process by like how to fill out a form when it’s the open enrollment time for your employer, I’m not gonna be jumping all over the screen.
However, if I’m showing you how to operate the pop machine, yeah I’m thinking I push the button, drop-down move around, I think that makes more sense. So it’s still knowing what your content is but keeping in the back of your mind that if someone needs to focus on something they do have the power to pause that video and rewatch.
Yeah, so again going back to this idea that’s been presented a couple of times now, is know your audience. Know who you’re talking to and make the video that’s for them, that’s gonna resonate with them. Not just the one that you like to make.
Make the ones you want to make as practice and then remember the reason you’re making the future videos. Absolutely.
Be more precise
Okay any other things that we should be thinking about from terms of things that we can do in our video editor that whether it’s in Camtasia or something else to make our edits maybe easier, more effective?
Yeah, the biggest thing I would recommend regardless of what video editor you’re using is if you have the ability to zoom in on your timeline to make very precision cuts, I recommend that. Yes, I do spike the timeline so I can quickly, visually change and cut different parts that I want to make the errors that I want to cut out.
If you can zoom in and see the granular detail, whether it’s frame by frame or second by second, do yourself a favor, learn that functionality of your editor and make those precision cuts. You will still get faster over time, but making those precision cuts will make your video have a more professional polish at the end.
Rather than clipping a word here or there and that means like taking the first utterance off a word or at the end which I have been guilty of doing before I took my own advice.
Arrange your workspace
Yeah absolutely, I also feel like arranging your workspace is super helpful. Like I had you bring up the audio so you could see it better. By just changing like whatever you see here to work with what you’re trying to do?
If you’re fortunate enough to work in a multiple monitor setup that is also helpful. Most video editors do allow you to take this area which is your canvas and separate it so that you can put it on a separate monitor. Which then allows you to have even more what we describe is real estate to work with your tracks and then you can see maybe a playback on another monitor at that full resolution that you’re going to produce at and see how it looks.
Maybe there’s some things you didn’t catch before. Maybe there’s a lighting error, maybe there’s a longer lag on a screen recording. But the ability to to arrange things so that it’s appropriate for you is helpful. Whether it be turning on or off side panels that you don’t necessarily need at all times because you’re really operating underneath the shortcut world. Learn your editor. Absolutely.
Molto buona. Well I know we’re getting close to our time and I want to make sure we’re answering your questions. So if you guys got questions go ahead and put them into the Q&A pod we’ll come over here to me so we can we can go through some of those questions for you guys.
Have the end in mind
Okay Jason, so again we talked a lot about tips and tricks. Shane says that editing always seems like the longest part of the process.
It does depending on what your end goal is. I have gotten to the point in my video creation where I think the prep work takes longer because I’ve made myself so comfortable in the editing process. But the prep work is probably what makes that editing process easier. Having the things organized, having a pre-recorded script done. All really helpful. The edits only take as long as you think you need to get to the product that you want to deliver. Watch the rabbit hole, don’t over edit. Get the product out, get feedback on it.
So I’d also say that probably not exaggerates, but it means that as you’re going into the we’ll call it content creation piece. The piece where you’re recording. Whether you’re on camera or on screen that you’re making sure you get what you need. I know when we were making some of the TechSmith Academy’s stuff the the last thing we ever wanted we were going on a blazing fast pace to try to get those things done in time. And last thing we ever wanted to do because the video guys were gonna kill me if I ever had to say to ’em we missed that. I mean we probably just made do before we went back and tried to recapture something.
There’s a lot to be said by having an outline. There’s a lot to be said and a lot to be said that you can not live and die by it, but know that there’s flexibility built into that and make changes. If you miss something, how crucial is it? Was it part of the storytelling that’s really important?
Thinking about Buddy’s session if he had pulled a couple pages of that comic would the story still flow? Maybe, but you want to make sure that you give yourself the best possible starting point and then allow for that freedom to make changes.
Yeah so what you’ll find in this QA and great questions everyone keeps sending them in is lots of how do I just faster?
And we’ve talked a lot about that. So I don’t want to spend too much more time on that. But as of course as things come up we’ll do it. So let me go to this next question.
How to create video engagement
How do we get employees or customers engaged to view our videos? So here’s a little add-on to that, we built a cool training library but ignore them and they call us anyway.
Yeah, yeah, that happens. So the way I would get around that is I would make a couple of different types of videos to start and solicit feedback. I mean if we’re talking about training videos that are 35 seconds, minute and a half long you can make different styles of videos and see which one gets more views than others. If they’re required, that’s another conversation.
But if you’re talking about engaging your audience be true to who you are, don’t fake the person that you think they want to see but try a couple different video types to see which ones resonate. If you’re deadpan monotone talking about SOP processes or something like that that may not be engaging. If your job is to engage that’s one thing. If your job is to deliver content that’s another. You got to marry the two comfortably and try a couple different ways.
Now I would just add to that from my experience that there are lots of elements to video that I think you can use depending what you’re trying to do.
Like music.
I mean there’s a whole rabbit hole we can go down about music and where music’s appropriate, where it’s not appropriate. But using visuals, finding things. I think I’ve heard a lot today about connecting with a person. And I think that if you look at the video that you shot you can see who you are. You can see the eyes, you know the old saying the eyes are the window to the soul. That soul doesn’t disappear because you’re on camera. And so using those types of things to build the engagement.
So I think yeah just thinking about those different types of process but what I want to clarify is you’re not saying make a bunch of different videos every time. No. But find what works then make more of them.
Find out which type of video works for you
Yeah, I usually go two to three different types and if number two is one that resonates I make that kind of video and tweak it a little bit here and there. Sometimes I’ll throw something new and random in. But it’s after I’ve delivered several videos from what the audience expects to receive.
Yeah I do want to tell a quick story that one of the customers that we work with they were making videos inside of their company, and they talked about at the end of the video, one of the ways that they engaged, this was an internal employee video, that they would put the outtakes basically. Or the mistakes, ’cause people make mistakes. They get in front of the camera, they get uncomfortable, they say things, you know. And they were putting that in kind of as fun. Never to make haha, look what you did. But more like yeah this is hard we recognize.
I think that’s a tremendous tool and if your work environment supports that kind of thing absolutely. I think it’s invaluable, I think it’s invaluable.
I would also say I think to this question because it’s a such an important question is context around the video. And I think we’ll talk about that later when we’re with Amanda Robinson. But it’s not all about the video right? ‘Cause if people aren’t going to it, it doesn’t matter how good or bad the video is?
Got to make it easy to find, very discoverable. If it’s something that they think they’re gonna gain, I think the question mentioned they’re always coming to us instead, why is that? Are they more comfortable speaking to you in person? Are you not the person that’s coming through on those videos? Are they easy to find, are they updated, are they relevant to what they need to learn?
There’s all these little things you need to consider when you’re creating a library of videos as you said. It seems like the last point is to train your users to take the action that you want.
First video out the door is how are you gonna use this system?
Make ’em aware and promote it, and get ’em aware of it.
What are the best practices of shooting a product sales video?
So a couple other questions here. We’ve got what are the best processes and practices of shooting a product sales video?
Wow see the guys who would be best to answer that are actually shooting this video for us right now. It’s something I’ve learned it is lighting is a huge component to that product video. Make sure that you are flattering with honesty.
Meaning you’re showing all the parts that you need to show that are relevant to the context of the commercial shoot so to speak. And make sure you have current information.
And if you don’t have information you need to be honest about that as well. Give the bullet points that are important and then get back to people that may have questions to make sure that their understanding of your product is apropos and timely.
I would also, I keep adding my thoughts in here, Yeah please do. But I think.
Get a good microphone
Don’t forget about the audio and Owen Video talked about that, get a decent microphone. we’ve got these nice lapels. Get a microphone that’s gonna support that because you know from what I’ve seen people will handle a little less quality of video, they still want quality video, don’t go make really bad video.
But they’ll take it, but if the audio is bad, your sale, it’s gonna make a barrier between you and your prospect right? It seems like that’s super critical, if you’re gonna start someplace in that process.
If a video has bad audio I will tolerate it for a very short period of time.
Get to the basic information quickly
The other thing I would say especially it seems to me in the sales, and I’m not making a lot of sales videos. I’m on more of the I received some sales videos but I do other types of videos, a lot of instructional videos, I would also say make sure that you’re really thinking about the time you’re asking someone to invest in you.
Very true, very true you want to get to the basic information as fast as you possibly can without dragging them through a long process. If it’s a 30 second video don’t make the first 20 seconds of fluff, get to what you’re trying to convey and then give them some sort of call to action.
You want them to do something with the information they just gained. Is it visit you on a website? Is it join you for a live Academy event? Make sure you’re delivering that crucial information early on and often if you can.
Yeah so definitely we’re not the sales experts.
Talk to Owen Video, there’s others who, maybe we’ll do another Academy event or video about that very topic.
How do I get like a clickable link in my video?
This last question’s really interesting, we might have some more come in here I’ll check but how can I link to a website or landing page that’s added that the viewer clicks on? So how do we get like a clickable link in our video?
In the video. With Camtasia we actually have something called interactive hotspots. And they are simply the ability to add a section to your screen. So if I had a oh I don’t know, we’ll add something simple like this shape, if I wanted to make the the spot clickable I would use our visual effects and an interactive hotspot and type in there, and there click for more information, or click here for more content.
The thing about those is those videos have to live in certain environments. You want be sure that you, if you’re gonna create a video that has something interactive like that, you test wherever you’re gonna host it to make sure that link is possible.
The other place that’s very common is to put it in the description or wherever you’re hosting those links are powerful and visually calling that out. I don’t know how many YouTube videos you may have seen that say link in description below, that is a common piece of verbiage that’s used and still effective.
Yeah, so again from a Camtasia perspective you can only really on your website, on something like, we have screencast.com, does not work to do this here and add it to YouTube.
YouTube, Google Drive, Vimeo, they all have their own players which then when you upload them it re-encodes the video so it plays well in their environment and it strips out all that interactivity. But the other thing is some of these sites now are adding this functionality to that where you just edit. Where upload the video and then you add it.
How to move all the elements with the timeline marker?
So great, that’s a great question. Something that I think is really important because if you have an action, you watch the video, you want them to do something, it you can put it right there. So this is a very specific question which I think is an excellent one. How is he moving all the elements with the timeline marker?
I’m not sure if this is in all video editors but in Camtasia I think what they were referring to is when I created space here at the beginning to put our intro in wherever I place the playhead if I even place it here in the middle of our timeline, if I hold my shift key down and click and drag the playhead it moves everything in concert to the right of that playhead and keeps it in sync.
So if I have things that are call-outs that are popping up at certain times, animations that are happening, it allows them to stay in sync. And then to bring it back I simply hold the shift key and drag it back until the media hits something original that is blocking its movement. That could be done in the beginning and wherever you need it to be. I do not know if that’s consistent with a lot of other video editors but it is something you can do in Camtasia.
Storyboard or no storyboard?
Perfect, thank you for that. So here’s another debate we could have about to storyboard or not storyboard? And if you do storyboard what do you use?
If I’m going to storyboard and the if is because I don’t always do it, I’m becoming a bigger fan of paper and pen, I really am. I will draw a six panel comic strip almost and that’s going to be if I am going to shoot multiple cameras or different environments I will use that.
Most of the time I do not storyboard. I am a down-and-dirty video recorder. I hit record I see what happens, I call it good. But that’s also as we keep saying, knowing my audience. If it’s some video I’m making for you Matt, sorry you’re not getting a storyboard.
If it’s a video I’m making for the entirety of the live event audience I’m gonna take some time, I’m gonna storyboard it, I’m gonna use my horrific drawing skills. Which I just heard earlier, is okay. Oh boy, and then I will script that out in a storyboard format as well.
So one the questions they said, the real question is what do you use to storyboard? I’ll point out that on the TechSmith Academy if you go to the course about storyboarding we do have some free template in there. You can print it off, it’s just basically panels. And you can, because I’m a big fan of pen and paper too, however interesting enough, if you look in the episode we actually have a storyboard and I create use characters that I drew in Illustrator.
And then I just was able to copy and paste them, make slight changes to ’em. So there’s lots of ways to do it. I think with storyboarding in particular, when your video starts to get complex, it’s really important because you want to start to work out what the camera is gonna see, where it’s gonna be placed. Especially if you’re working with other people.
So you don’t have to guess and the video guys here can tell you that I’m not very good at it always, and don’t always do it like I should. But ideally, it’s representing the story so that someone can get the vision of what you want on camera and you can see if it will work or not before you ever have to hit record.
I think the simple answer to any tool question is what’s the best tool to use for whatever it is? At the moment you’re at right now the best tool is whatever you’ve got in your hand, sitting on your desk available to you now.
You can grow, you can add things, you can add software, you can add cameras, and lights, and microphones.
But use what you’ve got right now to get to the end state.