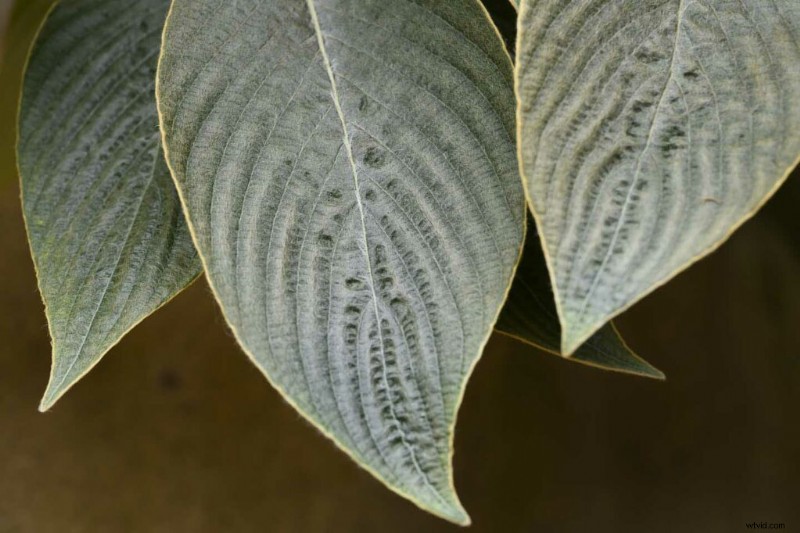
I Picture Control di Nikon sono in uso da secoli sulle sue fotocamere digitali per conferire ai Jpeg un aspetto particolare che si adatta alla scena o all'umore del fotografo. Inizialmente, l'elenco delle opzioni includeva Standard, Neutro, Vivido, Monocromatico, Ritratto e Paesaggio, con l'aggiunta di Auto per consentire alla fotocamera di decidere la scelta più appropriata e Flat per l'uso durante le riprese video. Più recentemente, è stata aggiunta una raccolta di 20 controlli immagine creativi e puoi trovarli su fotocamere come Nikon D780, Nikon Z5, Nikon Z6 II e Nikon Z7 II. Hanno nomi come Dream, Morning, Pop, Sunday, Silence e Bleached e vanno oltre le solite piccole modifiche di nitidezza, saturazione e contrasto per produrre immagini più creative che possono essere notevolmente diverse dal risultato standard.
Sebbene sia ancora possibile modificare le immagini in una certa misura, l'effetto prodotto da un Picture Control viene "cotto" in un Jpeg, ma i file raw hanno ancora tutti i dati sui colori. Oltre ad applicare i Picture Control a Jpeg in fase di ripresa, è possibile applicarli utilizzando i controlli di elaborazione NEF (RAW) della fotocamera Nikon nel menu di ritocco o utilizzando i controlli in Adobe Lightroom Classic e Adobe Camera Raw.
Naturalmente, non a tutti piaceranno tutti gli effetti creati dai controlli immagine creativi di Nikon e non funzionano con ogni scena, ma possono essere un ottimo modo per migliorare la modalità di una scena o creare un'immagine interessante in condizioni non perfette . Ecco come si fa.

Come utilizzare i Picture Control di Nikon integrati nella fotocamera in fase di ripresa
01 Scatta raw e Jpeg
Poiché l'effetto dei Picture Control è incorporato in Jpeg, è una buona idea scattare contemporaneamente file RAW e Jpeg in quanto ciò ti offre una maggiore flessibilità per modificare l'aspetto delle tue immagini.
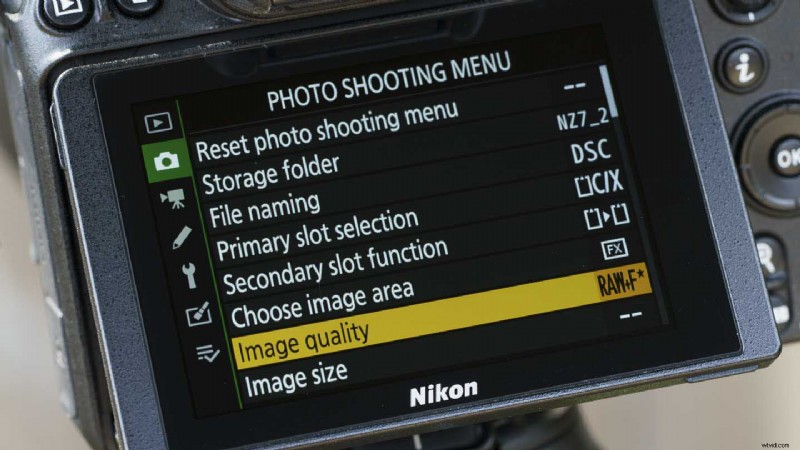
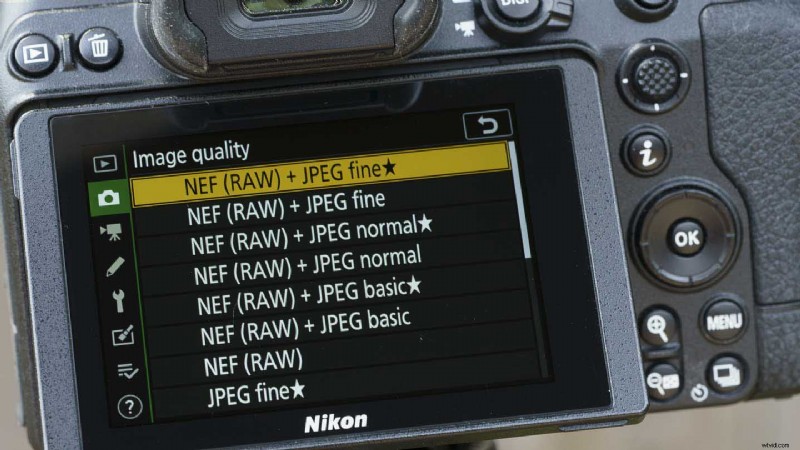
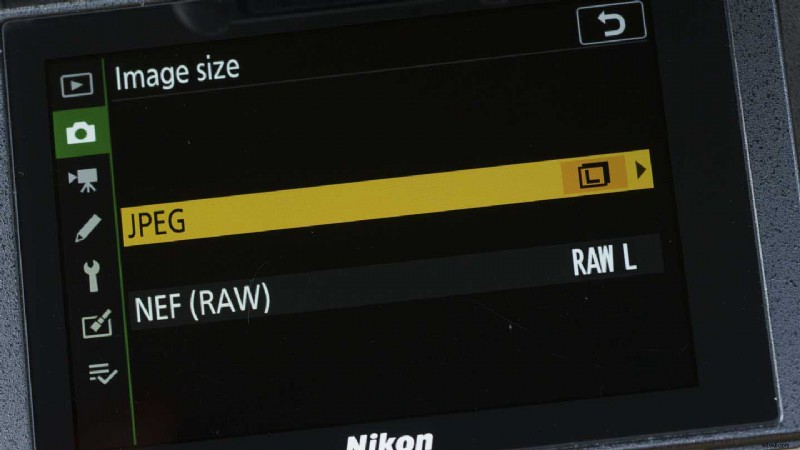
Premi il pulsante menu e vai a "Qualità immagine" nel menu di ripresa. Quindi premi il pulsante "OK" o tocca "Qualità immagine" nel menu per visualizzare le opzioni. Per ottenere la migliore qualità possibile, seleziona "NEF (RAW) + JPEG fine" e premi nuovamente il pulsante "OK".
Quindi seleziona "Dimensioni dell'immagine" sotto "Qualità dell'immagine" nel menu e assicurati di aver impostato sia i file Jpeg che i file raw da registrare con le dimensioni grandi (L).
02 Seleziona il Picture Control
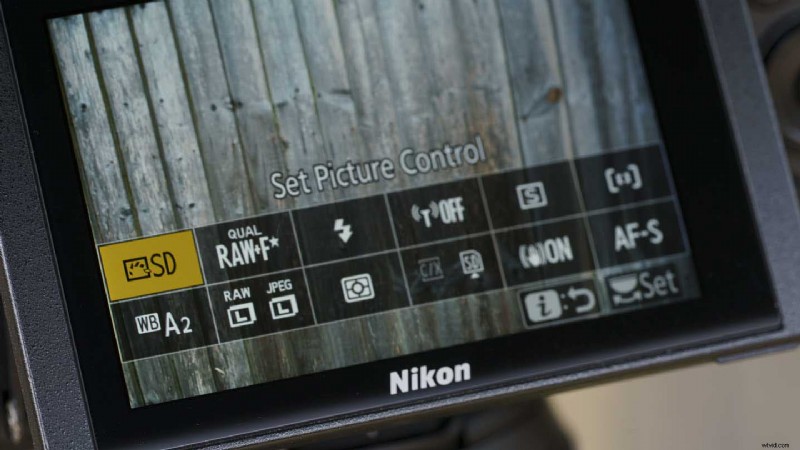
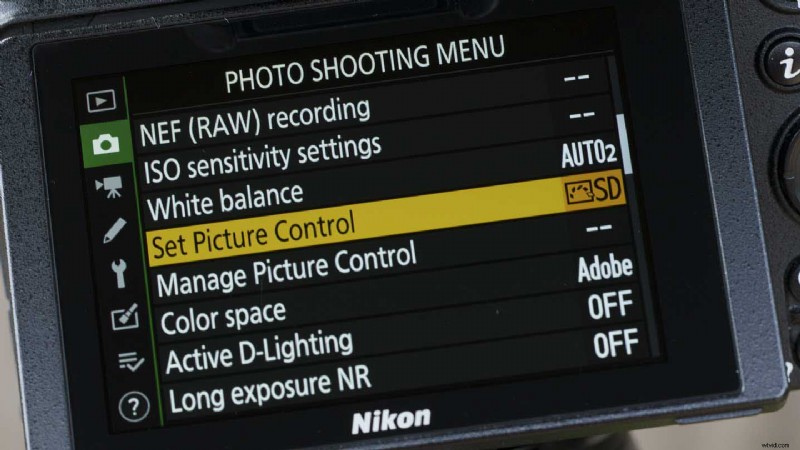
Per impostazione predefinita, è possibile accedere ai Picture Control tramite il menu "i" a cui si accede premendo il pulsante "i" sulle fotocamere Nikon, ma se hai personalizzato quel menu e rimosso l'opzione, lo troverai nel menu principale .
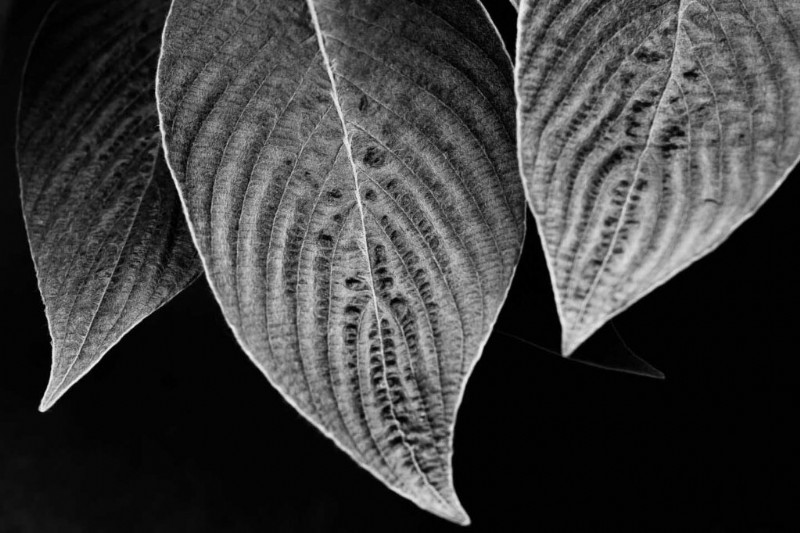
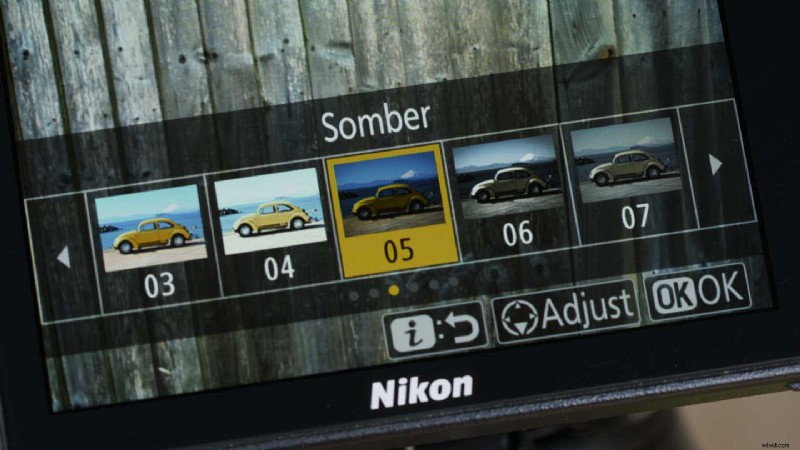
Individua semplicemente "Imposta controllo immagine" in entrambi i menu e premi il pulsante "OK" o toccalo sullo schermo. Quindi scorrere le opzioni fino a trovare quella che si desidera utilizzare (o provare). 08 Bleached è uno dei miei preferiti.
03 Regola le impostazioni
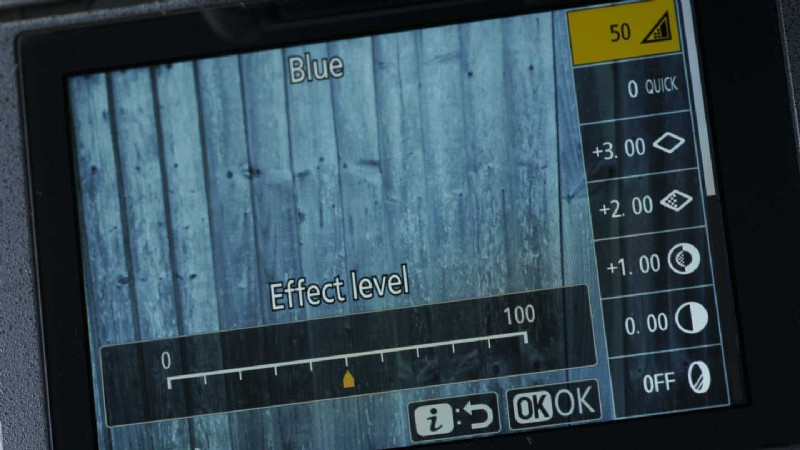
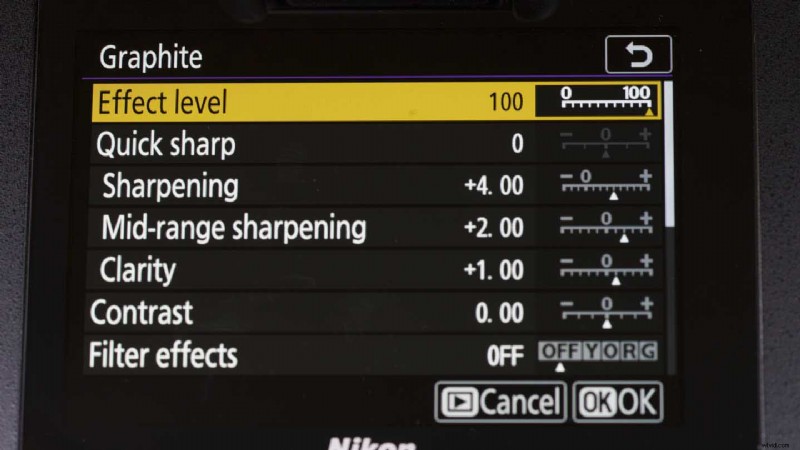
Puoi utilizzare uno qualsiasi dei Picture Control creativi nella loro configurazione predefinita, ma come con gli altri Picture Control puoi regolarne le impostazioni. Per fare ciò, accedi al Picture Control come nel passaggio 2 e con il Picture Control che intendi utilizzare evidenziato, premi il tasto di navigazione giù sulla fotocamera.
Questo fa apparire un elenco di parametri per la regolazione, inclusa la possibilità di ridurre il livello dell'effetto applicato.
Selezionare il parametro che si desidera regolare utilizzando i controlli su/giù oppure toccare lo schermo, quindi utilizzare i pulsanti sinistra/destra o toccare la scala sullo schermo per regolare il valore. Quando sei soddisfatto, premi il pulsante "OK".
04 Spara
Se possiedi una fotocamera mirrorless Nikon, vedrai l'impatto del Picture Control selezionato nel mirino e sullo schermo. Se utilizzi una DSLR, devi passare alla modalità Live View per vedere la scena con il Picture Control applicato.
Applicazione di un Picture Control post-acquisizione nella fotocamera
01 Individua il menu di ritocco
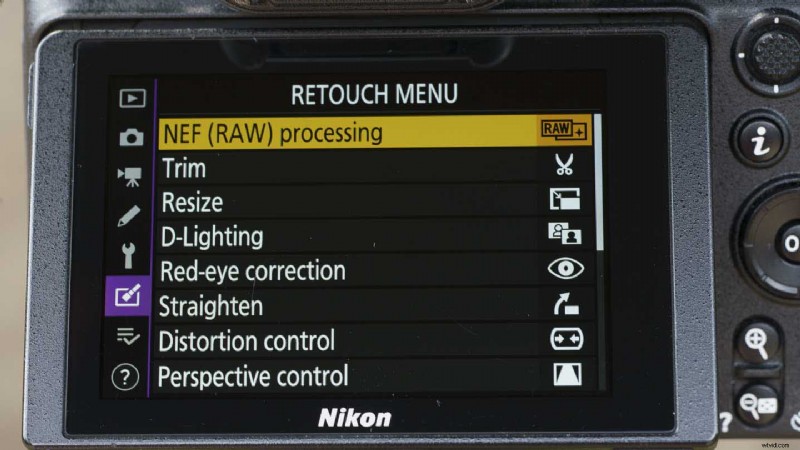

After you’ve finished shooting, press the ‘Menu’ button and scroll to, or tap on, the ‘Retouch Menu’ icon. Locate and select ‘NEF (RAW) processing’ at the top of the screen. Then tap on ‘Select image(s)’ or selected it in the menu and press ‘OK’.
02 Select the image(s)
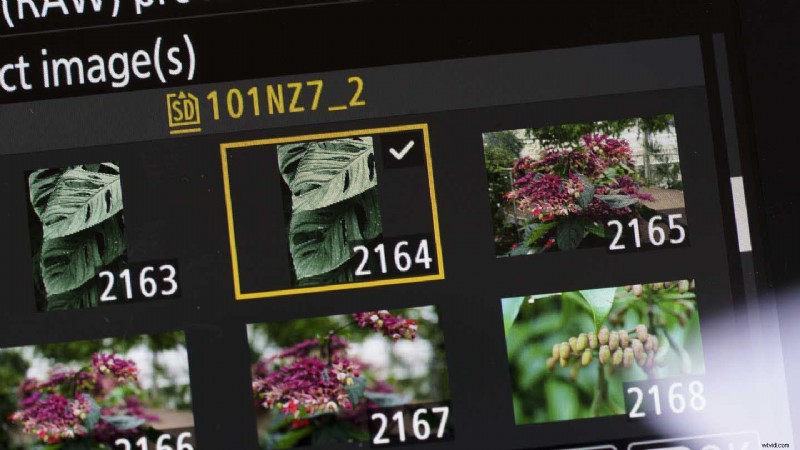
Browse through the images and use the zoom out button to add a tick to the thumbnail(s) of the one(s) you want to edit. Alternatively, tap once on the image to select it and tap again to add the tick.
Once you’ve selected the image(s) you want to edit, press the ‘OK’ button.
03 Make the edits
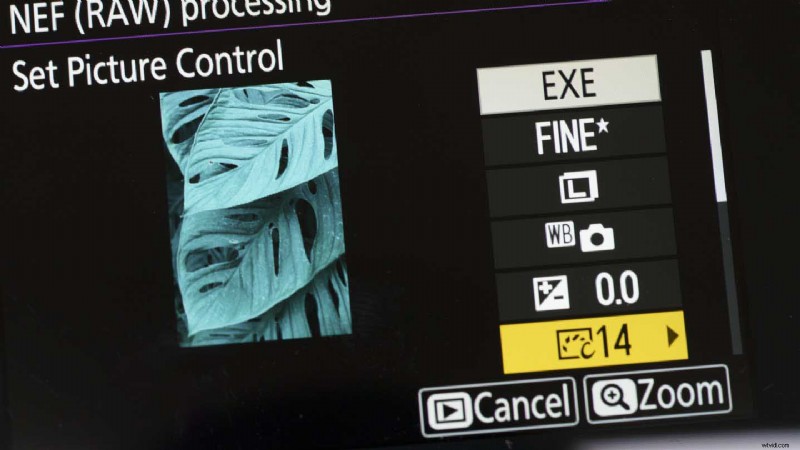
You’ll now see a screen with one of the images and a short list of the parameters available for adjustment. The Picture Control is at the bottom of the first page of the list. Tap on it or use the right navigation key to see a list of all the available Picture Controls.
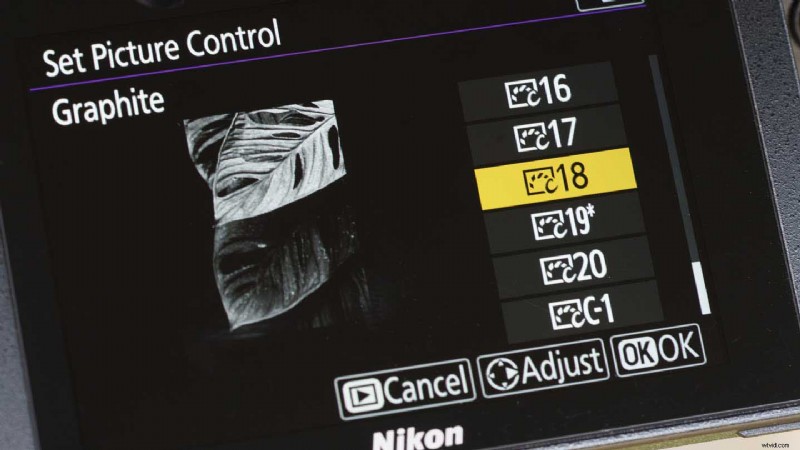
As you tap on any of the alternative Picture Controls, or navigate up and down using the navigation controls, you’ll see the image change as the new effect is applied. When you’ve find the one you want, you can either press ‘OK’ to apply it or you can press the right navigation button to access the same adjustment controls that are available for tailoring the image when using the Picture Controls at the shooting stage.
Make any edits that you want before pressing ‘OK’ and then scrolling up to ‘EXE’ to save the image as a Jpeg.
Using Nikon Picture Controls with raw files
Adobe Lightroom Classic and Adobe Camera Raw, which is the raw file editor supplied with Adobe Photoshop, both have the profiles to replicate the impact of using Nikon’s Picture Controls with Nikon camera raw files at the processing stage. It’s really easy to apply them in either software package and you can use them in combination with all the usual editing controls. Here’s how it’s done:
01 Open the image
If you’re using Adobe Lightroom you first need to import the images to the software, but if you’re using Adobe Photoshop you just need to locate the file(s) you want to work on and then open it/them. Photoshop automatically opens Adobe Camera Raw when you attempt to open a compatible raw file.
02 Select the profile in Adobe Camera Raw
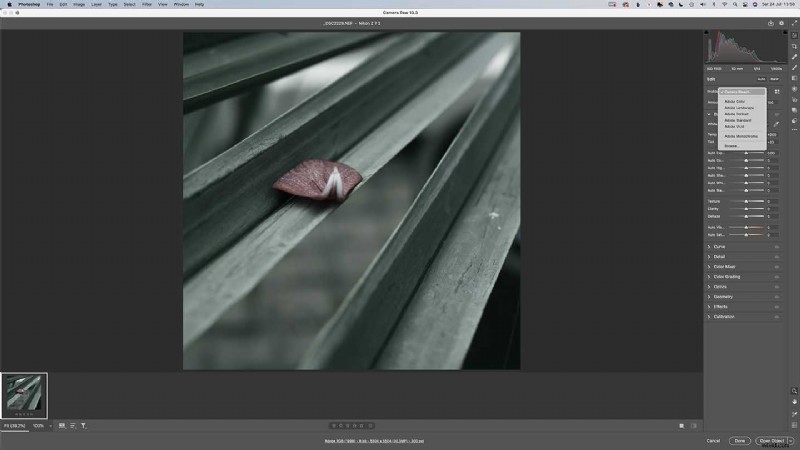
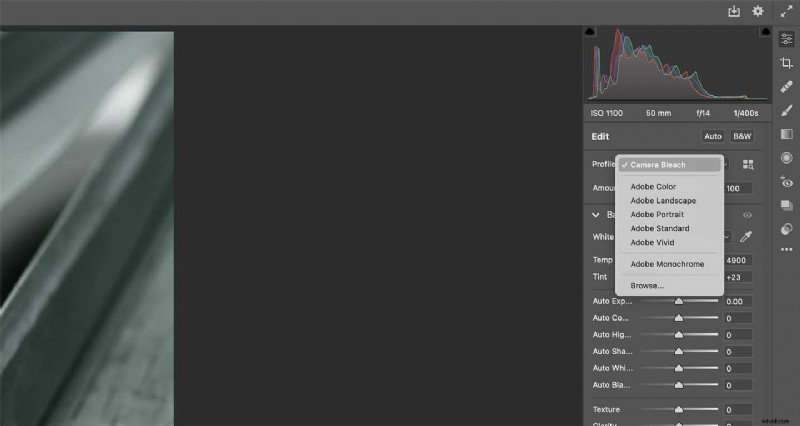
With the image open in Adobe Camera Raw, select the ‘Edit’ icon at the top of the adjustment icons and then find ‘Profile’ near the top of the adjustment panel, it’s immediately under ‘Edit’. It will show ‘Camera’ and the name of the Picture Control that you used originally.
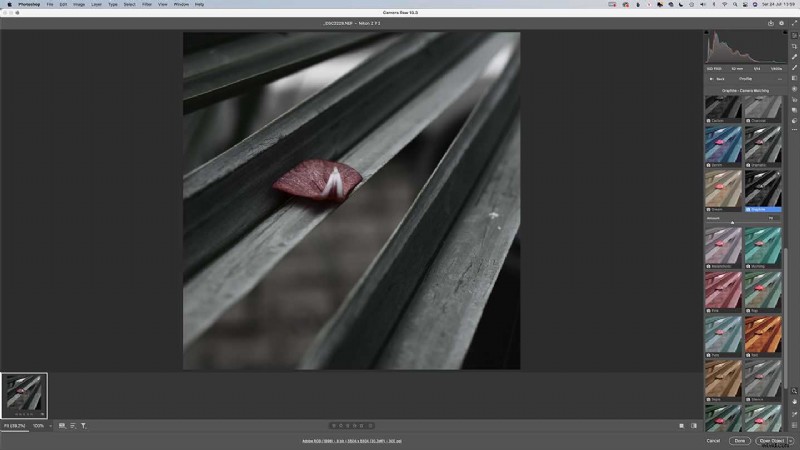
Click on the dropdown arrow to the right of the profile name to reveal the options available. You’ll see a short list of Adobe options followed by ‘Browse’. Click on ‘Browse’ and, if necessary, ‘Camera Matching’. This will reveal thumbnails of all the Picture Controls available. Just scroll until you find the one you want – the main image on the screen while change to show a preview if you hover over any of the thumbnails.
Once you’ve selected the Picture Control you want, you’ll see a sliding control to let you reduce the degree of the effect. After setting the level you want, click on ‘Back’ near the top of the panel to get access to all the usual Adobe Camera Raw Controls and process your image as normal.
Or
02 Select the profile in Lightroom CC
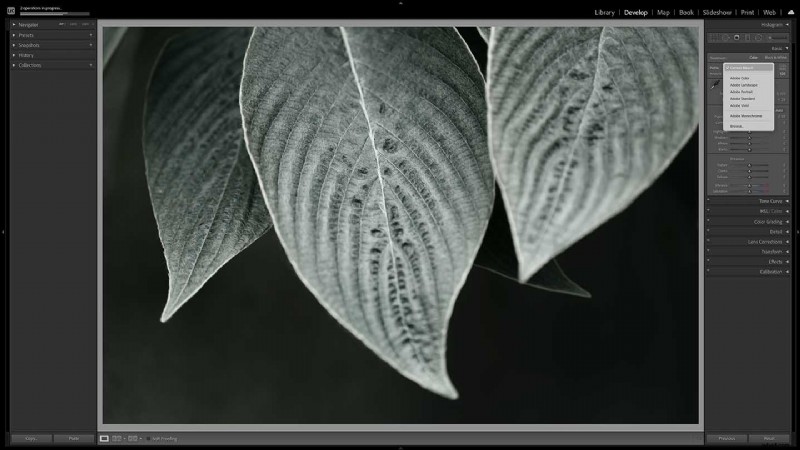
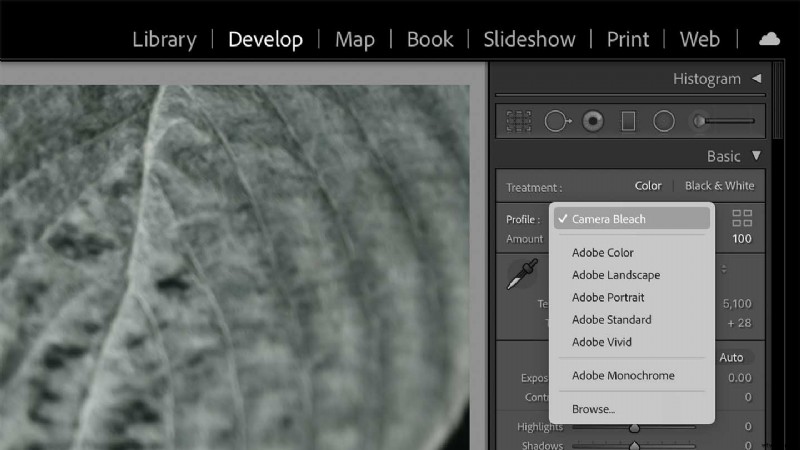

With your images imported into Lightroom CC, select the one you want to edit and click on ‘Develop’. Make sure that the Basic adjustment panel is open and click on the profile dropdown arrow. This is to the right of where it says ‘Profile’ followed by ‘Camera’ and the name of the Picture Control that was used at the shooting stage.
Click on ‘Browse’ beneath the Adobe options, and if necessary expand the ‘Camera Matching’ section to see the available Picture Control settings. As you hover over the thumbnails for each Picture Control settings, the main image will preview the effect. Simply click on the one you want to use. You can then use the control at the top of the panel to reduce the level of the effect. When you’re finished, click on ‘Close’ to return to the usual Lightroom editing panel and finsih your image as normal.